January has come to an end, and with it the first month of my Athena’s Thimble sample of the month grand plan. I wrote about the inspiration and getting started a few weeks ago here on the blog. I really had to get my skates on to get it finished by the end of the month, but Jan 30th the final stitch went in.

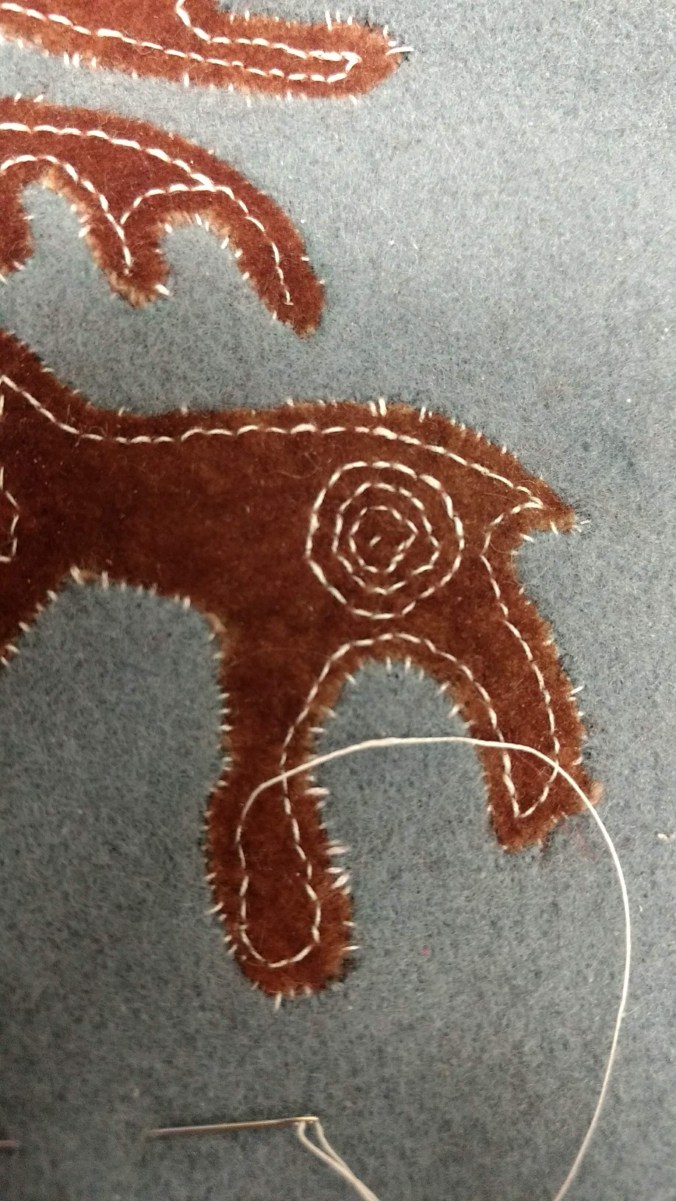
Derpy deer in his final glory.
The basic details: Wool cloth (one colour dyed by me), linen thread, linen cord and silk thread. I am really pleased with how he turned out. A few modifications from the original, and some thoughts on the technique and challenges I bumped into. (aka ways I screwed it up.)
There was a lot of debate at the event I was showing it at about why on earth anyone would do this, when it’s a whole lot easier to just set the appliqué on top like a normal person. It does keep it from being overly thick, it helps maintain the hand of the fabric, both of which seem frankly irrelevant in a wall hanging. It is very fabric conservative, there’s next to no waste, but that also feels pretty irrelevant in a piece that feels gilded leather is a reasonable outlining cord. Ultimately, I think we came down to ‘someone realized they could, so they did’. If you have better reasons, although that’s a good one, feel free to share!
The most obvious change is size. This is about half the size of the original, and as such made from some extremely tiny (and fragile) spots. Everything was tiny, and while I am quite happy to work at tiny scale (Quote from the spouse: You do bonsai textiles.), this got so tiny, my cloth was losing structural integrity and I had to take off my glasses and squint to see the backstitches. (I am profoundly and outrageously nearsighted. I almost stabbed myself in the nose with the needle, it was that close.)
Speaking of my cloth, I should have felted it even more than I did. I would have sworn that the cloth was well fulled when I started, but tiny little curves and tiny little tacking stitches to hold it to another tiny bit of wool, and I found all the places the the threads just pulled away from the rest of the fabric and I had to pray for structure and for something to grip. It was maddening. The dyed wool was better, I’d been rather <cough> aggressive in my dye work and felted it a bit more, and that was a feature.

Green sharpie to the rescue
Accept that you are not going to cut both versions identically, and know that you are about to do some trimming. Be grateful that wool has some stretch and give to it, so the wee gaps just sort of snuggle in together. Trying to mark my template onto wool was miserable. I used a sharpie on the lighter colour (that worked fairly well), but on the dark colour? Nothing showed. I didn’t have a white gel pen (on the shopping list for next time), so I literally used the template like a stencil and rubbed chalk all over. I cut it out and hoped for the best. It worked better than I feared, but there was a lot of trimming up of details. It is for jobs like this that the Cricut was invented.

The original used gilded leather cut in approx 1 mm strips to outline it. I considered learning how to gild leather, then I considered painting leather with gold paint, and then I remembered half scale and I was not going to cut anything to 0.5 mm reliably. I used linen cord in a bright gold colour. Perfect. A really fuzzy linen cord in the perfect colour. Alright, beeswax will fix that.. and it sure did, and was perfect. It also shed so badly, my little chunk of beeswax looks like it needs a shave. Worth it.

Fuzzy beeswax
I would absolutely do this again, preferably at a more sane size, once I got past my ‘omg, I am gonna break it!’ brain, it was pretty fun to do.
