I’ve actually been accomplishing and finishing projects and experiments and not writing about them, so there’s going to be some catching up. I know that it’s no longer January, we’ll just ignore the fact that I’m only talking about it (and indeed only finished it) in February. Close enough.
For those who haven’t been following along, this is part of my plan to go explore all of the embroidery categories from the East Kingdom’s embroidery guild. I got six (ish) categories done last year, and I hope to finish the other six this year (with at least one re-do from those first six.) Ostensibly I was going through it in alphabetical order, and while I did do a little jumping around, Free Embroidery was next on the list and so here we are.
In hunting up inspiration pictures, I was casually surfing the MET’s archives and not really being inspired. Sure there’s lots of great things there, and I started (and quit) a polychrome motif that just wasn’t doing it for me last year. And then .. I found it. The perfect bit of glorious psychotic derpery from 15th century Egypt.
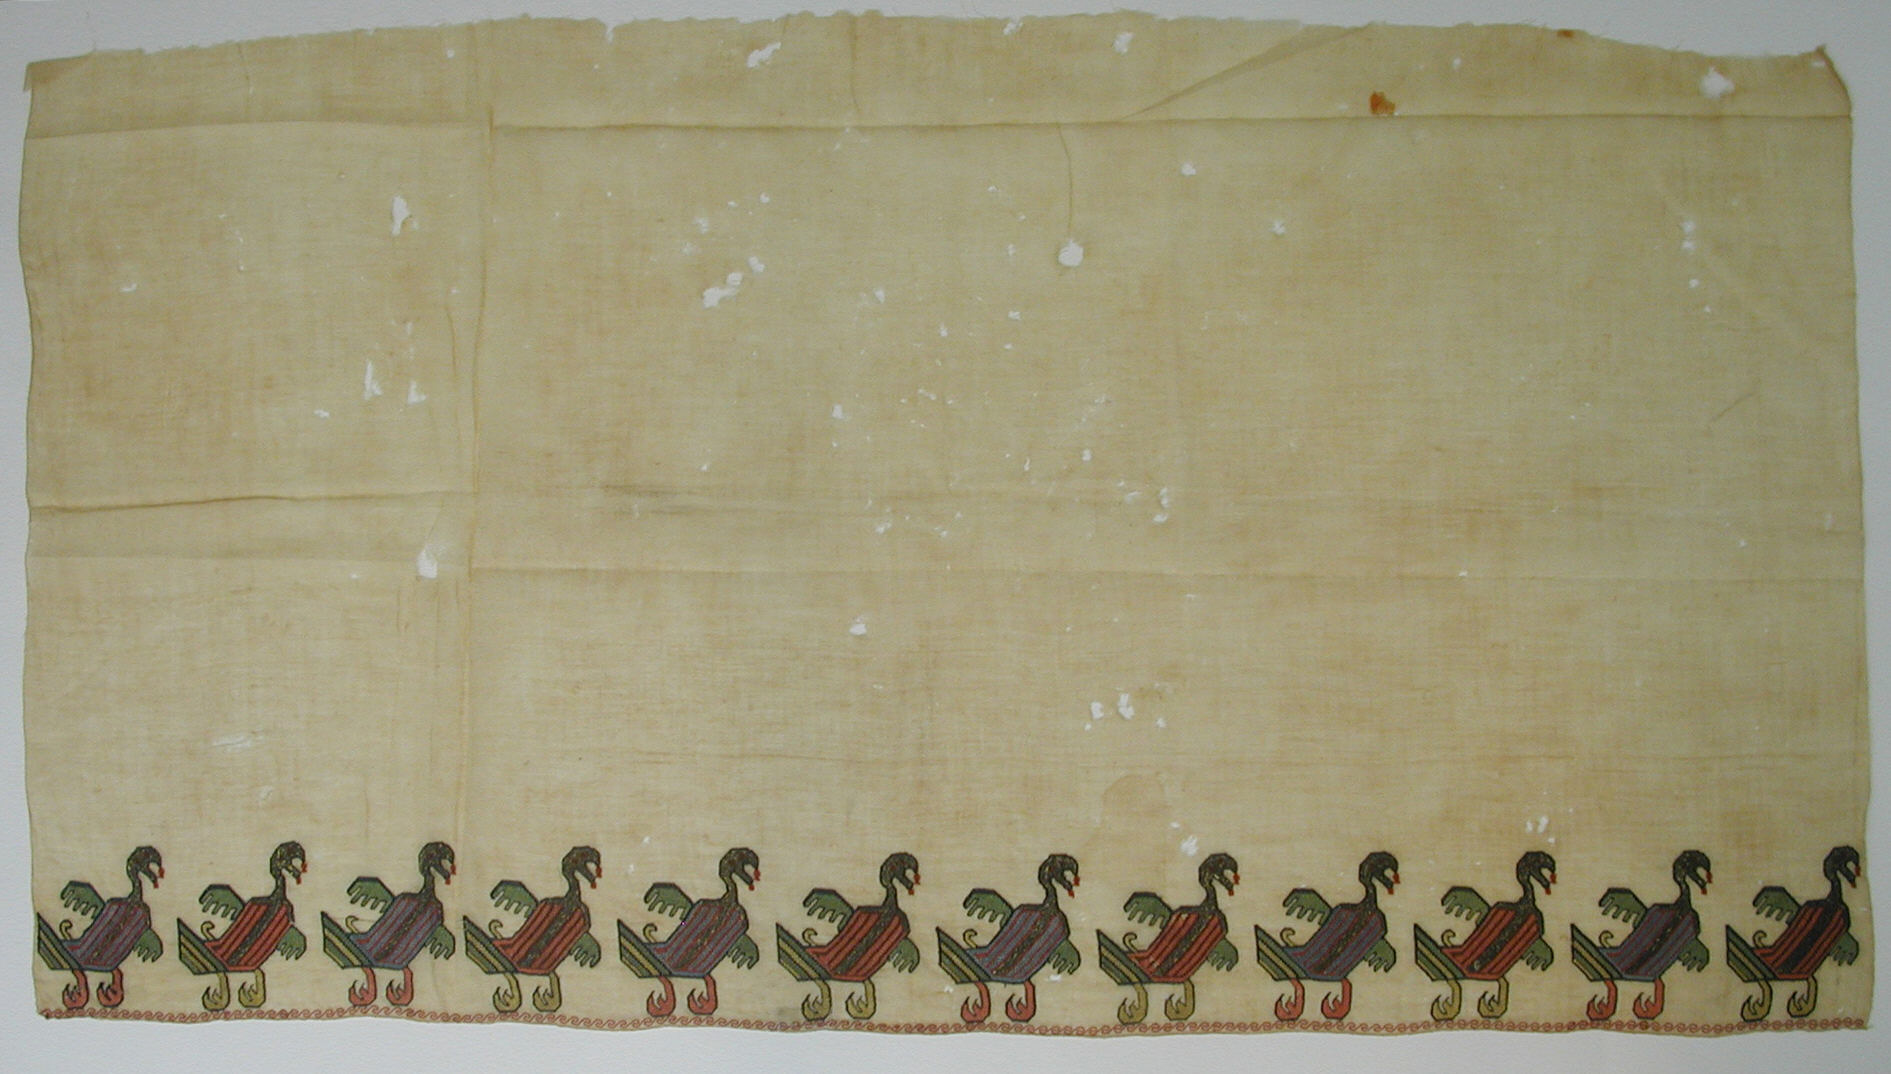
https://www.metmuseum.org/art/collection/search/450540
Psychotic medieval fever dream fowl of some sort with dripping beaks? (jaws? Fangs?) I’m in! I poked both the Ealdormere Embroidery FB group and the EK Athena’s Thimble embroidery group for their thoughts on what stitches were used in the original, and it looks like some sort of interlaced stitch in my opinion. That being said, I remembered that this was supposed to be a free embroidery sample, and so I used a whole selection of stitches.

All of the thread was hand dyed by me, and it’s a mix of size 60/2 weaving silk and size 30/2 weaving silk. The 60/2 was just so very thin, it looked fairly anemic, but the 30/2 is a lofty squishy thread, which looked too plush for quite what I was aiming at. I suspect that my interlaced back stitch is a pretty good approximation of the body stitch in the original, but the original was a firmer, probably 3 ply thread at a guess that didn’t have quite so much squish as mine. Ultimately I used back stitch, interlaced back stitch, chain stitch, stem stitch and eyelets.

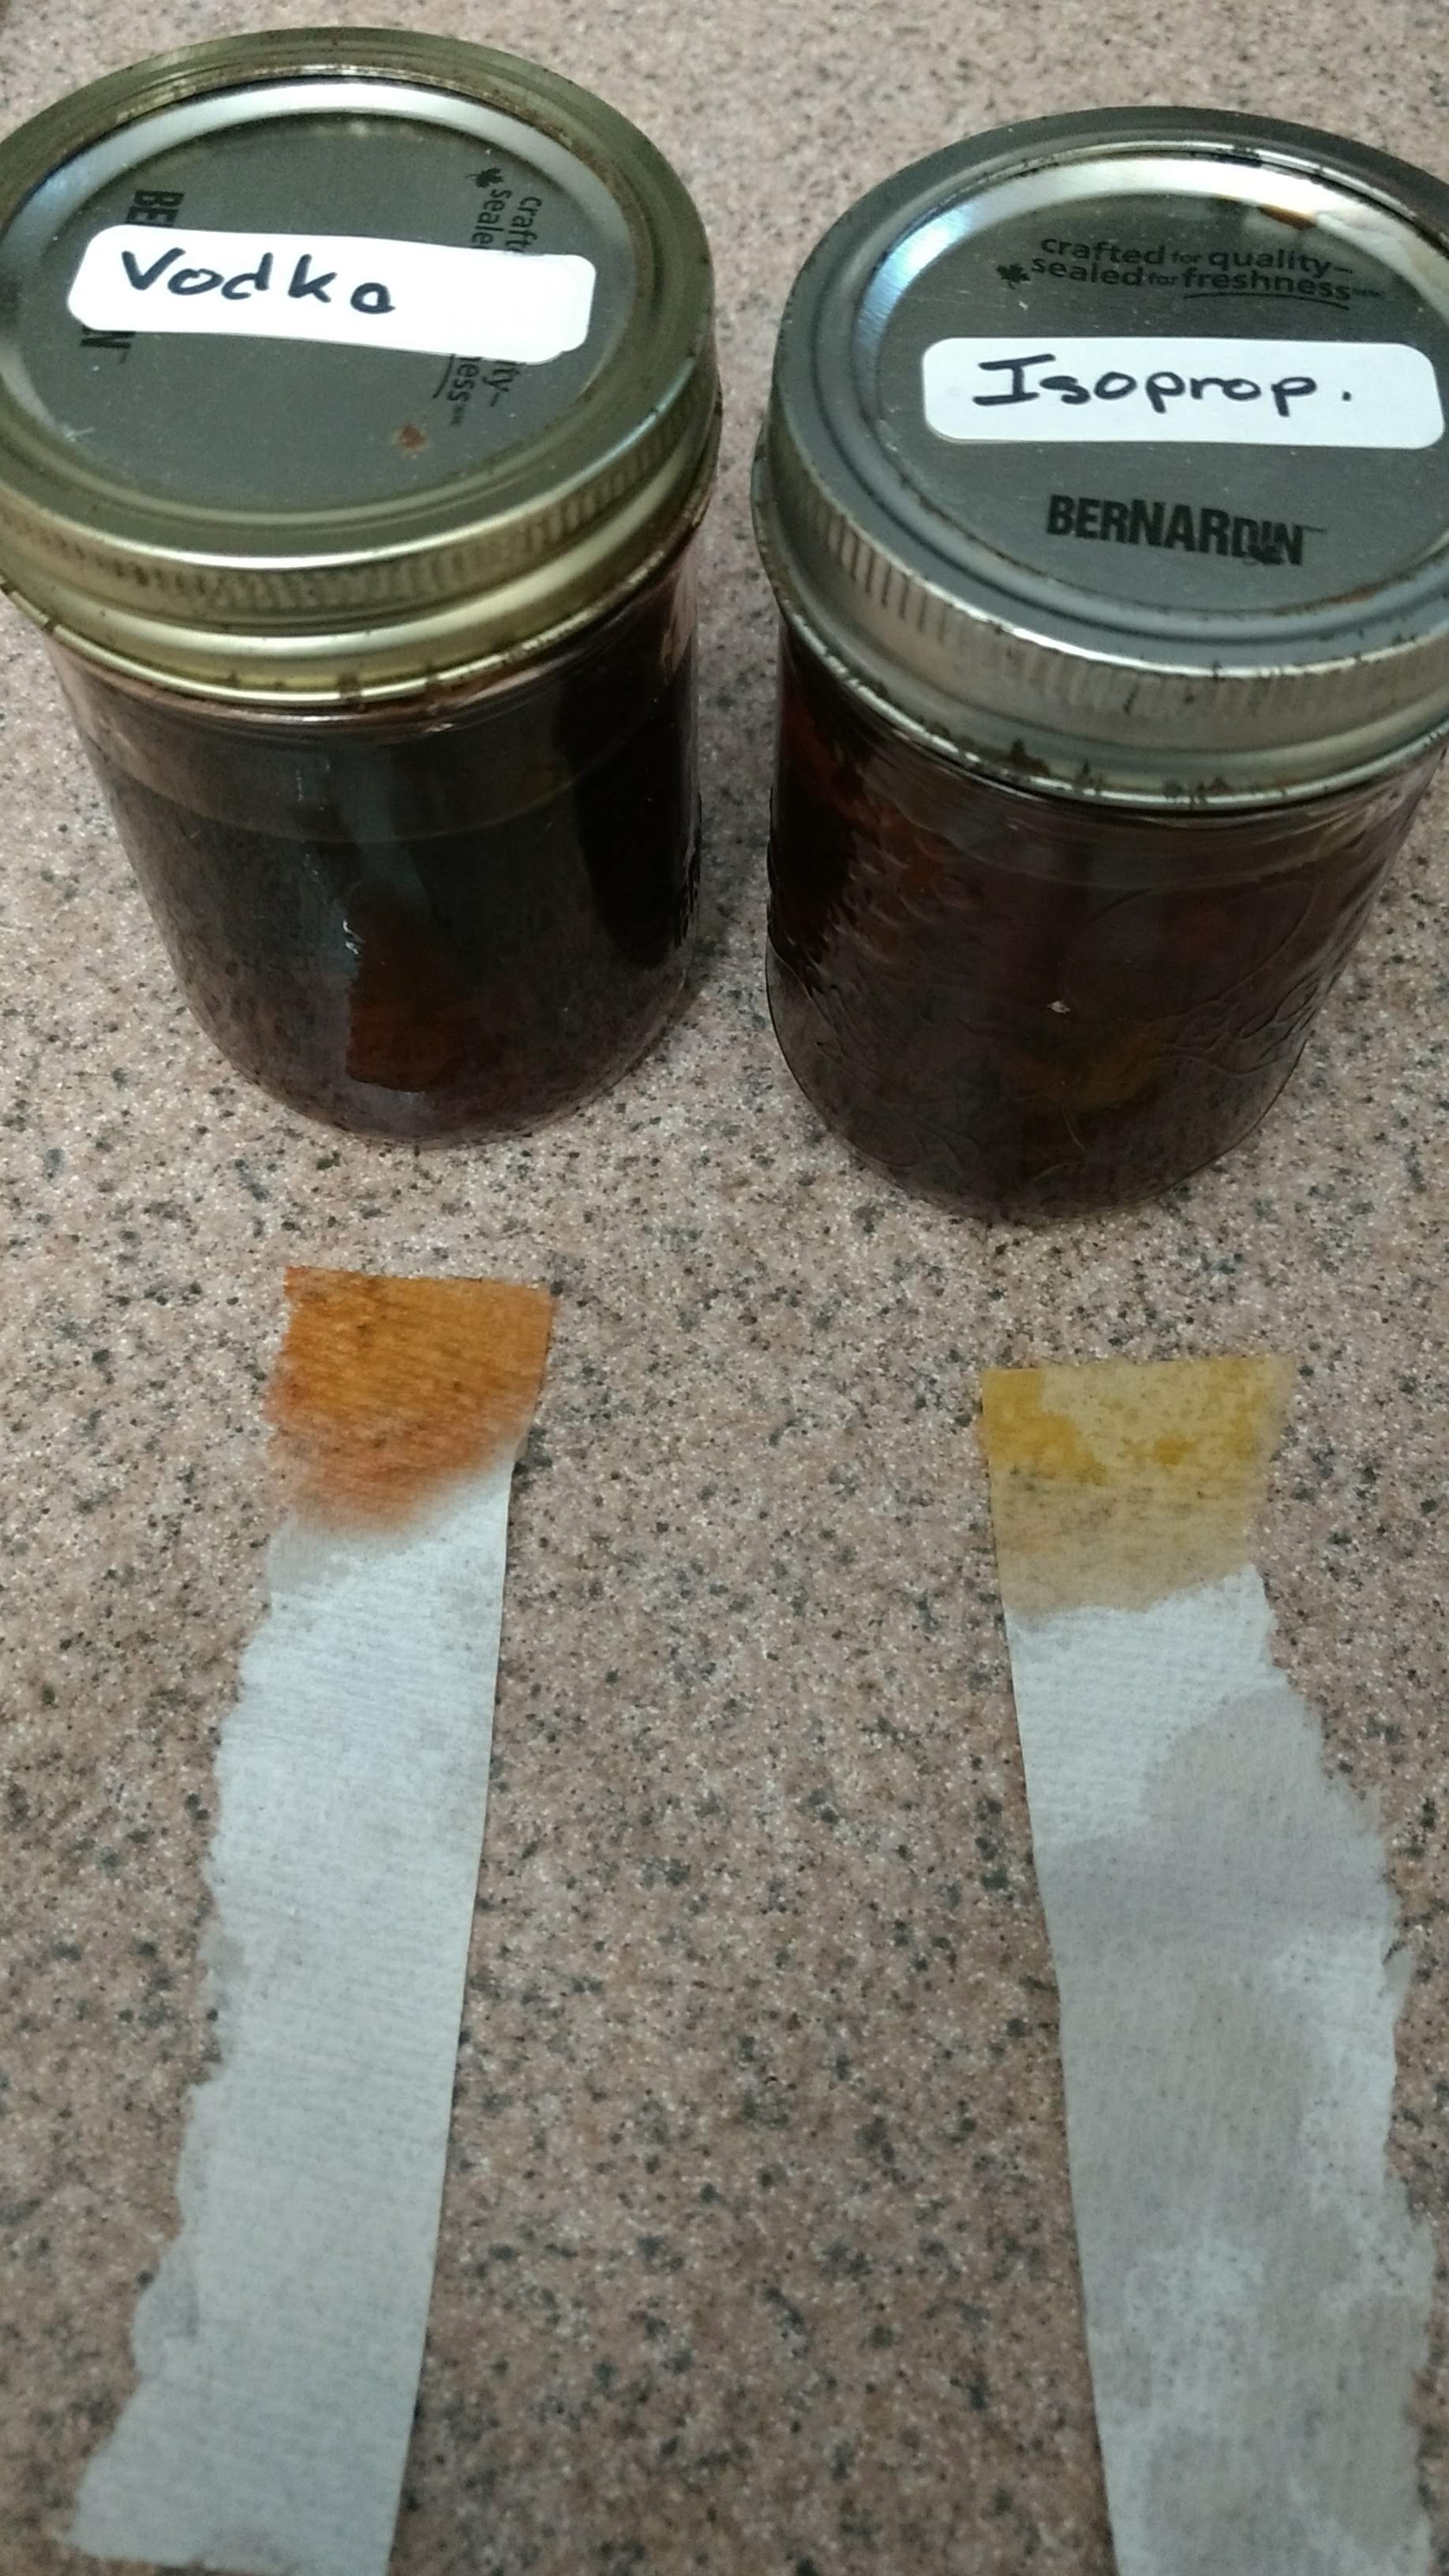
After I finished up my psycho ducks, I was super looking forward to just quickly popping on that delicate little edging of the original. My first attempt.. well it looked like someone had done it with an etch a sketch. Okay, thinks I, no biggie, I’ll trace it from the original, no biggie. Well, dear reader, that’s when it all went horribly wrong. I use a micron pen to trace. I love it, it’s fine tipped and very very permanent. I wasn’t getting the curves quite right so I sketched it a couple more times. And then the realization hit. Very. Very. Permanent. Well now I had a big inky mess on my hands which was supposed to be a quick and easy little border.

It sat for a few weeks until I got past (mostly) being really really mad at myself, and then I just chain stitched the snot outta that bottom edge. Take THAT stupid ink stains. Bah! And so, my psychotic ducks are done. Another sample into the bag. Next up? Metal threads!