Blackwork progress

Y’know, I was all ready to post a couple blog posts with other things I’d been working on, in some sort of delusion that I was going to have tons of time to work on things other than the 12 months of embroidery project. Hunh. Apparently I am bad at ‘quick’, and life doesn’t pause just because I have a desire to do more projects. So this might be a blog that’s got a whole helluva lot of embroidery for the next while. I promise that I do other things, but they aren’t terribly interesting (or finished enough for photos).

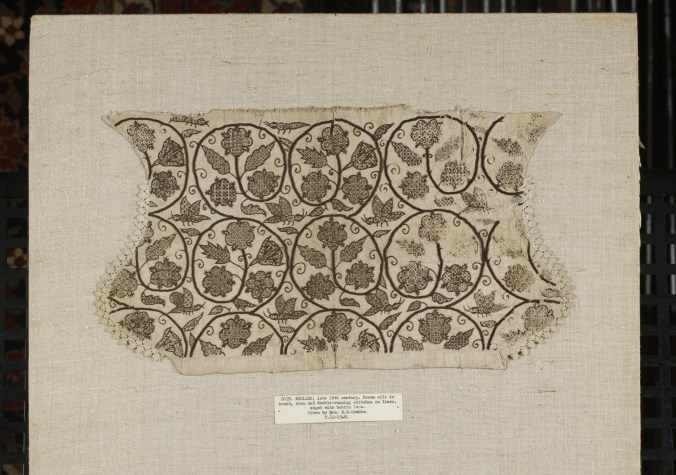
Alright, so February is Blackwork, and when last we chatted about it, I’d chosen my inspiration piece. After some fiddling with the photocopier to get it to a nice size on my 6″ square of linen (nothing fancy, retrieved out of the scrap bin probably from a chemise), the lightbox came into play to trace it onto my fabric. I am not a fancy tracer (and somehow I always manage to screw it up), but micron pen is my godsend here. It’s much easier to do little dots than drag the tiny tip along the fabric, but whatever works for you. (Dot tip acquired from a teacher whose name I’ve forgotten at Known World Fibre in Calontir a few years back. Shout out, thank you!) (While I’m asiding here.. y’know, it’s often the tiny offhanded comments that stick with me long after a class, not necessarily anything about the class material itself. Hanging out with other artistans who do what you do is VITAL.. but I’ve commented on that before.)

img_20200131_182712086

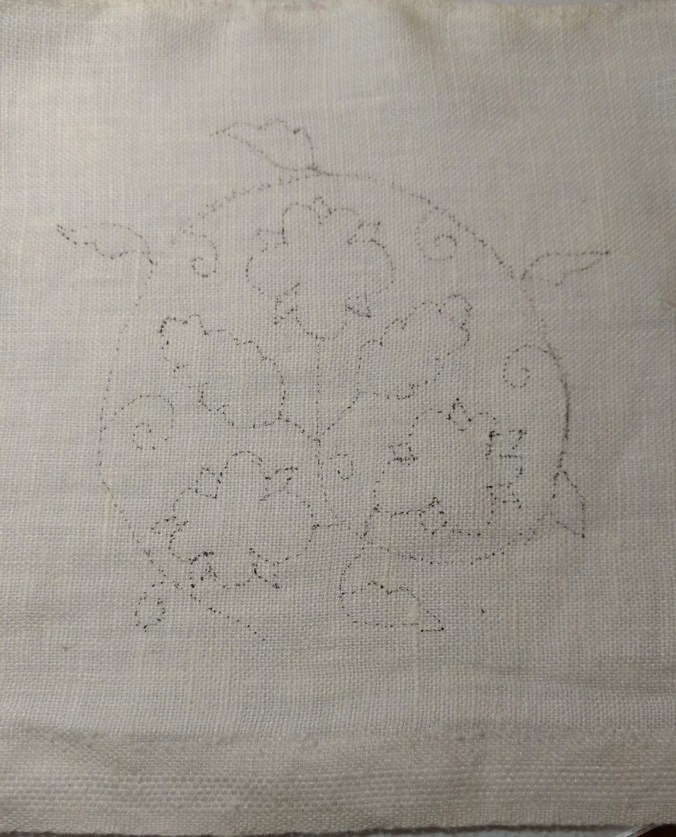
No matter that I’m tracing from a very clear image, eternally my roses are special snowflakes, but still, time pressure is a thing, and so I press on. They are clearly just heritage breed, non GMO roses. Clearly. I decided to do the outline in backstitch, just to be different from the split stitch I did my coif in. The thread is a 60/2 weaving silk that I dyed with cochineal a while back, and after a tight race of votes at an event, the pink won. It is really nice to embroider with, tightly spun and smooth, but not stiff and unyielding. I haven’t embroidered with it before, but I will again (and again, and again I expect in this year).

img_20200216_073553788

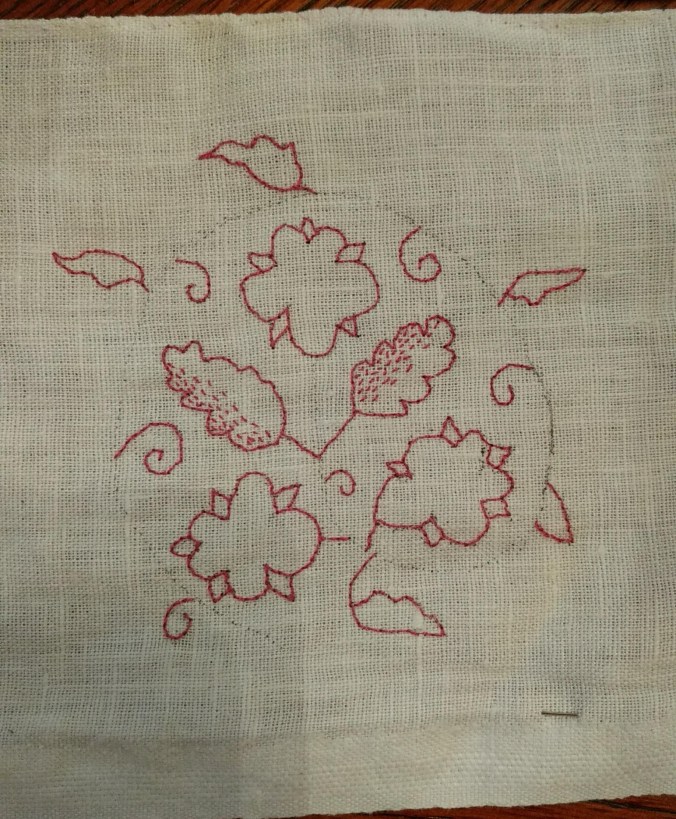
Outlines done, now it’s time to fill in some bits. There’s three main styles of fill in coif blackwork. There’s the little seed stitch highlights, there’s the dense geometric fill (The same fills that the modern world claims is the ONLY blackwork, but I rant about that a lot.), and the last fill style is to leave it blank. I decided to do my leaves in seed stitch, and my trio of roses in three different fills, and then leave my little leaves blank. Full spectrum of examples! Most coifs pick one and use it for the whole thing, rather than combining, but I’m leaning into this example thing, so we’re getting the buffet plate.

img_20200217_112457851_hdr

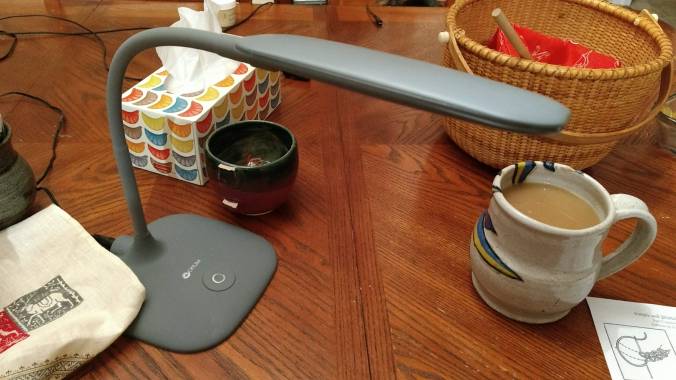
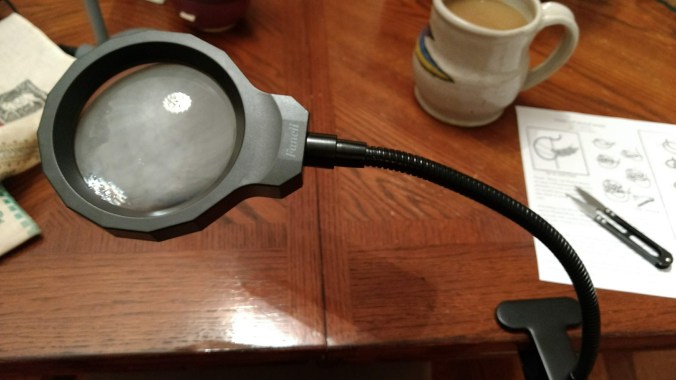
When choosing my fills, I knew exactly where I was headed. Over to Countess Ianthé’s book of fills, mostly historical, but beautifully charted and where I knew exactly where to find them. She’s got two volumes out, and all three of mine came from Volume One. I’ve used them before, I have favourites and I got to plunk a few into this sample. I did do them as counted work, over 2 threads of linen, using my shiny new magnifier. By this point, it was only mid-February and things were going great guns, I started having visions of being done in a day or two and getting a couple week’s ahead on canvas work! Life had other plans. I’ll show you braid work next week.

Tools of the Trade

With getting back into embroidery and tiny knitting and other handwork this year, I’ve been doing some shopping to make my life easier. I figured I’d show some of the new toys I’ve gotten recently and some old favourites.

A couple caveats here in how my workspace is set up. I work at the dining room table. Yes, this does mean I have to clean up what I’m working on if we want to pretend that we’re civilized people and eat at the table, and I have to clean it all up every week when we have people over for dinner and D&D. (Why yes, I do let my nerd flag fly proudly.) This means by nature, my set up is very portable and transitory, I do not have a ‘set up all the time’ work area. I also prefer to work at a table, rather than curled up in the couch with my embroidery, sewing, knitting etc. I appreciate being able to have my charts, coffee, notes, notions etc sprawled out in reach rather than falling into the couch cushions, or having a cat laying on them. It’s perhaps not as comfortable, but it works for me.

img_20200220_064800068

The first and most beloved of all is my Ott light. Acquired on killer sale at Jo Anns a few years ago, I have a small gooseneck LED lamp that just sits on the table. It is light weight, it travels well, it is brilliantly bright and it makes everything I do possible. I adore natural light most of all, but the mix of Canadian winters, full time jobs and being the short house between two taller houses ensures that I do not have much natural light in my home when I have time to do handwork. Take (nearly) everything else away, but pry my Ott light out of my cold dead hands.

img_20200220_064845194

A very new addition to the workspace is my magnifier. Until very recently, the reality of my extremely nearsightedness meant that tiny was fine, I just held it closer with good light. (See the Ott light above. So much <3)  Now with progressive lenses, and that whole ‘aging’ thing that none of us really signed up for, that’s not working out as well for me as it once did. It clamps to the table edge and it’s a 3x magnifier, which I’m finding just about perfect for my embroidery work. It has a built in light, but I find it far too dim to be functional for me. I am spoiled by my Ott light. (I swear it’s not sponsored.) Even though my house is not noted for its direct sunlight, I am trying to keep good habits of leaving its cozy on when not in use.

img_20200131_175531792

The next new toy is my snazzy light table. Acquired for a pittance off Amazon (bad me, support your local retailers etc etc), it’s a smidge larger than a standard piece of paper, plugs in via USB (helllooo battery pack at events / Pennsic), and has 3 brightness levels. It’s about the thickness and weight of a cutting mat, and indeed, I store it with my cutting mats, because it’s that damn convenient. While it will not be amazing to trace a whole jacket’s worth of blackwork pattern onto, it is brilliant for smaller pieces, and honestly, big pieces are just a whole lot of small pieces put together. I expect it will be fine. Also, I feel as if I should mention that I do own other mugs, but that IS a favourite one, painted for me by Dagmar, I’m not surprised that it shows up often in photos.

img_20200221_084350846

The next piece of super important kit is a bit more seasonal, but I swear I seem to find myself working with silk most winters, and winter = dry hands. Silk loves dry hands. It loves to catch on the dry spots, and pull apart, and stick and generally make your life absolutely miserable, so hand cream is vital. This is a very personal preference, so my favourites might be another person’s worst misery, but I tend towards hand cream that is not suitable for putting on right before embroidery. Or much else really. The super goopy, super greasy, wait for it to soak in for a while sort. I’ve a couple of homemade hand creams (one by me, one given to me by a friend), one that’s commercially available sort of homemade (shown above) and they all work well. I cover my hands before bed, and while I’m drinking my first coffee, when I’m not about to be doing much for a little while anyhow and it seems to keep the worst at bay.

img_20200221_103750411

The next bit are even more personal than hand cream choices. Needle choice. And here I could mean knitting needles, could mean sewing needles. I really could say tool choice, because I’m certain that it’s the same for paint brushes and chisels and whatever else people use. Get the good ones. You don’t have to get the best ones, I personally don’t buy tulip needles, cause while they are amazing, I lose embroidery needles far too quickly to justify spending the extra, but get up to good. Crappy points, burrs in the eyes, nasty finish.. it all makes for a miserable work experience. Yes, it does mean I spend 20 bucks (or more) on a set of dpns. (This is a lot for a set of double pointed knitting needles, not crazy, just a lot to casual knitters.) It means that my good embroidery needles are about a dollar each (goodness, phrased like that, I really need to stop losing the damnned things!), but with how much time you spend using them, and how much nicer it makes the experience, spend the money. In the grand scheme of things, it’s not even that much money. Ditto with thread. Please throw out the 3 / 99 cent threads. Please. They aren’t worth it. The environment will forgive you.

img_20191129_161655354

What the 3/99 cents thread deserved and got.

Alright, I think that’s enough rambling for the moment about my new (and old toys), I promise I’m also using them and toddling my way through February’s blackwork, I should have an update on that for you soon!

February is for Blackwork

First off, what is it? It’s the name of a style of embroidery that has a few forms, historically and tends to mean just one of those forms modernly.

img_20140613_112856

Reversible edging

It is stitched with black thread, except when it is not. It’s counted work, except when it’s not. It is reversible, except when it’s not. It is only done with double running stitches, except when it is not. You get the picture here.

img_20200129_070003793

Peppermint Purple SAL Week 5

The first style, and the one that is almost exclusively used modernly, is counted blackwork. This can be reversible, or not. (Modernly, usually not). It is very linear, made up of repeated motifs on evenweave fabric. It is what one thinks of in Tudor collars and cuffs. It can be stitched with backstitch, or double running stitch (also called holbein stitch). Backstitch is not generally reversible, double running stitch generally is. The best resource I’ve ever found for the nitty gritty of double running stitch can be found on Kim Brody Salazar’s blog (Countess Ianthé, d’Averoigne): String or Nothing. Blackwork (the counted fill variety) seems to be coming into a current spate of modern popularity, if some current stitch alongs are anything to go by.

img_20180307_075745867

 My coif and spangles

This is not what I’m using for my February’s blackwork piece for the Athena’s thimble sampler. I’ve done blackwork before in my coif, (which apparently I never blogged about, but there’s a shot of it in progress there, and pictured above.) and I’m going with another motif from a different inspiration coif. The free stitch blackwork on coifs is generally done with your favourite outline stitch: backstitch, split stitch, stem stitch, plaited braid stitches are the usual ones, and then the centres are either filled in with either small counted motifs, or shaded with just little seed stitches. Sometimes there are pearls, sometimes spangles. Usually it’s monochrome, sometimes it’s not. 

This coif is from the V&A, it’s listed in Digby’s Elizabethan Embroidery as being plaited stitch, stem stitch and back stitch and entirely done in black silk. I’m aiming to use some bits of dye experiments, so cochineal dyed silk on a scrap of linen fabric, and the current plan is plaited braid for the outline, and then split stitch interior outlines (maybe backstitch, we’ll see how the spirit moves me), with 3 leaves getting fills and 2 leaves getting seed stitch shading. Now we’ll see how much of this cunning plan survives contact with reality of stitching!

Pepper

Every so often, working at the University has some unusual benefits to it. One of the recent ones was opportunity to attend a lecture (and book tour stop) about the history and production of pepper. That ubiquitous spice that hangs out with the salt on every table, which is barely thought of these days.

The book was written by a retired professor from the School of Hospitality of Tourism, Joe Barth. (Now part of the Gordon S. Lang School of Business and Economics ’cause with enough money, you can get a whole college named after you.) Full disclosure, I met Joe over 20 yrs ago when I was his IT person and he was actively teaching. I no longer support that college, and he has retired, but I remembered him as an interesting speaker, so I was confident that he would not make a 2 hour talk about pepper boring.

img_20200204_170441288

HG Kitty at the talk

I was absolutely right. He’s an engaging speaker, and I’d say we spent almost an hour on the history of mentions of pepper (back to the earliest papyruses! 1550 BCE in a medical guide (Ebers Papyrus) And allllll the way through history, as those of us who hang out in medieval and renaissance cooking well know), and how it informed the spice trade along the silk road and various countries aiming to take over other countries to get a chunk of that sweet sweet spice money pie. His research claims that pepper was the most traded spice in history, and I believe it.

Other tidbits that I found fascinating from the talk.. most foods are fairly bland on their own, and humans like some zip in their food. (Most humans at least.. pungency trips off our endorphins and let’s face it.. endorphins are literally happy making.) There’s only 3 broad things that can be grown in Europe natively that are pungent. Garlic (allicin), mustard and horseradish (both containing allyl isothiocyanate.. probably why I dislike both of them, I’d no idea they have the same chemical compound!) Everything else that we use to spice things up come from tropical places and had to be imported. Which makes it expensive, as we well know from medieval studies. Spices are a show of wealth. Even more so than silk and gold, because you consume them. You still have gold after you work it, spices? Poof, gone in a fine meal.

True peppers (green, black, white and red pepper) are all the same plant, Piper nigrum. The four different varieties are different ripeness of the berries when they are harvested, and the nature of the beast makes it impossible to harvest mechanically. Every peppercorn you’ve ever used was harvested by hand. Even in 2020. Amazing, and crazy. Up very tall trees (pepper is a vine and they are trained to grow up a tree, or post), generally via sketchy bamboo ‘ladder’ (mostly a stick with spikes) and I got a little shuddery just watching it via video. India still grows pepper traditionally (intercropped, high quality, lower yields), Vietnam has gone the factory farm route (monocropped, higher yields, lower quality, required fertilizer and irrigation), and is the largest producer of pepper currently.

Black Pepper Farming Business

Image shamelessly stolen from: http://smallbusiness-jambuabang76.blogspot.com/2013/12/black-pepper-cultivation-black-pepper.html

The two other pepper varieties I’m familiar with in medieval cooking are cubeb pepper (Piper cubeba) and long pepper (Piper longam). Both part of the pepper family, but different species. There’s a great many other things colloquially referred to as peppers that have nothing to do with the piper family. Chili peppers spring to mind immediately (capsicum), but there’s also grains of paradise (Aframomum melegueta) which was sometimes referred to as melegueta pepper, alligator pepper (Aframomum danielli), Sichuan pepper (various Xanthothylum species) and pink pepper (Schinus molle)

img_20200204_170239349

Alligator pepper

It was a great talk, we did some pepper tasting (that blows your palette out for the evening, lemme tell you. I had no idea that cubeb pepper was SO wintergreen!) and I’m really looking forward to digging into the book in more detail. (Of course I got a book! Autographed and everything!)

Derpy deer

January has come to an end, and with it the first month of my Athena’s Thimble sample of the month grand plan. I wrote about the inspiration and getting started a few weeks ago here on the blog. I really had to get my skates on to get it finished by the end of the month, but Jan 30th the final stitch went in.

img_20200130_071713865

Derpy deer in his final glory.

The basic details: Wool cloth (one colour dyed by me), linen thread, linen cord and silk thread. I am really pleased with how he turned out. A few modifications from the original, and some thoughts on the technique and challenges I bumped into. (aka ways I screwed it up.)

There was a lot of debate at the event I was showing it at about why on earth anyone would do this, when it’s a whole lot easier to just set the appliqué on top like a normal person. It does keep it from being overly thick, it helps maintain the hand of the fabric, both of which seem frankly irrelevant in a wall hanging. It is very fabric conservative, there’s next to no waste, but that also feels pretty irrelevant in a piece that feels gilded leather is a reasonable outlining cord. Ultimately, I think we came down to ‘someone realized they could, so they did’. If you have better reasons, although that’s a good one, feel free to share!

The most obvious change is size. This is about half the size of the original, and as such made from some extremely tiny (and fragile) spots. Everything was tiny, and while I am quite happy to work at tiny scale (Quote from the spouse: You do bonsai textiles.), this got so tiny, my cloth was losing structural integrity and I had to take off my glasses and squint to see the backstitches. (I am profoundly and outrageously nearsighted. I almost stabbed myself in the nose with the needle, it was that close.)

img_20200128_095549060

Speaking of my cloth, I should have felted it even more than I did. I would have sworn that the cloth was well fulled when I started, but tiny little curves and tiny little tacking stitches to hold it to another tiny bit of wool, and I found all the places the the threads just pulled away from the rest of the fabric and I had to pray for structure and for something to grip. It was maddening. The dyed wool was better, I’d been rather <cough> aggressive in my dye work and felted it a bit more, and that was a feature.

img_20200105_133004336

Green sharpie to the rescue

Accept that you are not going to cut both versions identically, and know that you are about to do some trimming. Be grateful that wool has some stretch and give to it, so the wee gaps just sort of snuggle in together. Trying to mark my template onto wool was miserable. I used a sharpie on the lighter colour (that worked fairly well), but on the dark colour? Nothing showed. I didn’t have a white gel pen (on the shopping list for next time), so I literally used the template like a stencil and rubbed chalk all over. I cut it out and hoped for the best. It worked better than I feared, but there was a lot of trimming up of details. It is for jobs like this that the Cricut was invented.

img_20200105_161926457

The original used gilded leather cut in approx 1 mm strips to outline it. I considered learning how to gild leather, then I considered painting leather with gold paint, and then I remembered half scale and I was not going to cut anything to 0.5 mm reliably. I used linen cord in a bright gold colour. Perfect. A really fuzzy linen cord in the perfect colour. Alright, beeswax will fix that.. and it sure did, and was perfect. It also shed so badly, my little chunk of beeswax looks like it needs a shave. Worth it.

img_20200130_072842392

Fuzzy beeswax

I would absolutely do this again, preferably at a more sane size, once I got past my ‘omg, I am gonna break it!’ brain, it was pretty fun to do.