I realize that the vogue thing to do was to have written this a couple of weeks ago, but 2022 has been a slow and gentle easing into the year. More like the painful creep into too cold lake water for a swim rather than the enthusiastic cannonball of getting it all over with at once and then shivering for 15 minutes. So midway through January, I’m just about ready to consider what, if anything, I managed to accomplish in 2021. (Spoilers: It didn’t feel like much, but there were a few things here and there).
First off, full disclosure time: No. I have not yet finished all 12 samples for my 2020 sampler of embroidery styles. I got stalled at nine, and my brain has just been absolutely rebelling at the notion of those last three. In theory, two of which are my favourites (open work and needle lace). I know I hate lacis (so far), but the other two should be a delight, but I’ve had a pattern on my desk for 4 months for a needle lace piece and not even a hint of enthusiasm, just dread. So I’m accepting that reality and we’ll see when it gets done. That’s okay. Life is heavy right now, I don’t need to be a harsh taskmistress upon myself, so it waits.
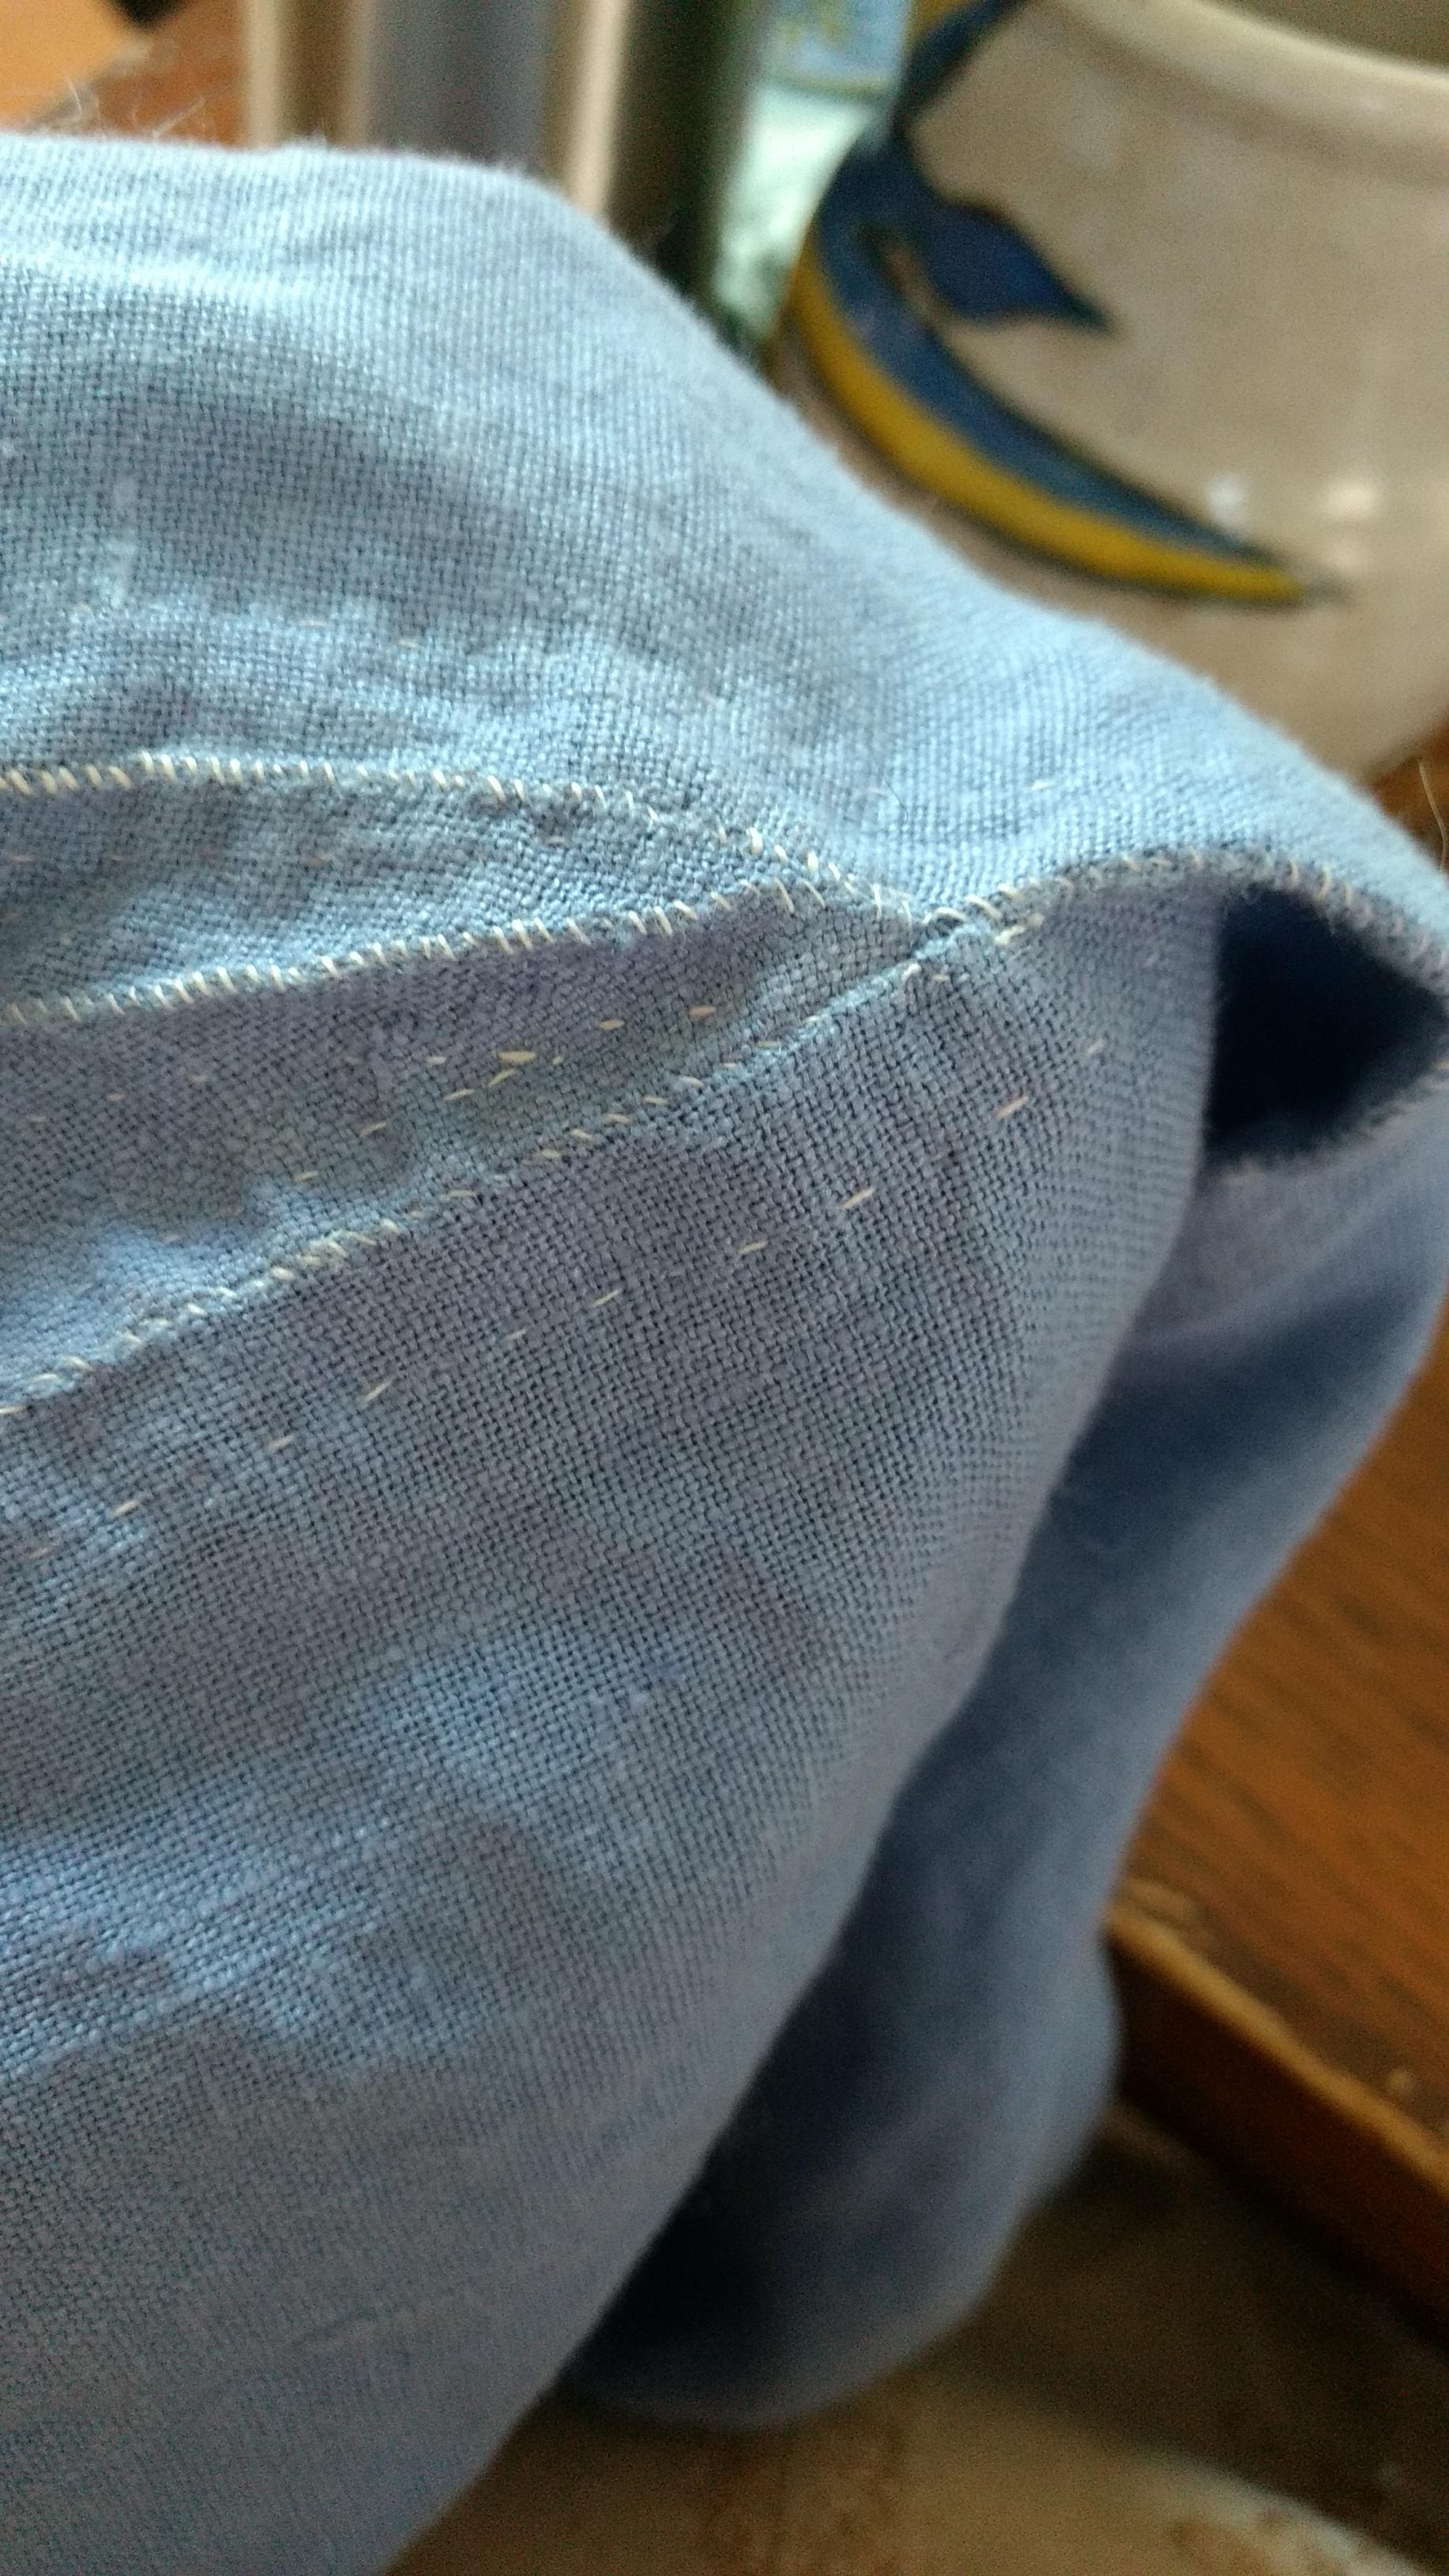
I did a lot of SCA teaching in 2021 on zoom. Mostly dye classes, a class on saponification (the chemistry of soap making), round tables and discussions. I acted as moderator and TA and general helper all over the place online and it was good. I should do that again. I’m still mad that I missed the deadline to sign up to teach at University of Atlantia this winter, but that’s besides the point. I taught at least seven times in 2021, and in at least 6 kingdoms, which is not half bad, really. Only possible via online events, I would be hard pressed to get to six kingdoms in a year (our most in our craziest travel year was 5.) I’m expecting 2022 to look much the same, provided there are online events to be had. We shall see.
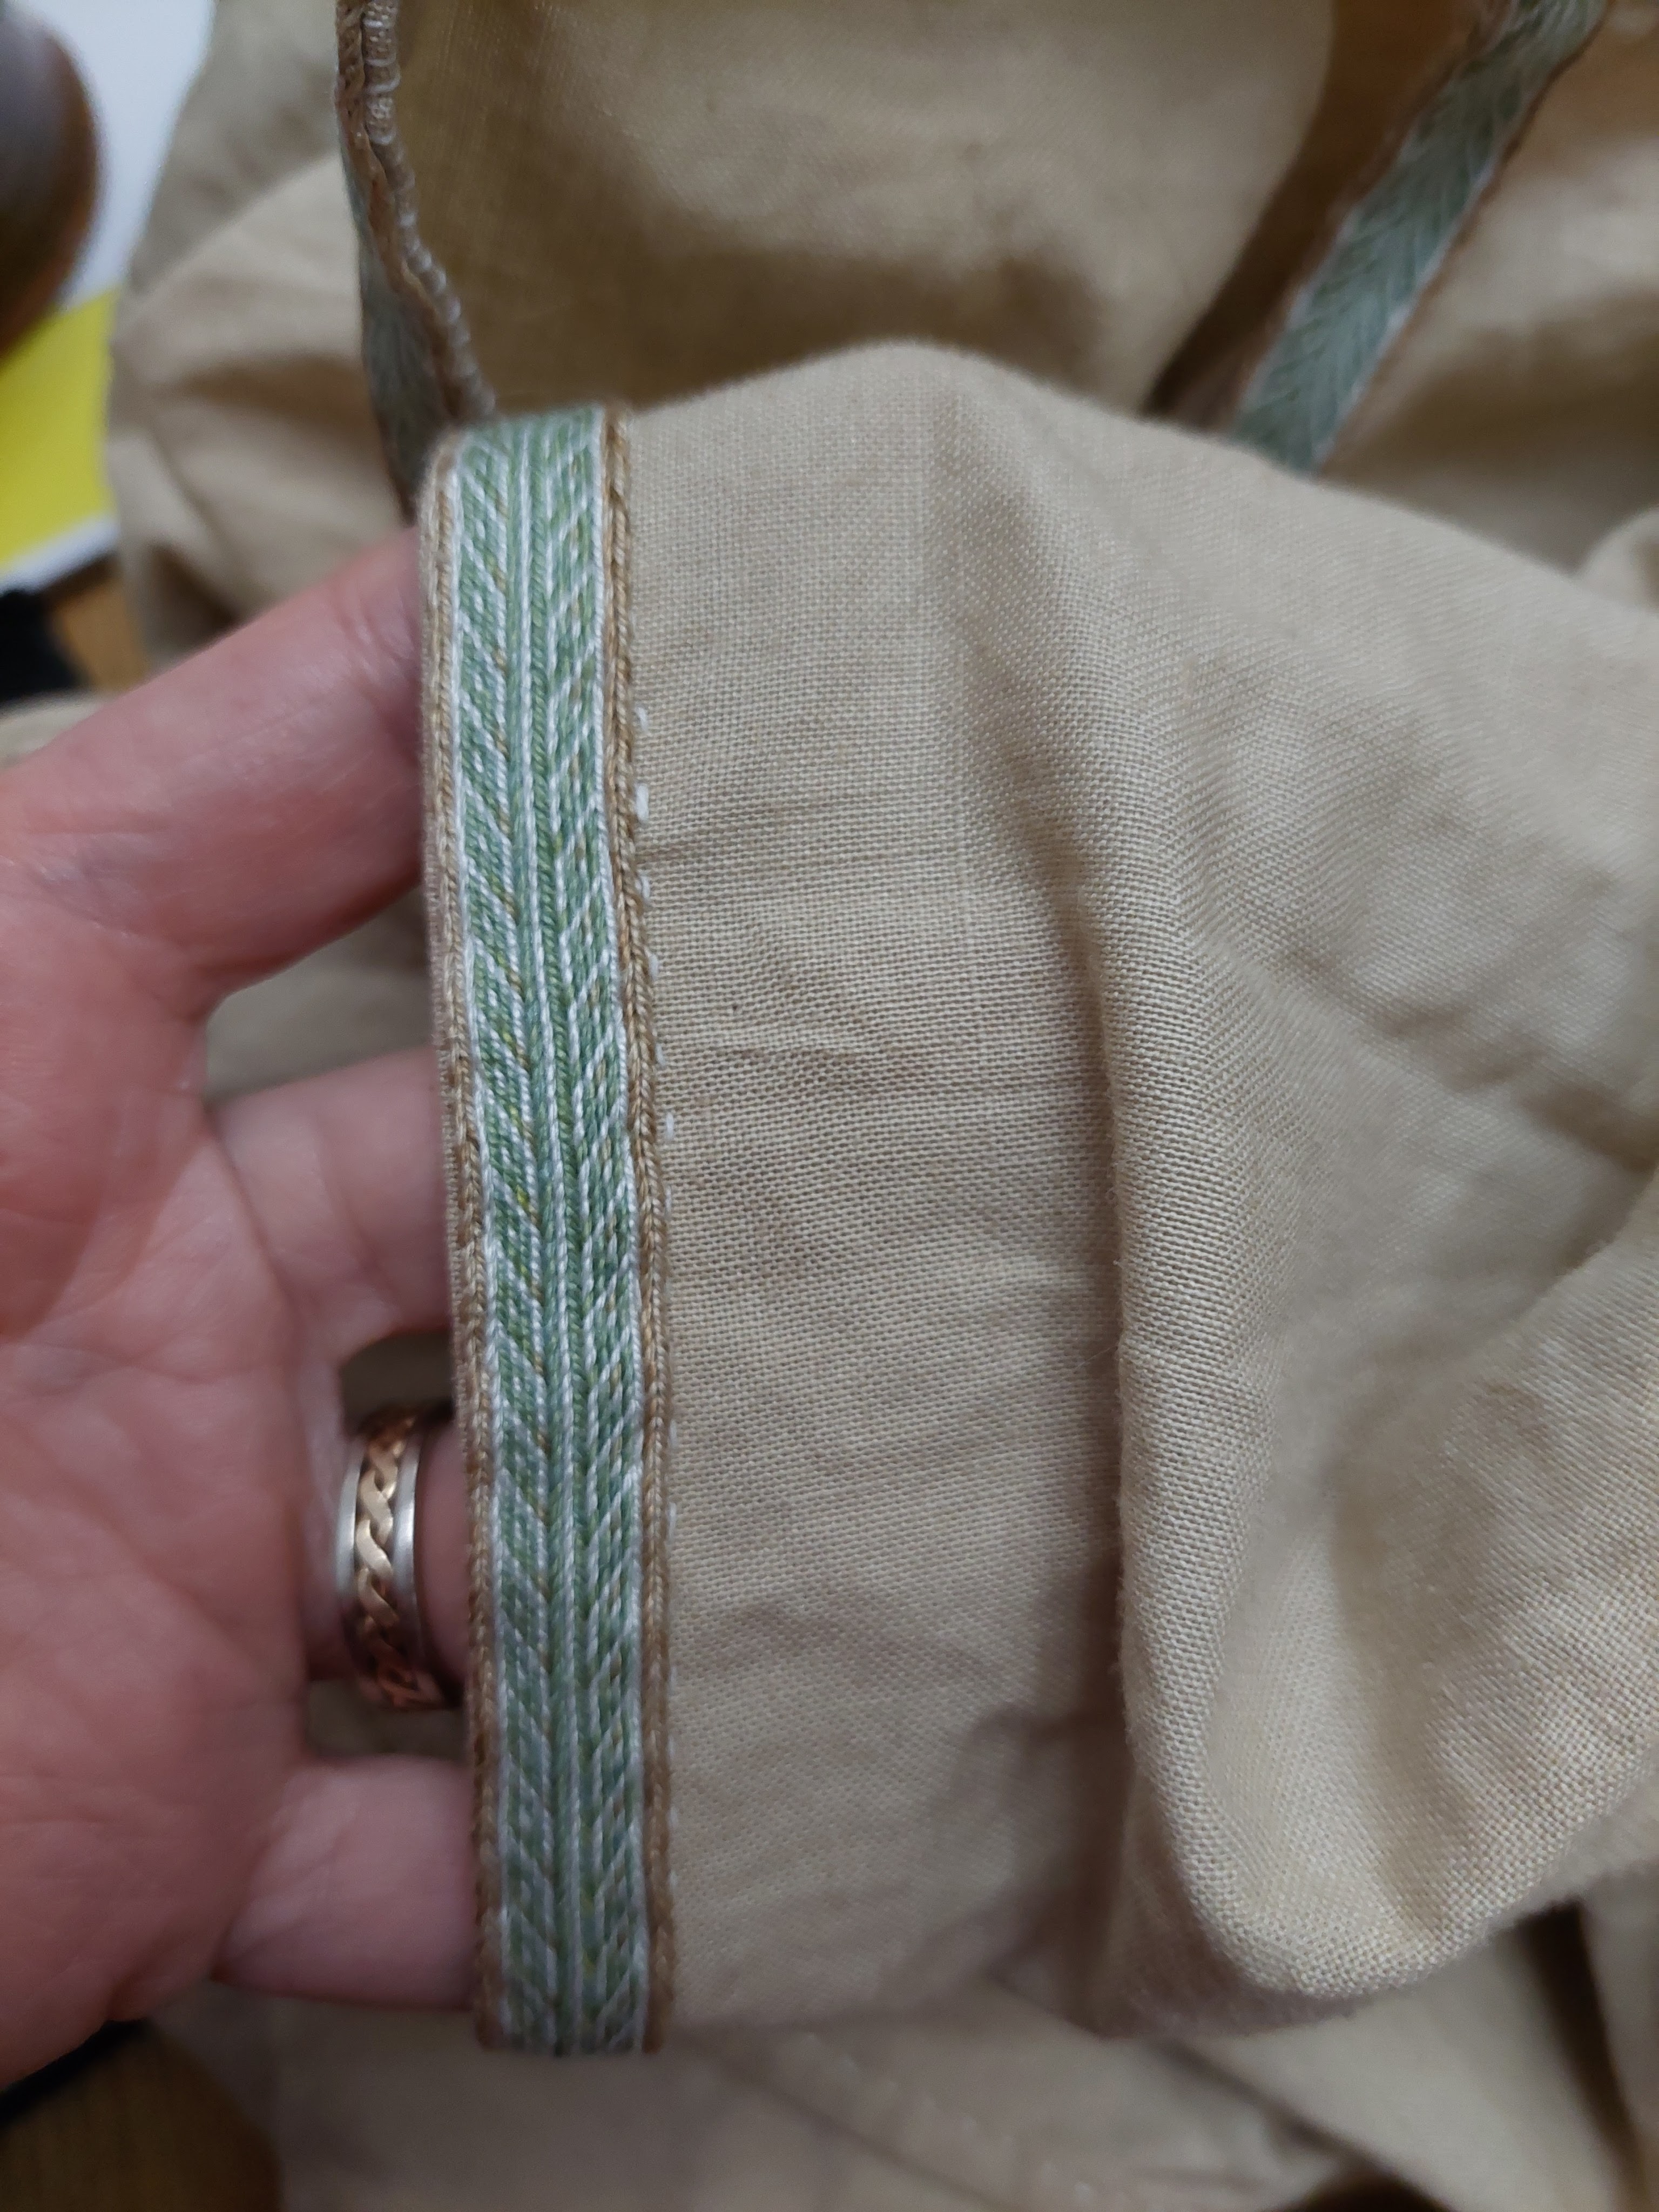
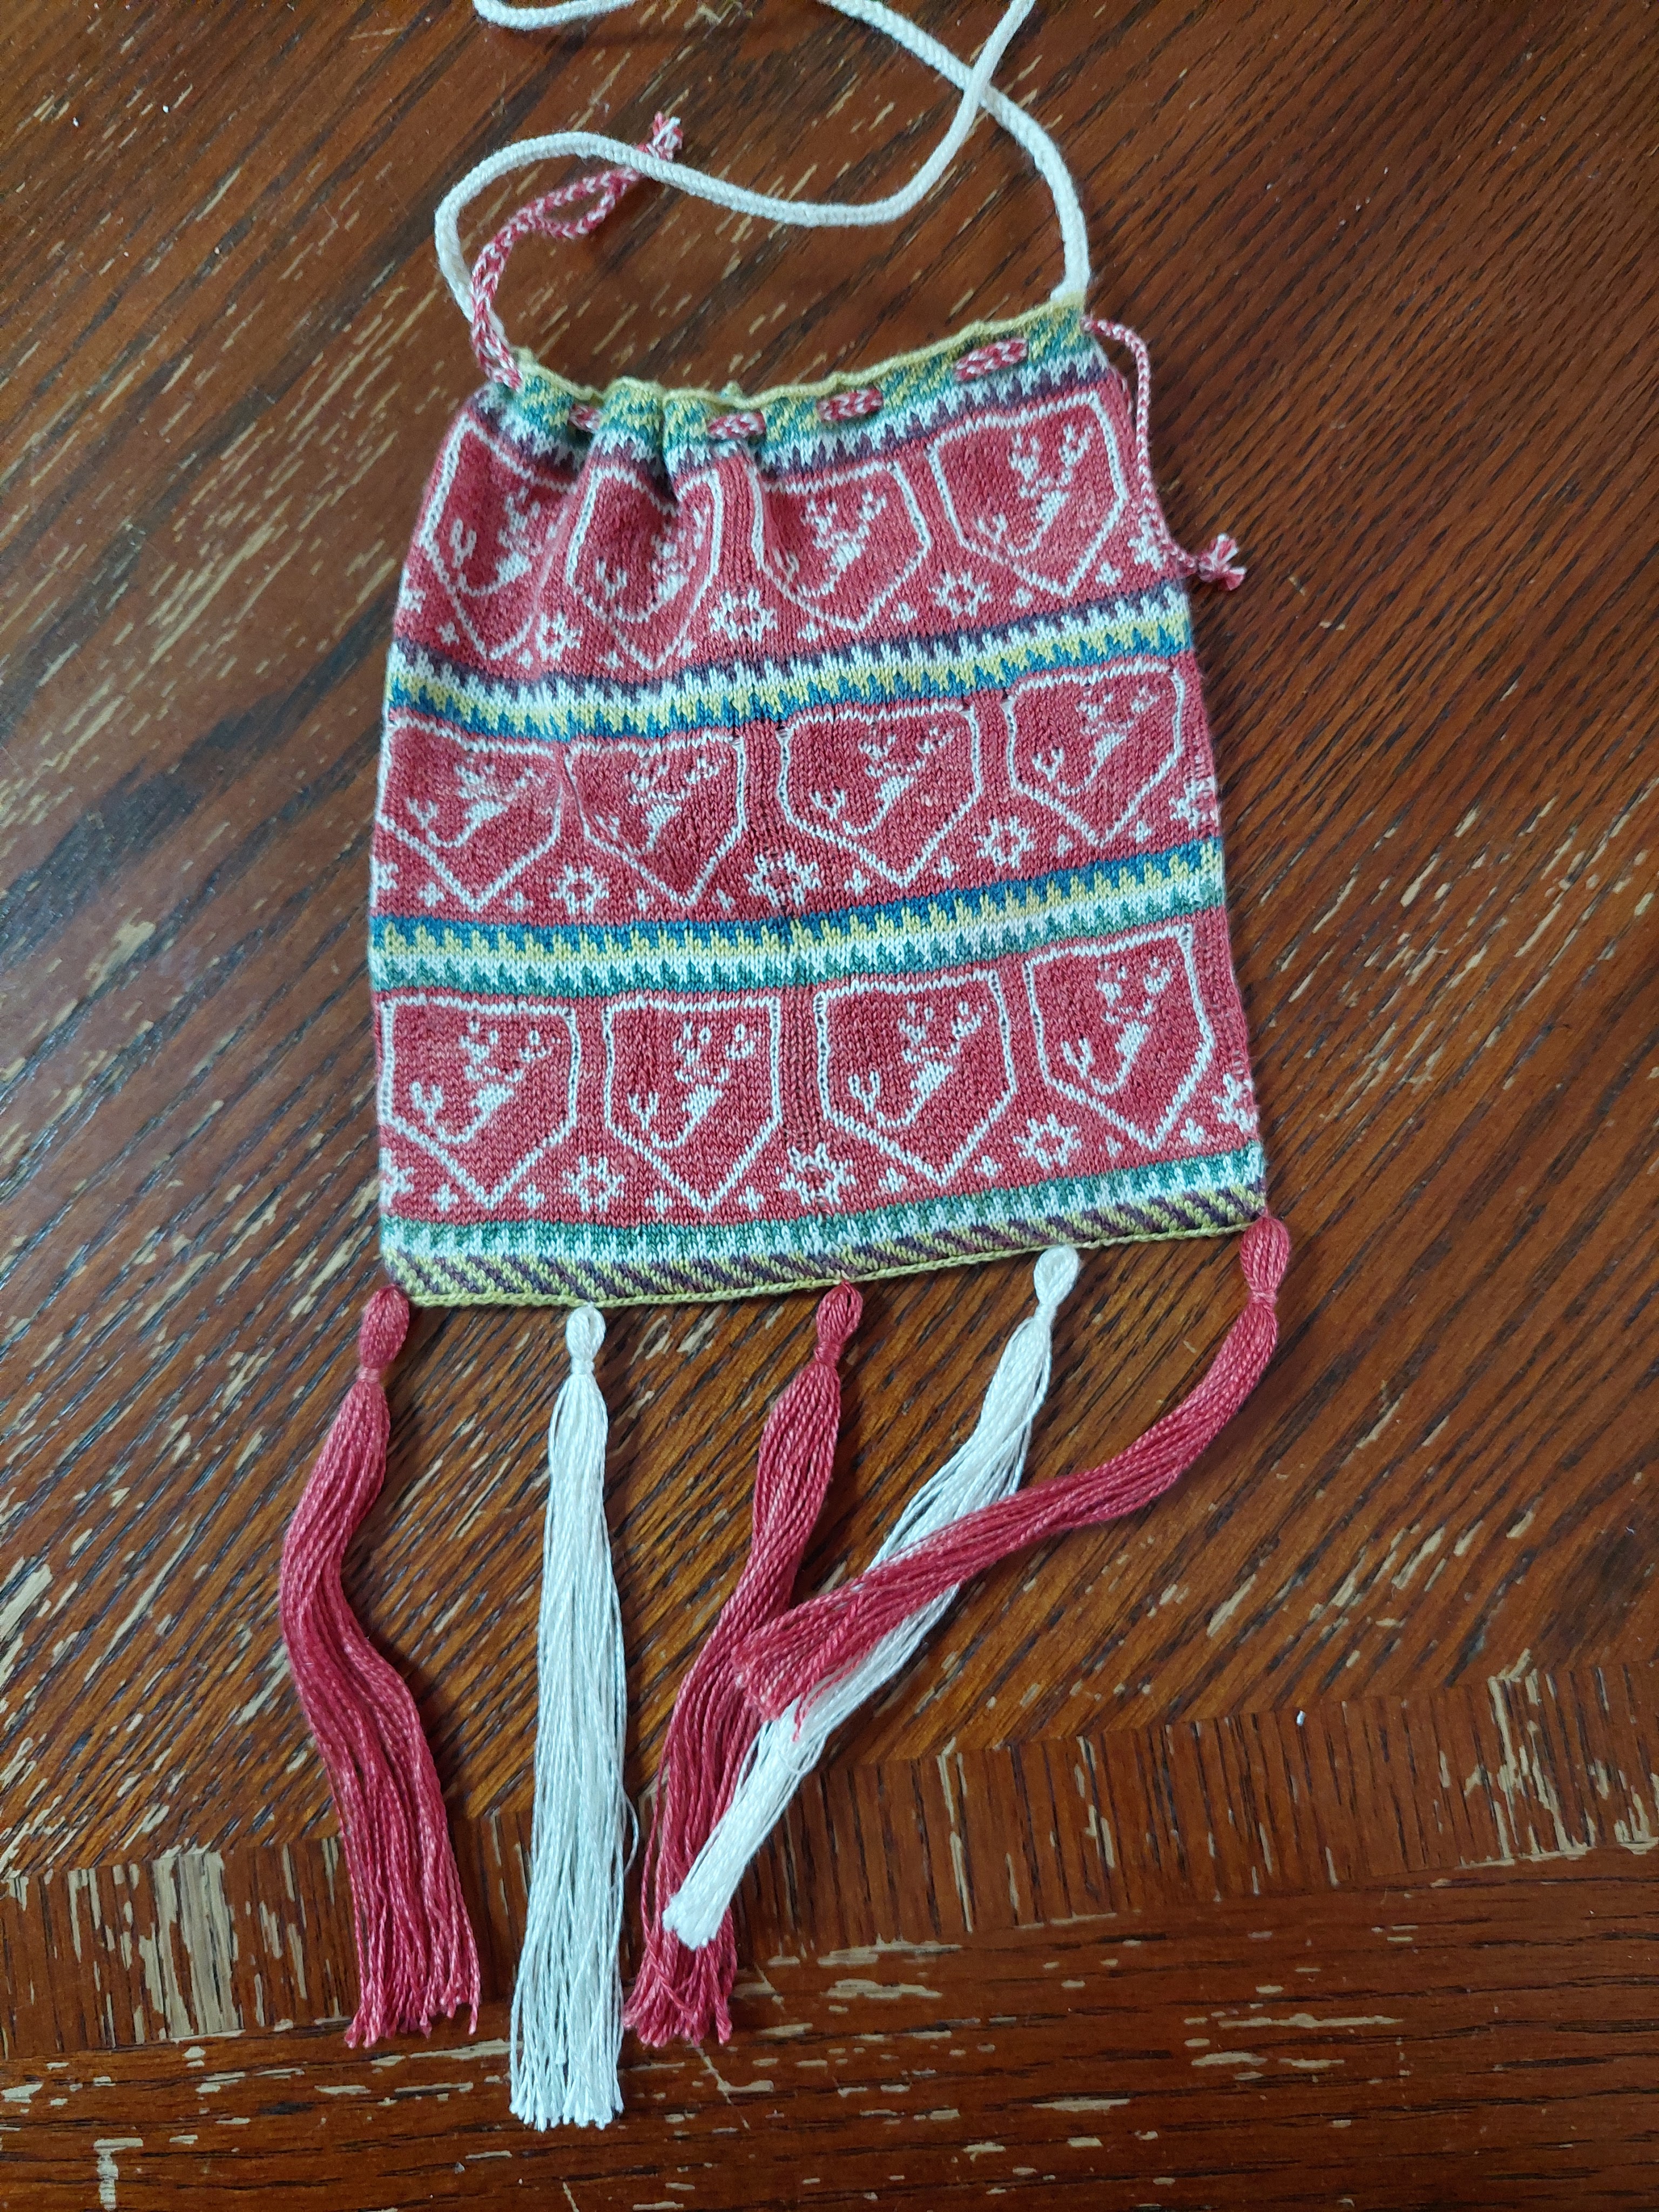
When I went tallying up my finished objects for 2021, my list got to 20. I’m hoping I forgot at least one, so that I can happily claim 21 FOs in 2021, but it’s not the most complete list. Highlights.. I’m very proud of two different projects where I started with plain white silk and dyed all the colours I needed and then worked the project. One was a knit heraldic pouch for an exchange, and the other was leafy trim for a friend’s laureling outfit. (Yes, even the underdress that no one saw had hand dyed silk trim.) A good mix of modern sewing, medieval sewing, modern embroidery, medieval embroidery and a lot of dye work. I kicked myself into making an effort to try new things. Some of which I enjoyed very much, a few of which that I learned that I don’t like it at all. Both pieces are important information. I expect 2022 to look much the same really.
I’ve plans for 2022, a big dye project, some sewing .. currently a lot of nebulous uncertainty that fits well with the copious amounts of nebulous uncertainty swirling around the world in general. I do hope to share more projects here. Let’s see what the future holds! May it be colourful and gentle.
I wrote a blog post for a group project that I’m a part of where we’re looking at the dye recipes (and fragments of dye recipes) from 3rd century Roman Egypt. Head over and have a read!
The last few weeks have been all about shoving me forcibly outside my comfort zone. Usually entirely in manners of my own devisings, really, but when you pause and go ‘what on earth have I gotten myself in for!?’ very shortly thereafer, you know you have found yourself solidly outside your comfort zone. It’s entirely because of various events that have been going on recently. The first was the Lady Mary Memorial Tournament, which was a scavenger hunt this year. Not a ‘find the object’ hunt, but a ‘complete these tasks’ sort of quest, done in teams. I.. am a competitive person. I don’t say that with pride, it causes me more grief than anything else, but when it comes to leaving points on the table in a ‘friendly’ competition.. well that was just not going to do.
My best beloved and I pretty much act like a set in most things, and this was no different. First up was well within my balliwick, teaching a class in 60 seconds. Saponification is (relatively) easily explained, and I have a slide deck! 8 takes later (I kept getting to 63 seconds, grrr!) and voila! One challenge done and dusted.
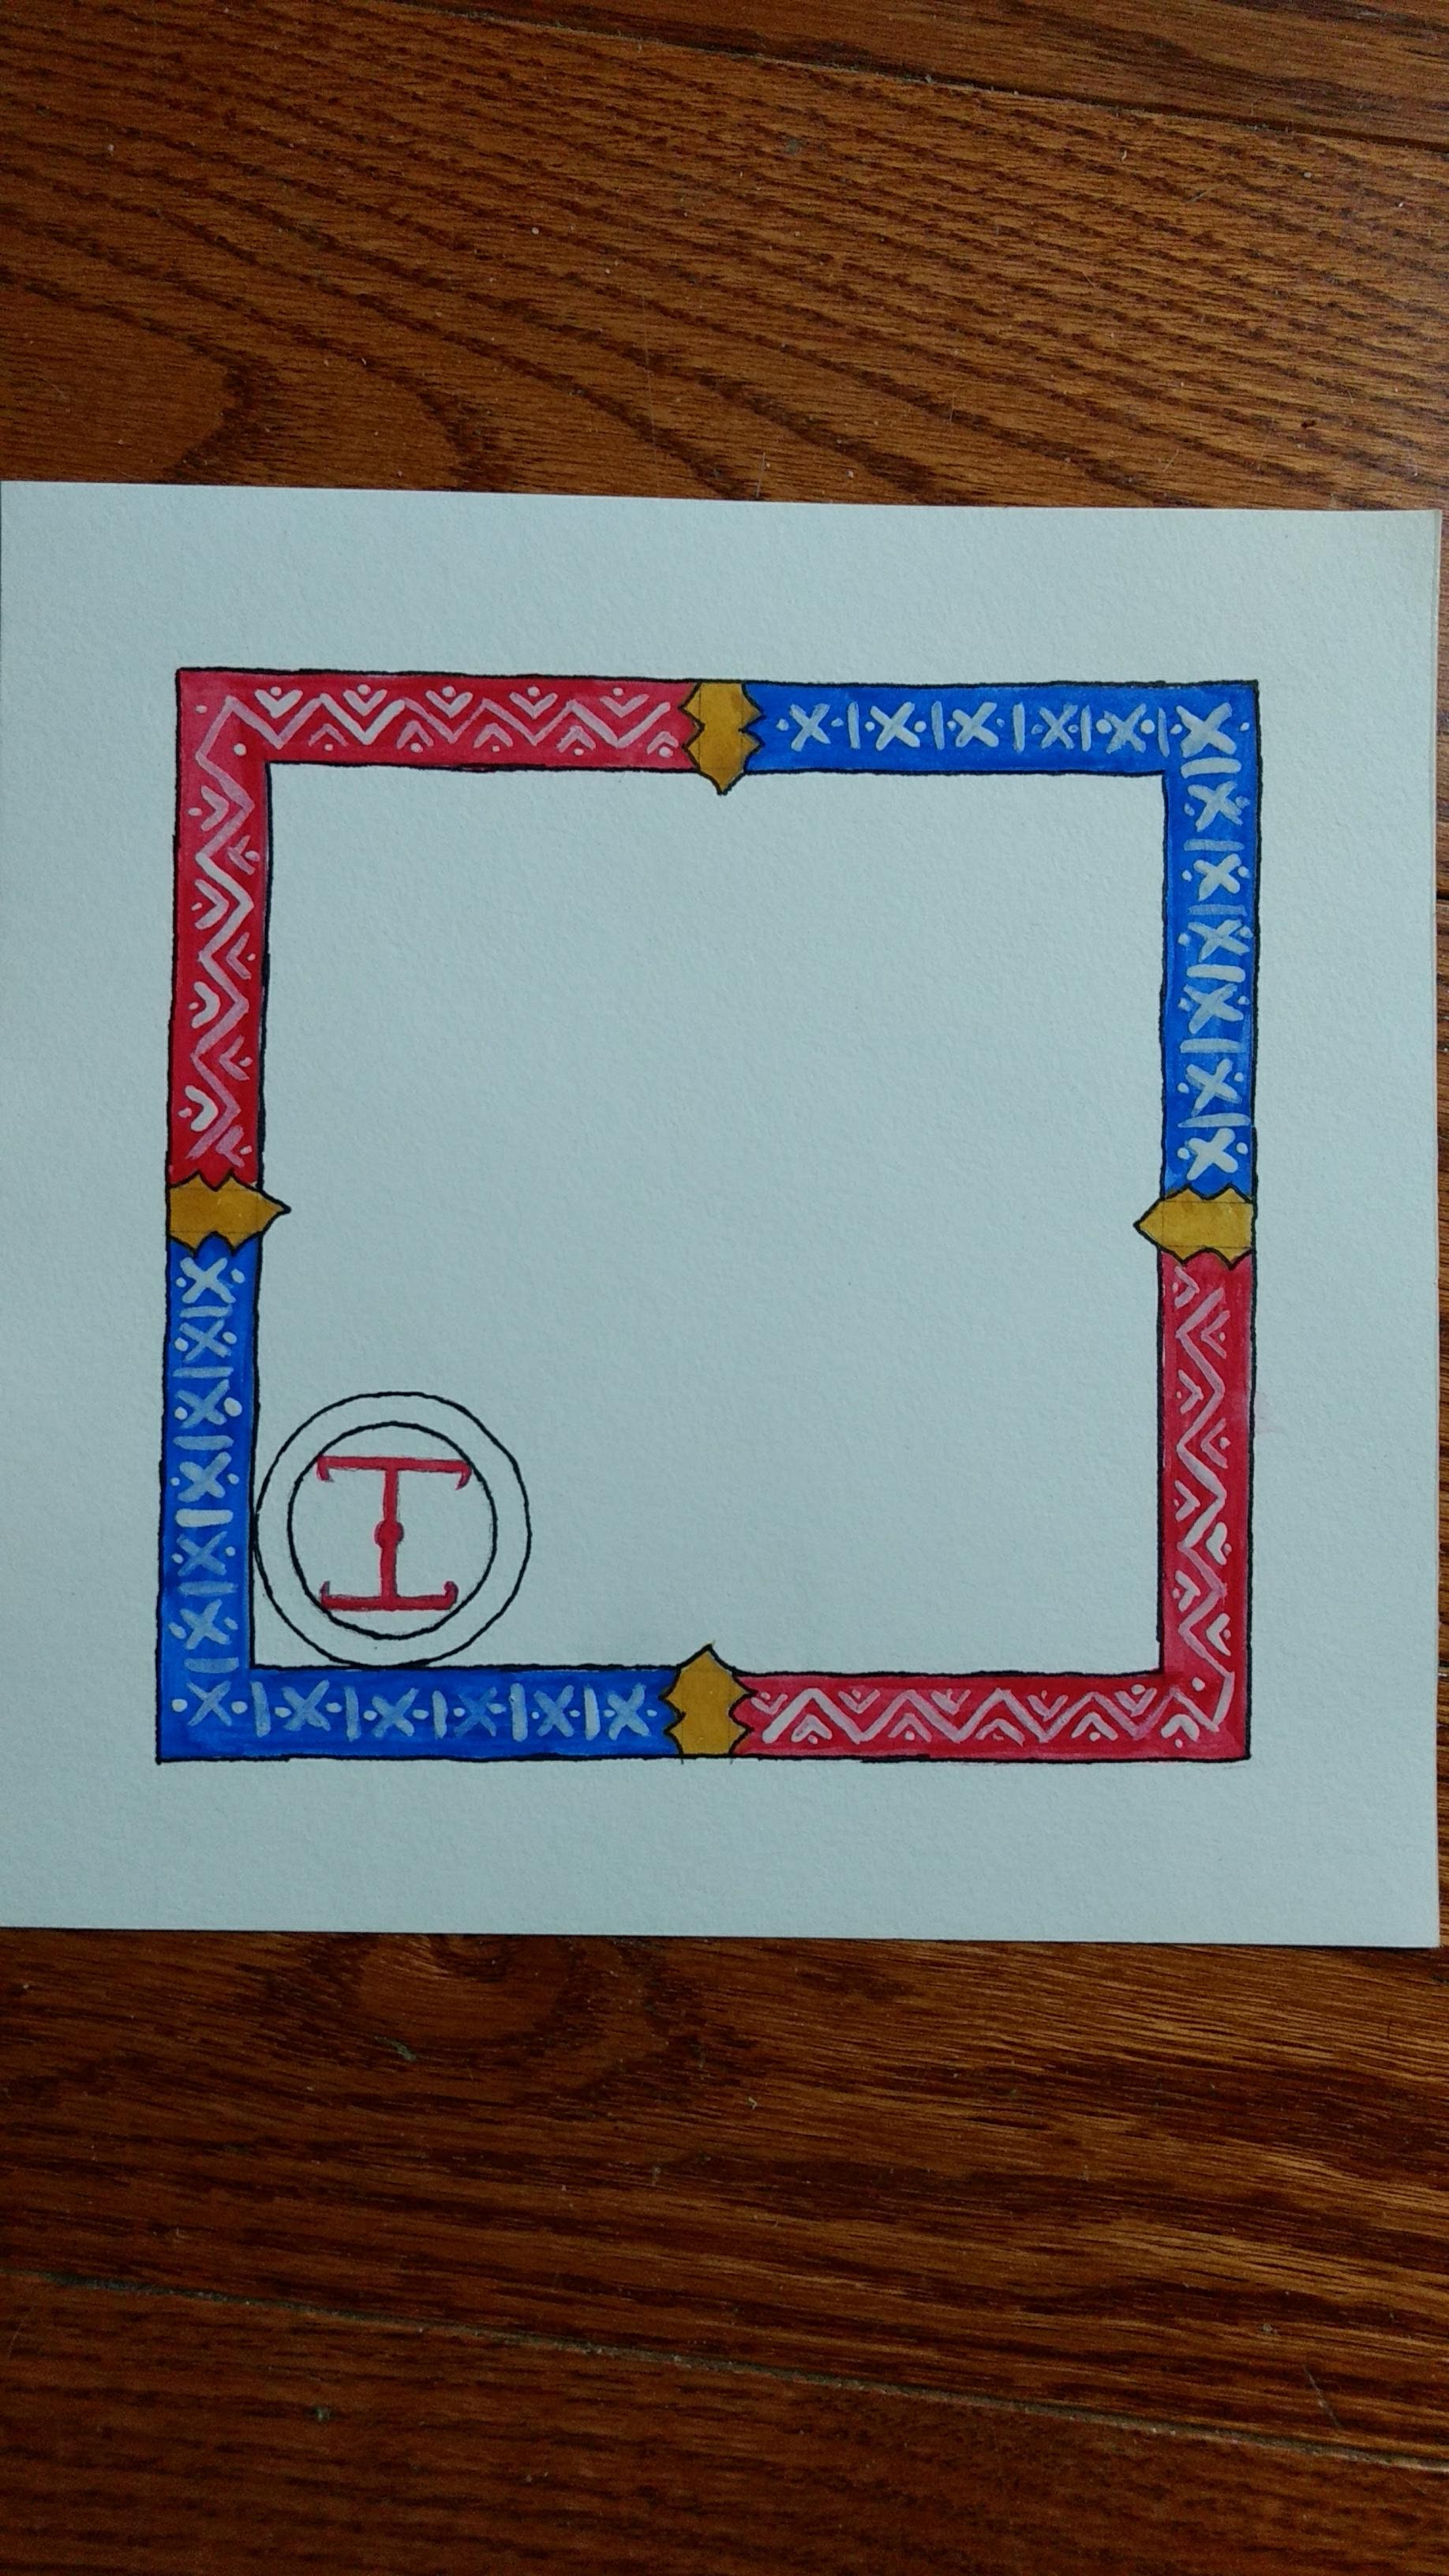
Next up, I decided to face the harder ones (for me at least) and dig into scribal. A whole lot of web searches later (and talking myself in.. and out.. of the idea) and I found some scroll blanks that looked to be not too hard. I knew full well that these were going to be very beginner, but my goal was to enter anything in the category, and not let my amateur efforts hold me back. Everything is still closed here, so I was hunting through the house for something to make a scroll from. I decided to go with cold pressed watercolour paper (8″ x 8″) and the watercolours that went with it. I have no clue why I own watercolour paper and watercolours, I haven’t used watercolours since elementary school, but there we have it, so off I went. It worked not too badly! I did a basic layout with pencil and then took a deep breath and went for it. I need smaller brushes for white work (found some for the second scroll!) and more opaque white would help too. Also? That lion is a nightmare, but I am generally pretty darn pleased with myself. The challenge was to work up scroll blanks for two specific baronial awards for the hosting barony.
Returning back to ‘things not done since elementary school’, there was a challenge to produce period music and after some asking around, we settled on a recorder duet. My spouse can play recorder, any of the dozen or so that live in our house. I last played recorder sometime in the early 1980s. I do still read music, but remember exactly zero fingerings. Fortunately the piece we found had a harmony part sufficiently simple that I could learn my four notes (yes, literally four notes for my part!) and off we went.
Phew, I think that’s enough new for one post, stay tuned for more pushing me outside my comfort zone that happened all through May!
Inspired by Engineering Knits over on her youtube channel, I couldn’t help myself but go spend a little time in the late 19th century and knit myself up a coffee sock. Okay, so the pattern calls it a ‘knitted coffee strainer’, but coffee sock has such a better ring to it. Reusable coffee filters are not even a little bit of a modern invention, and a knitting book from the 1890s included a handy pattern. Engineering knits decided to be sensible and knit hers from a worsted weight cotton so that it would go more quickly. I am not so smart. I did, however, take a step up from the tiny size 10 crochet cotton up to the 16/2 weaving cotton, that’s something right?
The pattern calls for 124 stitches, but as I have neither a fancy 19th century coffee carafe, nor a desire to go back to the crochet cotton that might give me that gauge (it has no other measurements, perhaps the coffee carafe is huge, and my yarn is right? I suspect not.) and I’m trying to fit it into my beloved giant mug, I have 80 stitches on 2 mm needles. Knit a while, then do a row of holes to thread around a wire, then go back to knitting. And now? It’s a sock. Well at least a sock toe for someone with a very pointy foot. Knit around and around and around, decreasing as you go until it’s a cone. I ultimately decided to decrease 8 stitches (evenly spaced) every 3 rows, which would give my coffee sock a very rounded cone shape. I was aiming to have it fit in a coffee cup, not a tall skinny pot, so that suits my needs well.
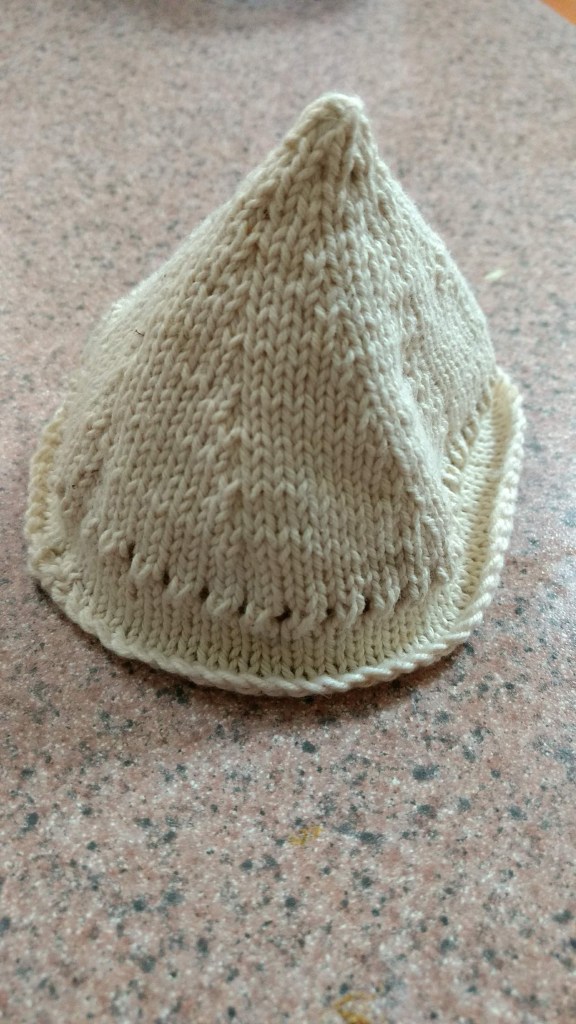
Looks like a gnome hat! Fits pretty well in my beloved mug before we go and find wire to hold onto.
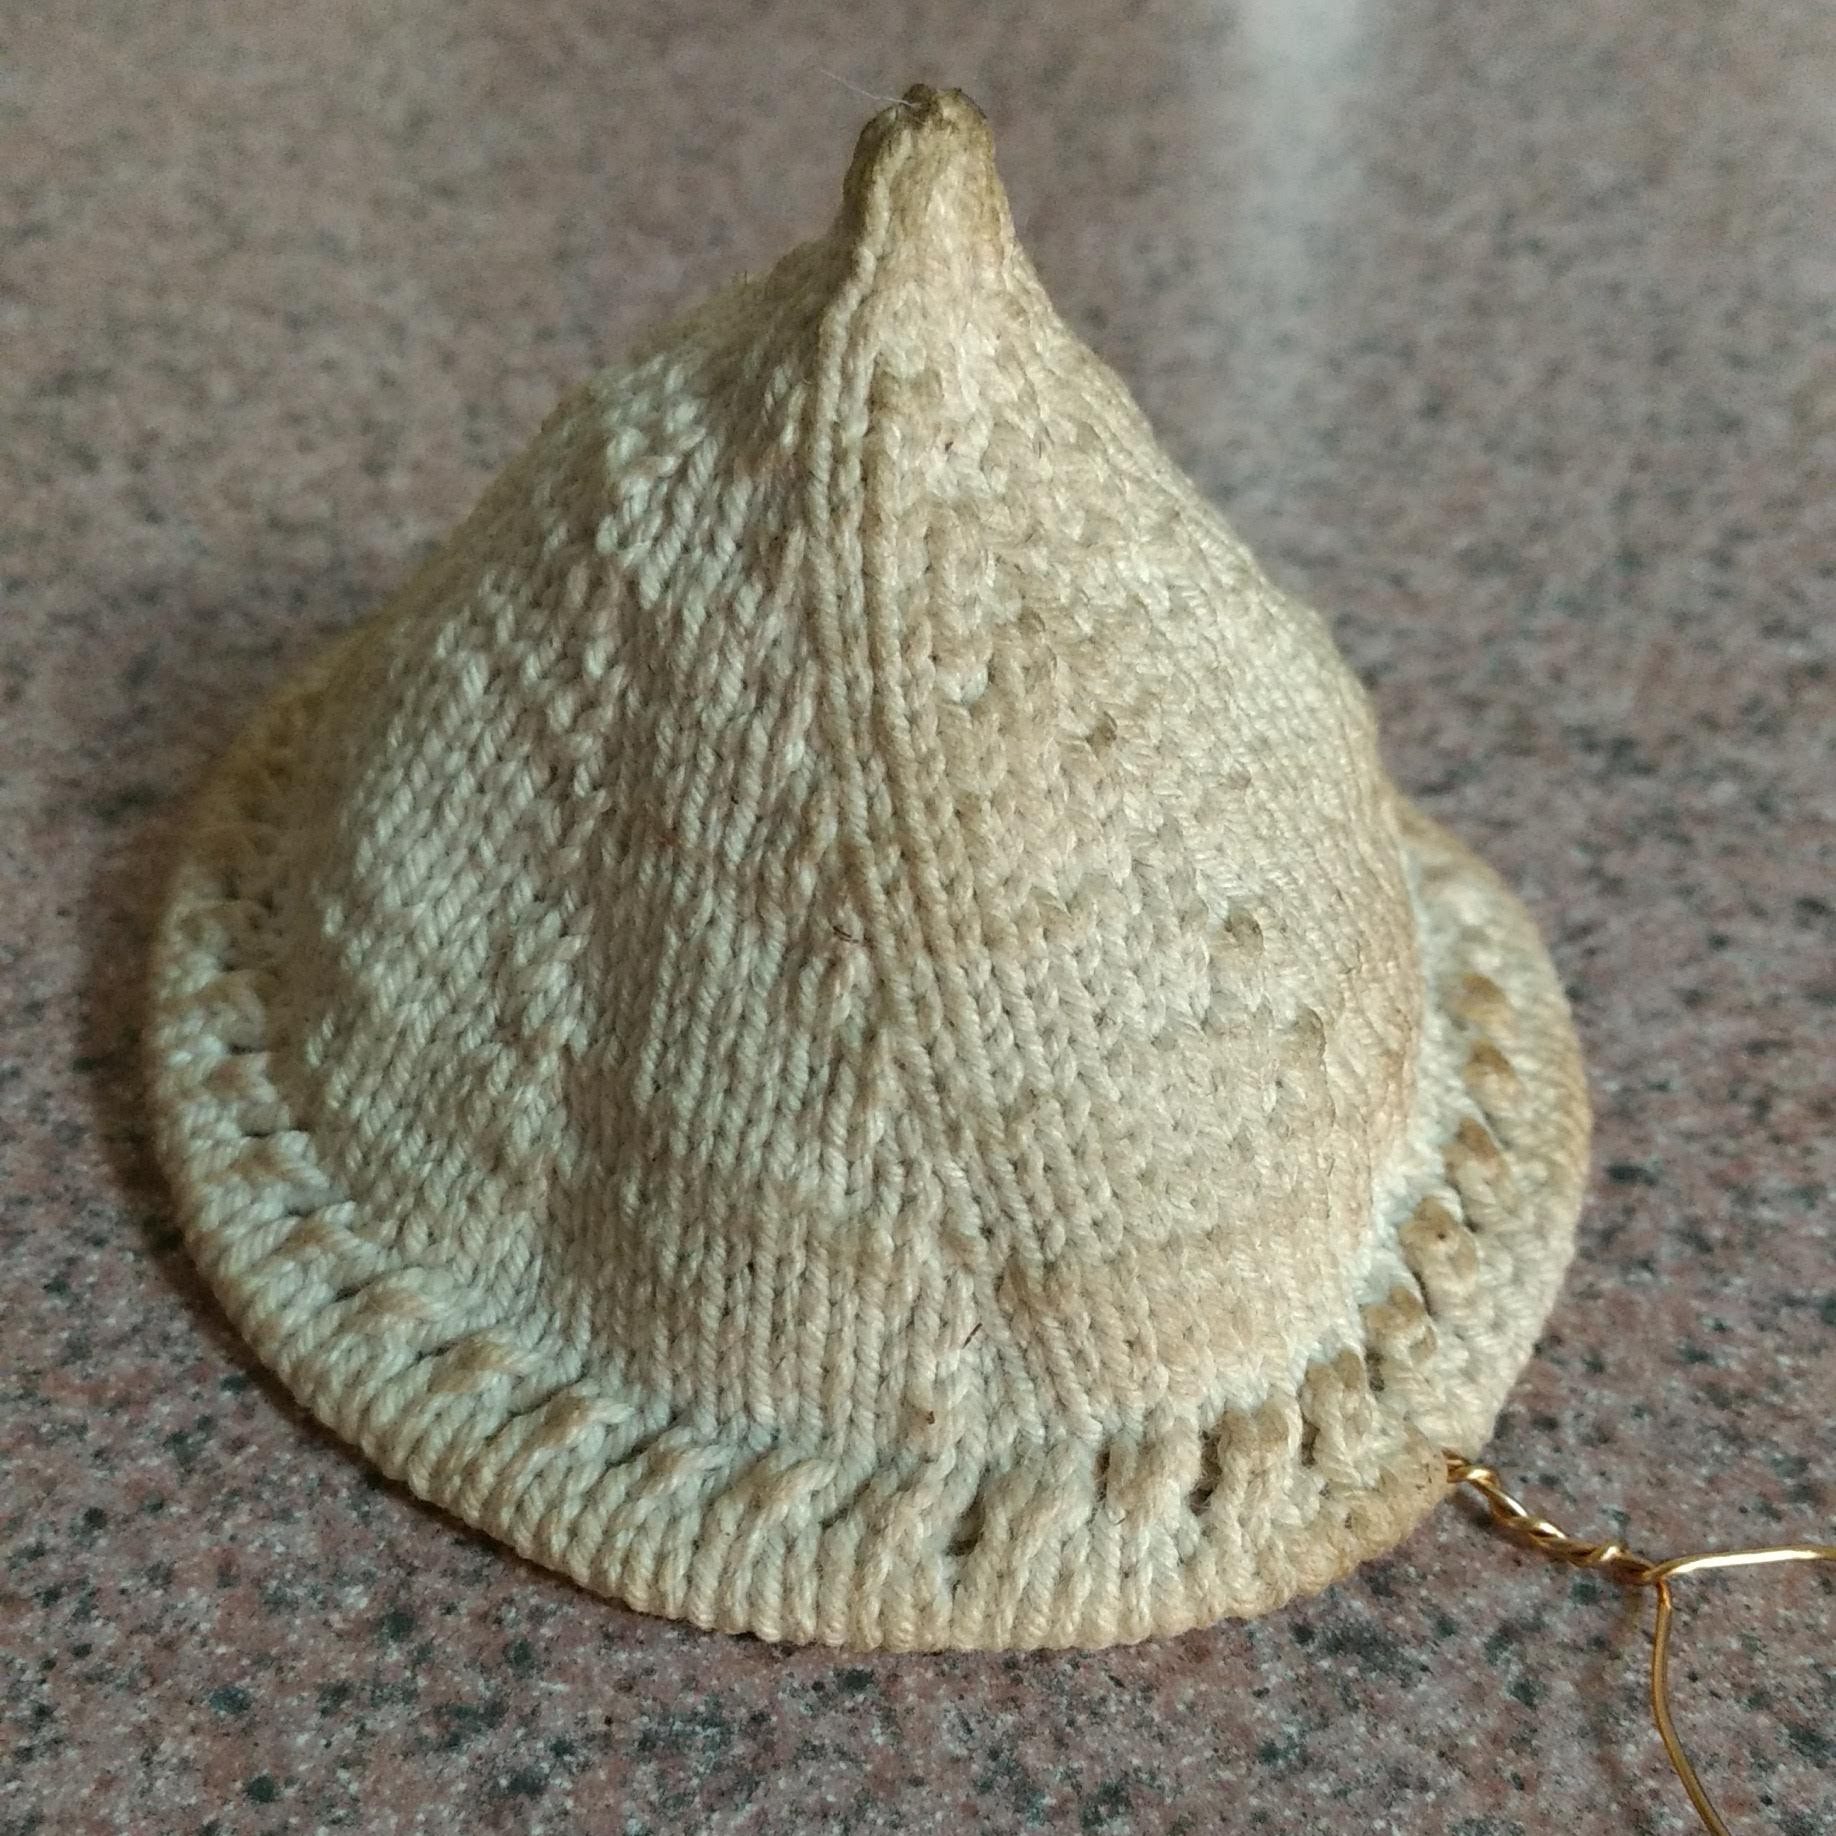
In working it, and in playing with it for a while afterwards, the pattern never says to put the wire through the holes, the pattern actually says to hem down to that increase row, but as with most vintage patterns, lets you M1 however you see fit. I went for a yarn over, but there’s no actual holes in the picture, and the metal ring appears to have been based right to the top of the hem. So score one for assumptions. They do specify that they are only decreasing 3 stitches every 4 rows, which is why the picture is quite a bit longer and pointier than mine. To be expected, I am basically making a mini one.
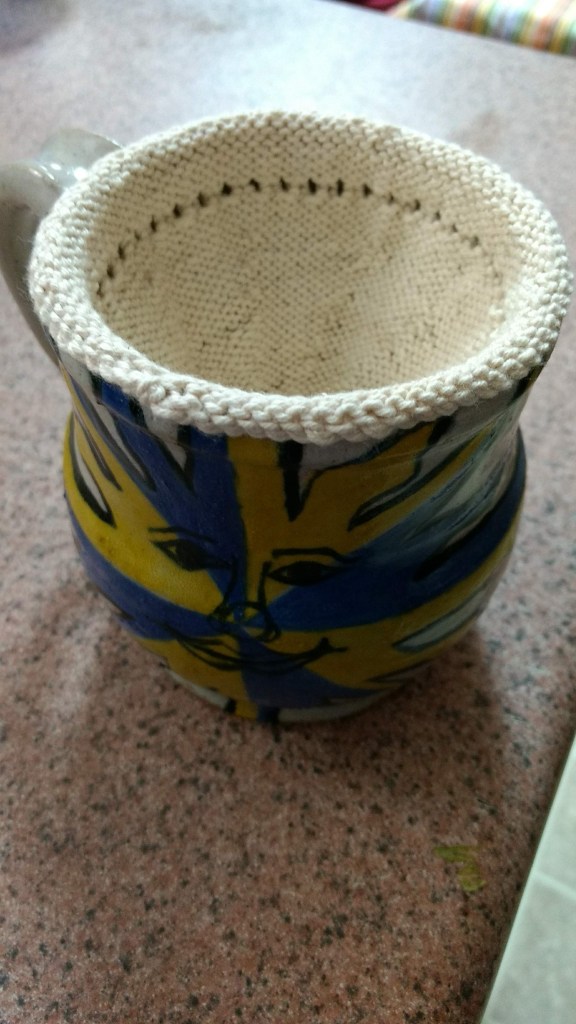
I went and dug out some brass wire (in an effort to minimize the rusting of this), but its a little softer than I’d like, still. I hemmed that in, and gave it a try. Forgive the videography of the clip, no one in this house is especially good at filming.
For those who don’t want to watch 2 minutes of coffee pouring, the tl;dr of it.. it works! It works brilliantly, actually. No grit at all at the bottom of my cup, the coffee was nicely strong enough. After it was brewed, it was literally just a nice cup of coffee, no ‘well I’ll drink it because I really should’. I gave it a rinse out with water, and you can see that it’s a bit stained, but it dried fine and doesn’t feel gross or that it took unreasonably long to dry. Pretty much, success all around, other than my wire is too soft to support it full of coffee. Not insurmountable, but that’s the only downfall.
A quick diversion of the blog to post my plague remedy as found for the Lady Mary scavenger hunt, as posting it directly to FB was ending poorly. 🙂
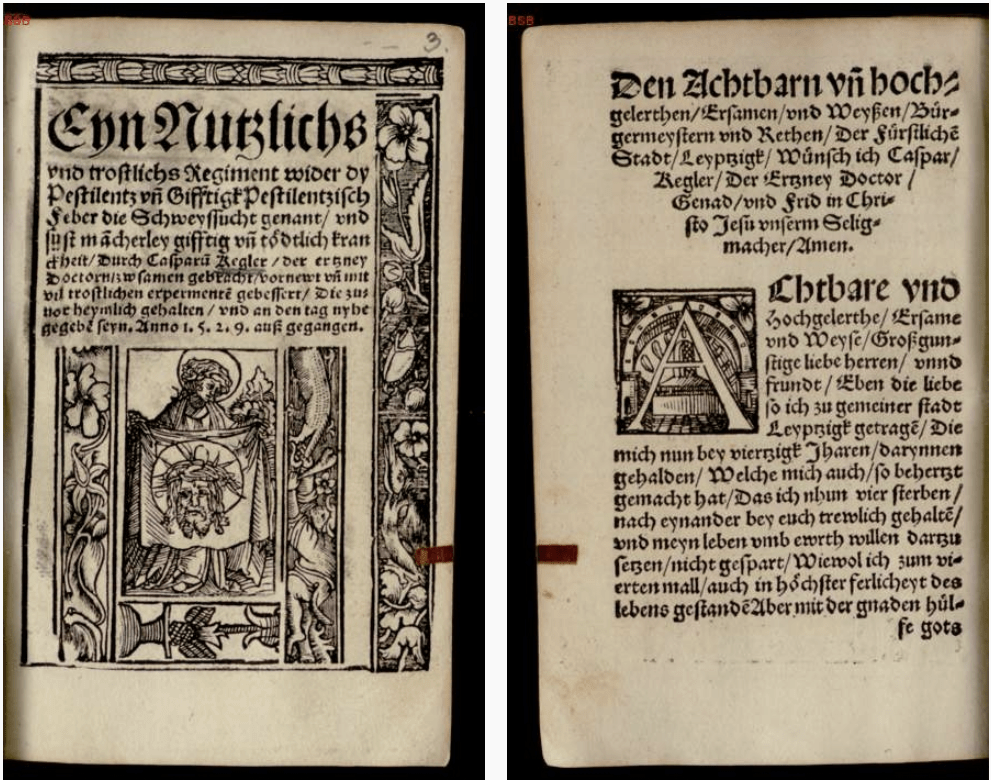
There were many suggestions of plague cures over the three centuries that the Black Death periodically ravaged Europe. Some medical, most religious, but one enterprising German physician in the early 16th century decided to turn to alchemy to assist his patients. Enter Doctor Caspar Kegler (ca. 1461 – 1537) He was amongst the earliest to promote his ‘secret recipes’ as a sure fire (provided God’s will was with you) plague preventative, most especially his aqua vitae and his “Doctor Caspar Kegler’s Electurary”, made with genuine unicorn horn! Electurary refers to a paste like concoction, generally taken by spoon.
A 1529 plague pamphlet (shown above) of his offered this recipe:
First wash and cut the celandine and place the parts in a pot with as much wine or wine vinegar as will fit. Next take a different glass vessel that is specially fashioned so that it can be turned over on the first edge of the pot, so that its bottom stands at top. Make a gum from beaten egg whites and flour and seal it well. Set it near a fire’s coals so that it dries well at all places. Then place the pot in a circular fire so that the coals do not touch it but are at a distance of a half ell. Let it boil without interruption for six hours. When these six hours have passed, take it from the fire, let it grow cold, and break the seal. Place the plant with the root in a clean cloth and wring it out little by little until complete. Hold the liquid in glasses prepared so that no smell is allowed to enter. Keep this until it is needed.
It is unclear on if this is a cure or a preventative, but he assures us that it has been used to help more than three hundred people over four epidemics and was recommended for monks and country gentlemen looking to treat large groups.
Celandine could mean either of two plants, Chelidonium majus (greater celandine) or Ficaria verna (lesser celandine). The former is part of the poppy family and has been used for herbalism as far back as Pliny as a detox plan. (The 21st century follows a long line of ‘detox plans’, nothing new under the sun.) The latter plant is part of the buttercup family, and was commonly used to treat hemorrhoids, and seems far less likely than the great celandine. The purgative nature of that plant fits in with the common themes of plague cures of the time, in preventing blockages of the natural flow of the body.
So clearly, if one is faced with the black death and you cant’ get your hands on some genuine “Doctor Caspar Kegler’s Electurary!”, you might just have to try some water of celandine, or preferably some antibiotics.
Reference: Heinrichs, E. (2012). The Plague Cures of Caspar Kegler: Print, Alchemy, and Medical Marketing in Sixteenth-Century Germany. The Sixteenth Century Journal,43(2), 417-440. Retrieved May 5, 2021, from http://www.jstor.org/stable/24245417
I was vaguely musing on what to do for the Padded Work category of the EK Embroidery guild samples. The usual is stumpwork, which while it can have some padded work, is best known for being exceptionally fine work, usually with a wired edge so that it can be posed in 3D. It’s gorgeous, it’s fussy, it’s tiny fiddly work and while usually that is 100% my jam, I wasn’t feeling it. There was a ton of meh about doing a stumpwork piece.
Then, at a panel, someone had done a trapunto piece, and it was gorgeous and simple but elegantly so, and someone in chat noted about the Tristan Quilt being in period and I had a ‘where have you been all my life’ moment.
Just one panel!
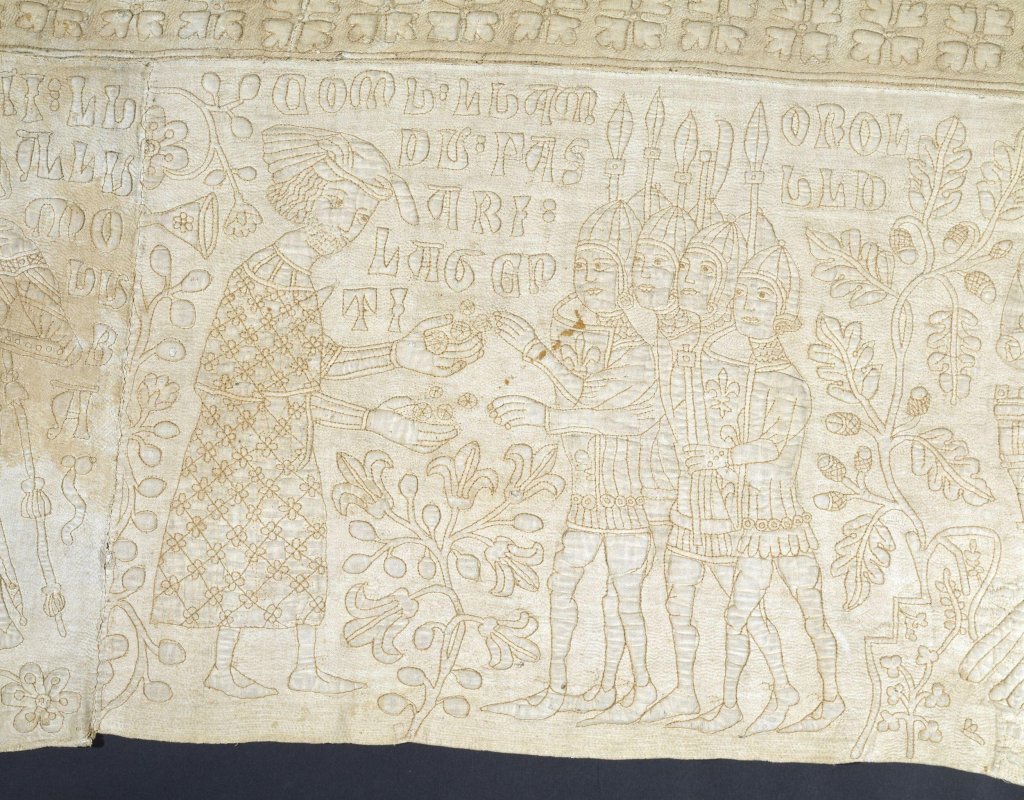
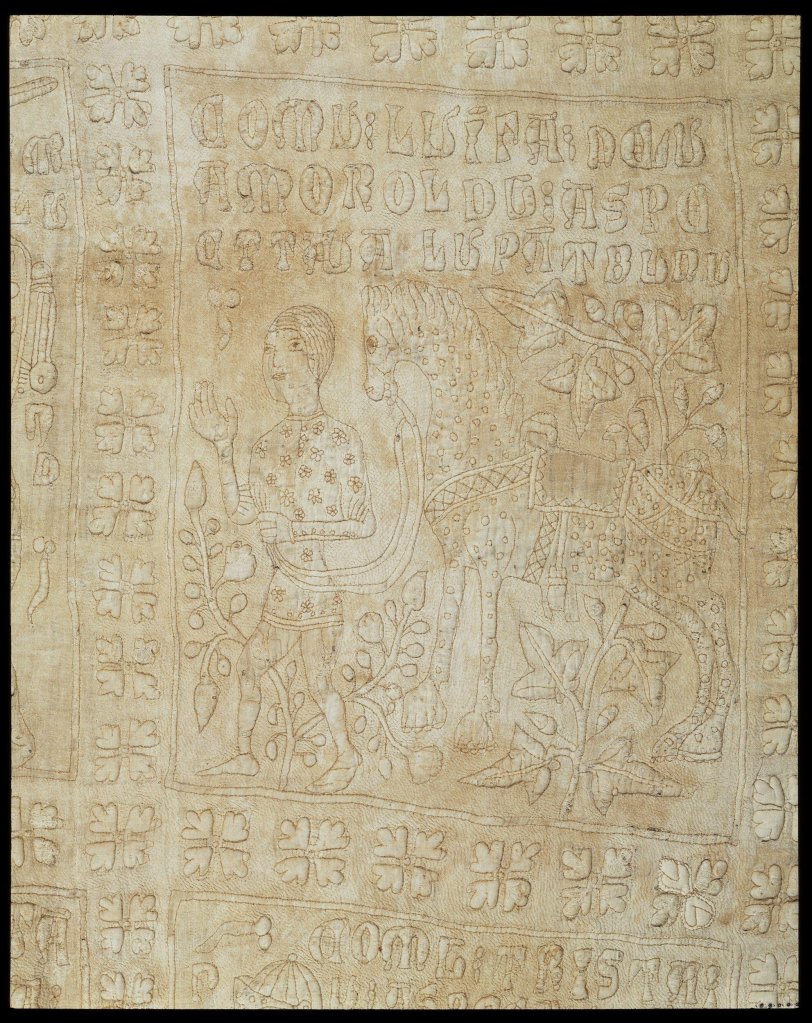
So, some back story. The Tristan Quilt is how its most often referred to, but it is probably better referenced as the Guicciardini Quilt, as it is suspected that it was made for the Guicciardini family of Florence, and figures in the quilt (Tristan) bear that family’s arms. It is a bed covering that was made between 1360 and 1400 (or so), with the story of Tristan and Isolde quilted into it in many panels. It’s monochrome, dark brown thread on cream coloured linen, and is enormous. The chunk at the V&A is 320 cm x 287 cm (126″ x 113″) , the chunk at the Museo Nazionale del Bargello in Florence is 238 cm x 207 cm (98″ x 81″) and there’s speculation of the missing bit being as large as either of those chunks, or possibly a little bit larger. (For reference, a modern queen size mattress is 60″ x 80″) and current research speaks to them being part of one giant quilt to start, and hacked up in later eras. (Randles) They are the oldest surviving examples of decorative quilting in Europe, and I fell in love.
Dude and his spotted horse.
So! I had my inspiration piece, and then I went hunting through online images to find a wee bit of the giant whole that I wanted to add to my samples. I considered the horses, but once they were down to something that fit into a 6″ x 6″ square, they were too small to stuff with any sort of interest. Then I found the fish. And well, that was that. Fish it was to be!
Fishies!
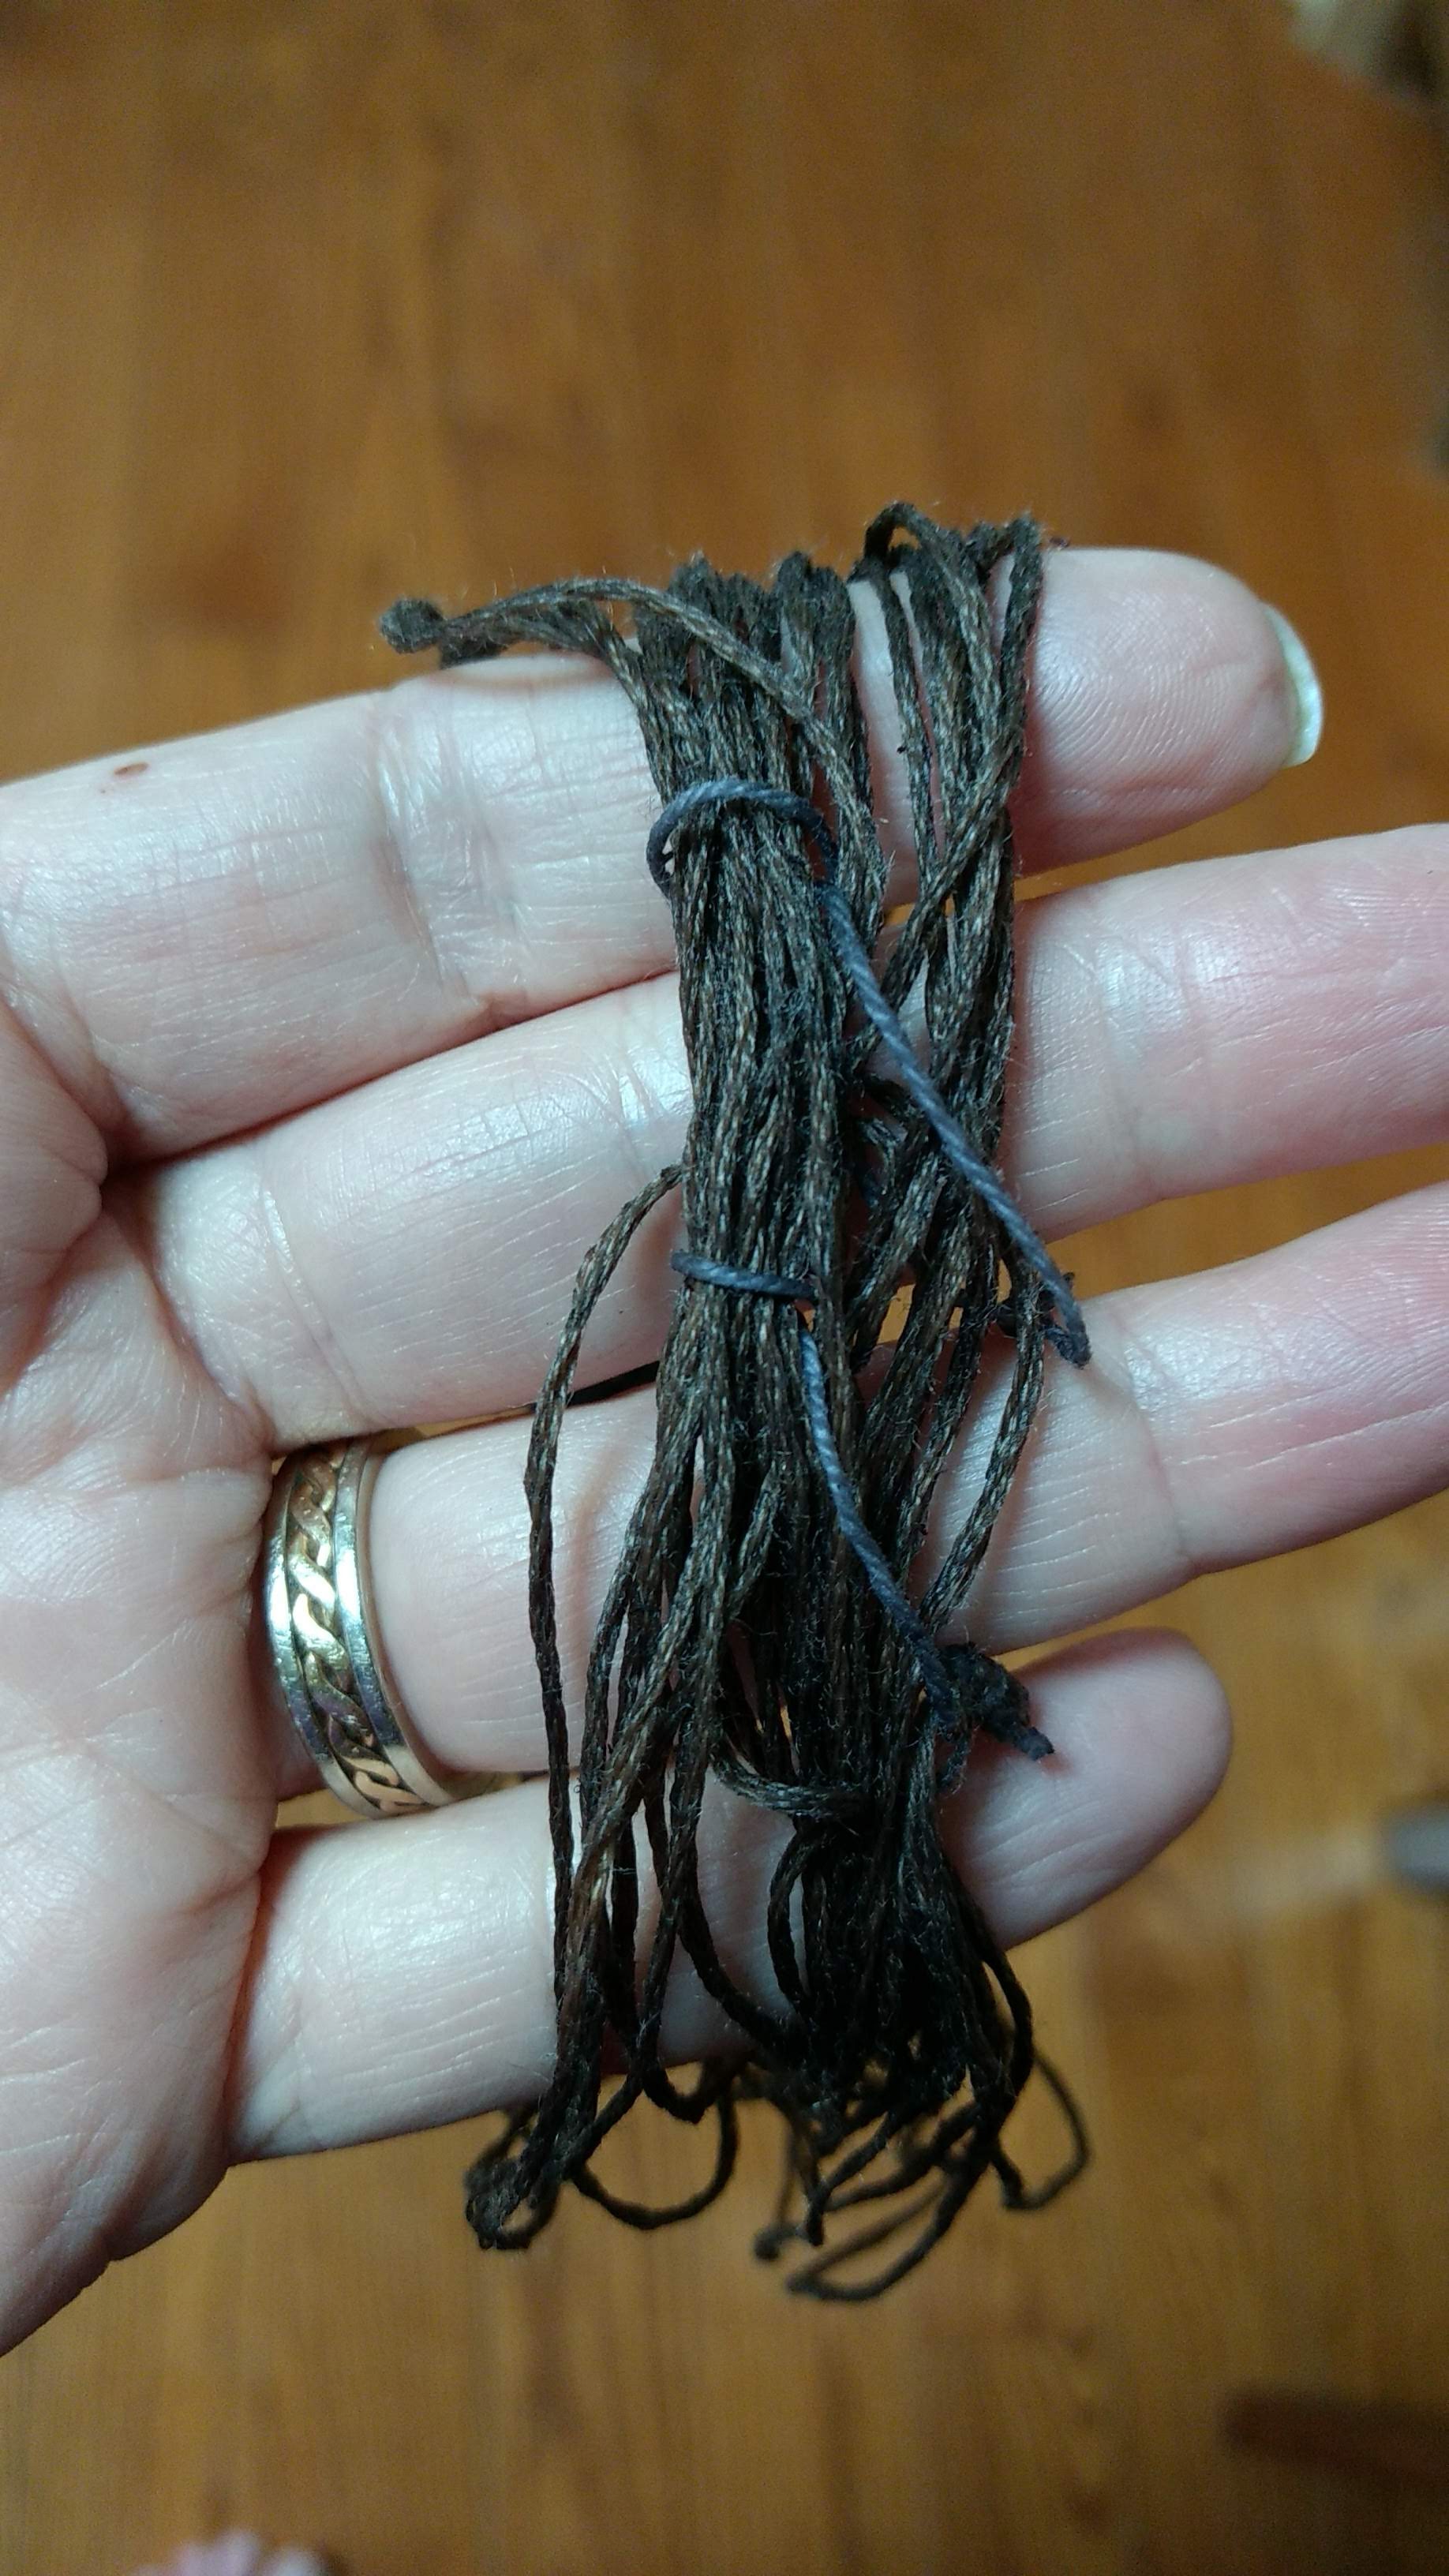
I chose a natural oatmeal coloured linen for my backing fabric, and then took some linen embroidery thread (conveniently stranded for me) and dyed it with an unholy combination of iron, pomegranate, walnut and padauk to get a fairly good dark brown. Not quite as dark as I wanted, but good enough.
Dyed linen thread
While a lot of trapunto is done by either cutting, or teasing apart the loosely woven back fabric to shove your cotton, or wool, batting into the stuffed sections, and then adding a backing, the original was not done that way. The stitching is shown on both sides, and the back fabric is as tightly woven as the front, so it is speculated that it was stuffed as they stitched. I went with that tactic on my fish as well. While there is no indication of traced out lines on the original, I have no illusions about my artistic skills and used modern washable fabric marker to trace out my fish and some background squiggles.
The blue is so startling. I promise it will all go away.
Being a ‘stuff as you go’ experience, it makes the most sense to start in the middle and then work your way up and down. So fish first! Stitch an area, add wool fleece (the original was cotton, I’m using wool because it’s what’s in my house.), shove fleece to where it’s supposed to stay, stitch more. Then add some details on top, and shove more fleece in. It’s a fairly basic procedure, all in all, if a little fussy to get the fabrics to stay relatively flat, with the fleece not spilling too far.
Fishie backside.
The stitching, even with fighting with fleece, went quickly. I used a basic back stitch throughout, and it was really a satisfying experience. I can utterly see why they’d choose something like this for a giant area, it is pretty zen and works up pretty fast.
A hem around the edge and then a quick bath to get rid of the marker and then voila! Fishy, fishy, fishy, fish!
If you’ve been reading this blog for any length of time, you’ll know that I’m rather fond of making yarn pretty colours. These days, I do a lot of work with natural dye, but that isn’t where I started*. I started with food dye. Kool aid to be precise, but that’s getting vanishingly hard to find as those little packets without extra sugar, and so I generally use icing dye these days.
Food dye? Really? Yes really. It is incredibly wash fast (and light fast and colour fast) on wool and silk. It does absolutely nothing to cotton except a pathetic stain that washes out fairly readily (unless it’s your or your kid’s favourite shirt, then you’re doomed), and even less to linen. Wool and silk? Sticks like glue!
Fibre Acid Dye Heat
It is really pretty basic, all in all. You need fibre, you need dye, you need something acidic, water and heat. I mostly work with wool for my food dye playing, it’s cheaper than silk. I have used both citric acid and vinegar as my acid in this, I find that vinegar is cheap and easy. (Are you sensing a theme here?). This is not the place to use that lovely artisanal amazing vinegar, the cheapest white vinegar from the store is just fine. The more expensive higher octane stuff is probably also fine, but I’ve never gone out and bought it on purpose, so use what you’ve got.
Your fibre needs to be good and clean, this is true for any dye project. We often call this step ‘scouring’ in the dye world, but end of day.. good and clean. Hot water, bit of soap, you want no dirt, not much lanolin left, no spinning oils, nothing that is getting in the way of the dye. Rinse it well. The theory in the dye world is to ‘Rinse until you’re willing to drink the rinse water’.
If you are dyeing right away after scouring, perfect, your fibre is good and soaking wet! If not, you need to get it good and soaking wet. Wool resists getting wet, so this is not a dunk and call it good, this is a dunk it in and walk away for a little while.
Blues not found in nature, baked in a sheepy casserole
This is a good moment to pause and consider the heat aspect, as that will inform what sort of container you are using. Food dye is an exception to the rule about never using a container you are going to use for food. Everything you are using is food safe. Except perhaps the fibre, please don’t eat the fibre, but technically it isn’t poisonous, just you don’t need that high of a fibre diet. You can see above that I often use an old crockpot. However! I have popped things in the microwave, I’ve used a steamer basket on the stove, I’ve baked wool in the oven, as seen in the photo above. (That is an interesting conversation to have with your partner ‘ooh, what are you baking? It smells.. sweet? And … sheepy?’ ‘Electric blue Kool Aid and fleece.’) I have shoved fleece into an old and clean peanut butter jar and stuck it on the back deck in the heat of summer. I’ve put jars of dye into a crockpot of water to have half a dozen colours on the go at once. Your options for heat are endless, but it will inform what container you’re using.
Right, so we’ve covered fibre, and getting it wet and containers and heat. The acid part is really very simple, I add a glug of vinegar to whatever water I’m using. That’s it. Nothing exciting, nothing fancy, just a basic glug. If I was doing this in a giant pot, I’d be aiming for perhaps a glug glug glug, but this is a no measure experience and just have faith. A glug is fine. (Citric acid powder is a whole lot more concentrated, a small spoonful should do it. Less in a mason jar, a big spoonful in a giant pot. You get the idea.)
Now you need to add colour. This bit is entirely up to you, and what you are aiming for. In the casserole style above, I had barely enough vinegar water to make things wet, and then sprinkled dry koolaid powder randomly about as I was aiming for something variegated. In the bucket of dayglo orange below, I dumped a packet of orange kool aid in and stirred liberally before putting in my sopping wet yarn, as I wanted it pretty uniform. I’ve been known to tie off sections, shibori style, or throw in balls of yarn, knowing that the dye was going to hit different sections at different times. This is entirely up to you, but I will say that know that the dye and water does not penetrate nearly as far into the ball of yarn as you hope, you end up with an outer layer of colour and nada in the middle. I was sad, so I share that with you so that hopefully it does not make you sad as well.
Orange kool aid and yarn in a random plastic tub in the microwave
I liberally mix my colours to get a liquid approximately the colour I’m looking for, and accept that it will not be quite the same on the yarn, but close. The little tubs of icing dye are VERY CONCENTRATED, so use sparingly. Really sparingly. I have been known, for a mason jar or small plastic tub, to measure them out with a toothpick. A very saturated dye in the crockpot, I went to tiny scoops on the end of a small spoon. Like seriously, you are aiming for amounts that would make small children who are trying not to eat a food happy. You can add more, but you do not want to be rinsing for 80 years.
At that point, pop in your wet fibre, steam/bake/nuke/stick in the hot sun and wait. Your choice of heating will determine how long you wait. I generally bake things in a gentle oven (say 275F?) for half an hour to an hour. Steam is more like 20 mins to half an hour. Sun dye is a few good days of solid summer warm (or months if you forget about it, and that’s fine too). Nuke it for a minute or two and see how it looks. There are not any hard and fast rules and regulations here. It needs to be hot, and it needs to be hot all the way through for a while. Not ages, but a while. If you don’t like what you get.. dye it again! 🙂
And there you have it, that’s dye with food colour in a nutshell. It’s fun, it’s easy, and if you are careful about choosing your icing dye combinations, it can look like you used natural dyes to get there without the fuss and hassle! (There are no natural dyes that give blue kool aid colours, just FYI.) Everything is non toxic, so it’s a great thing to do with kids without worrying that they are licking the mordants. Stick some wool and some colour in a mason jar and let it stew on the balcony! It’s a ton of fun.
*Technically I started with natural dye research. I was doing some fan fiction collaborative writing in the early 90s and it was based in a historical setting. The character I was working with was an early chemist, and so I went to the university library, and sat down with honest to goodness books about natural dye to be able to write her more effectively. That was the seed of it all, even if it took me years to actually TRY it, but the fascination started in dusty stacks of books and fiction.
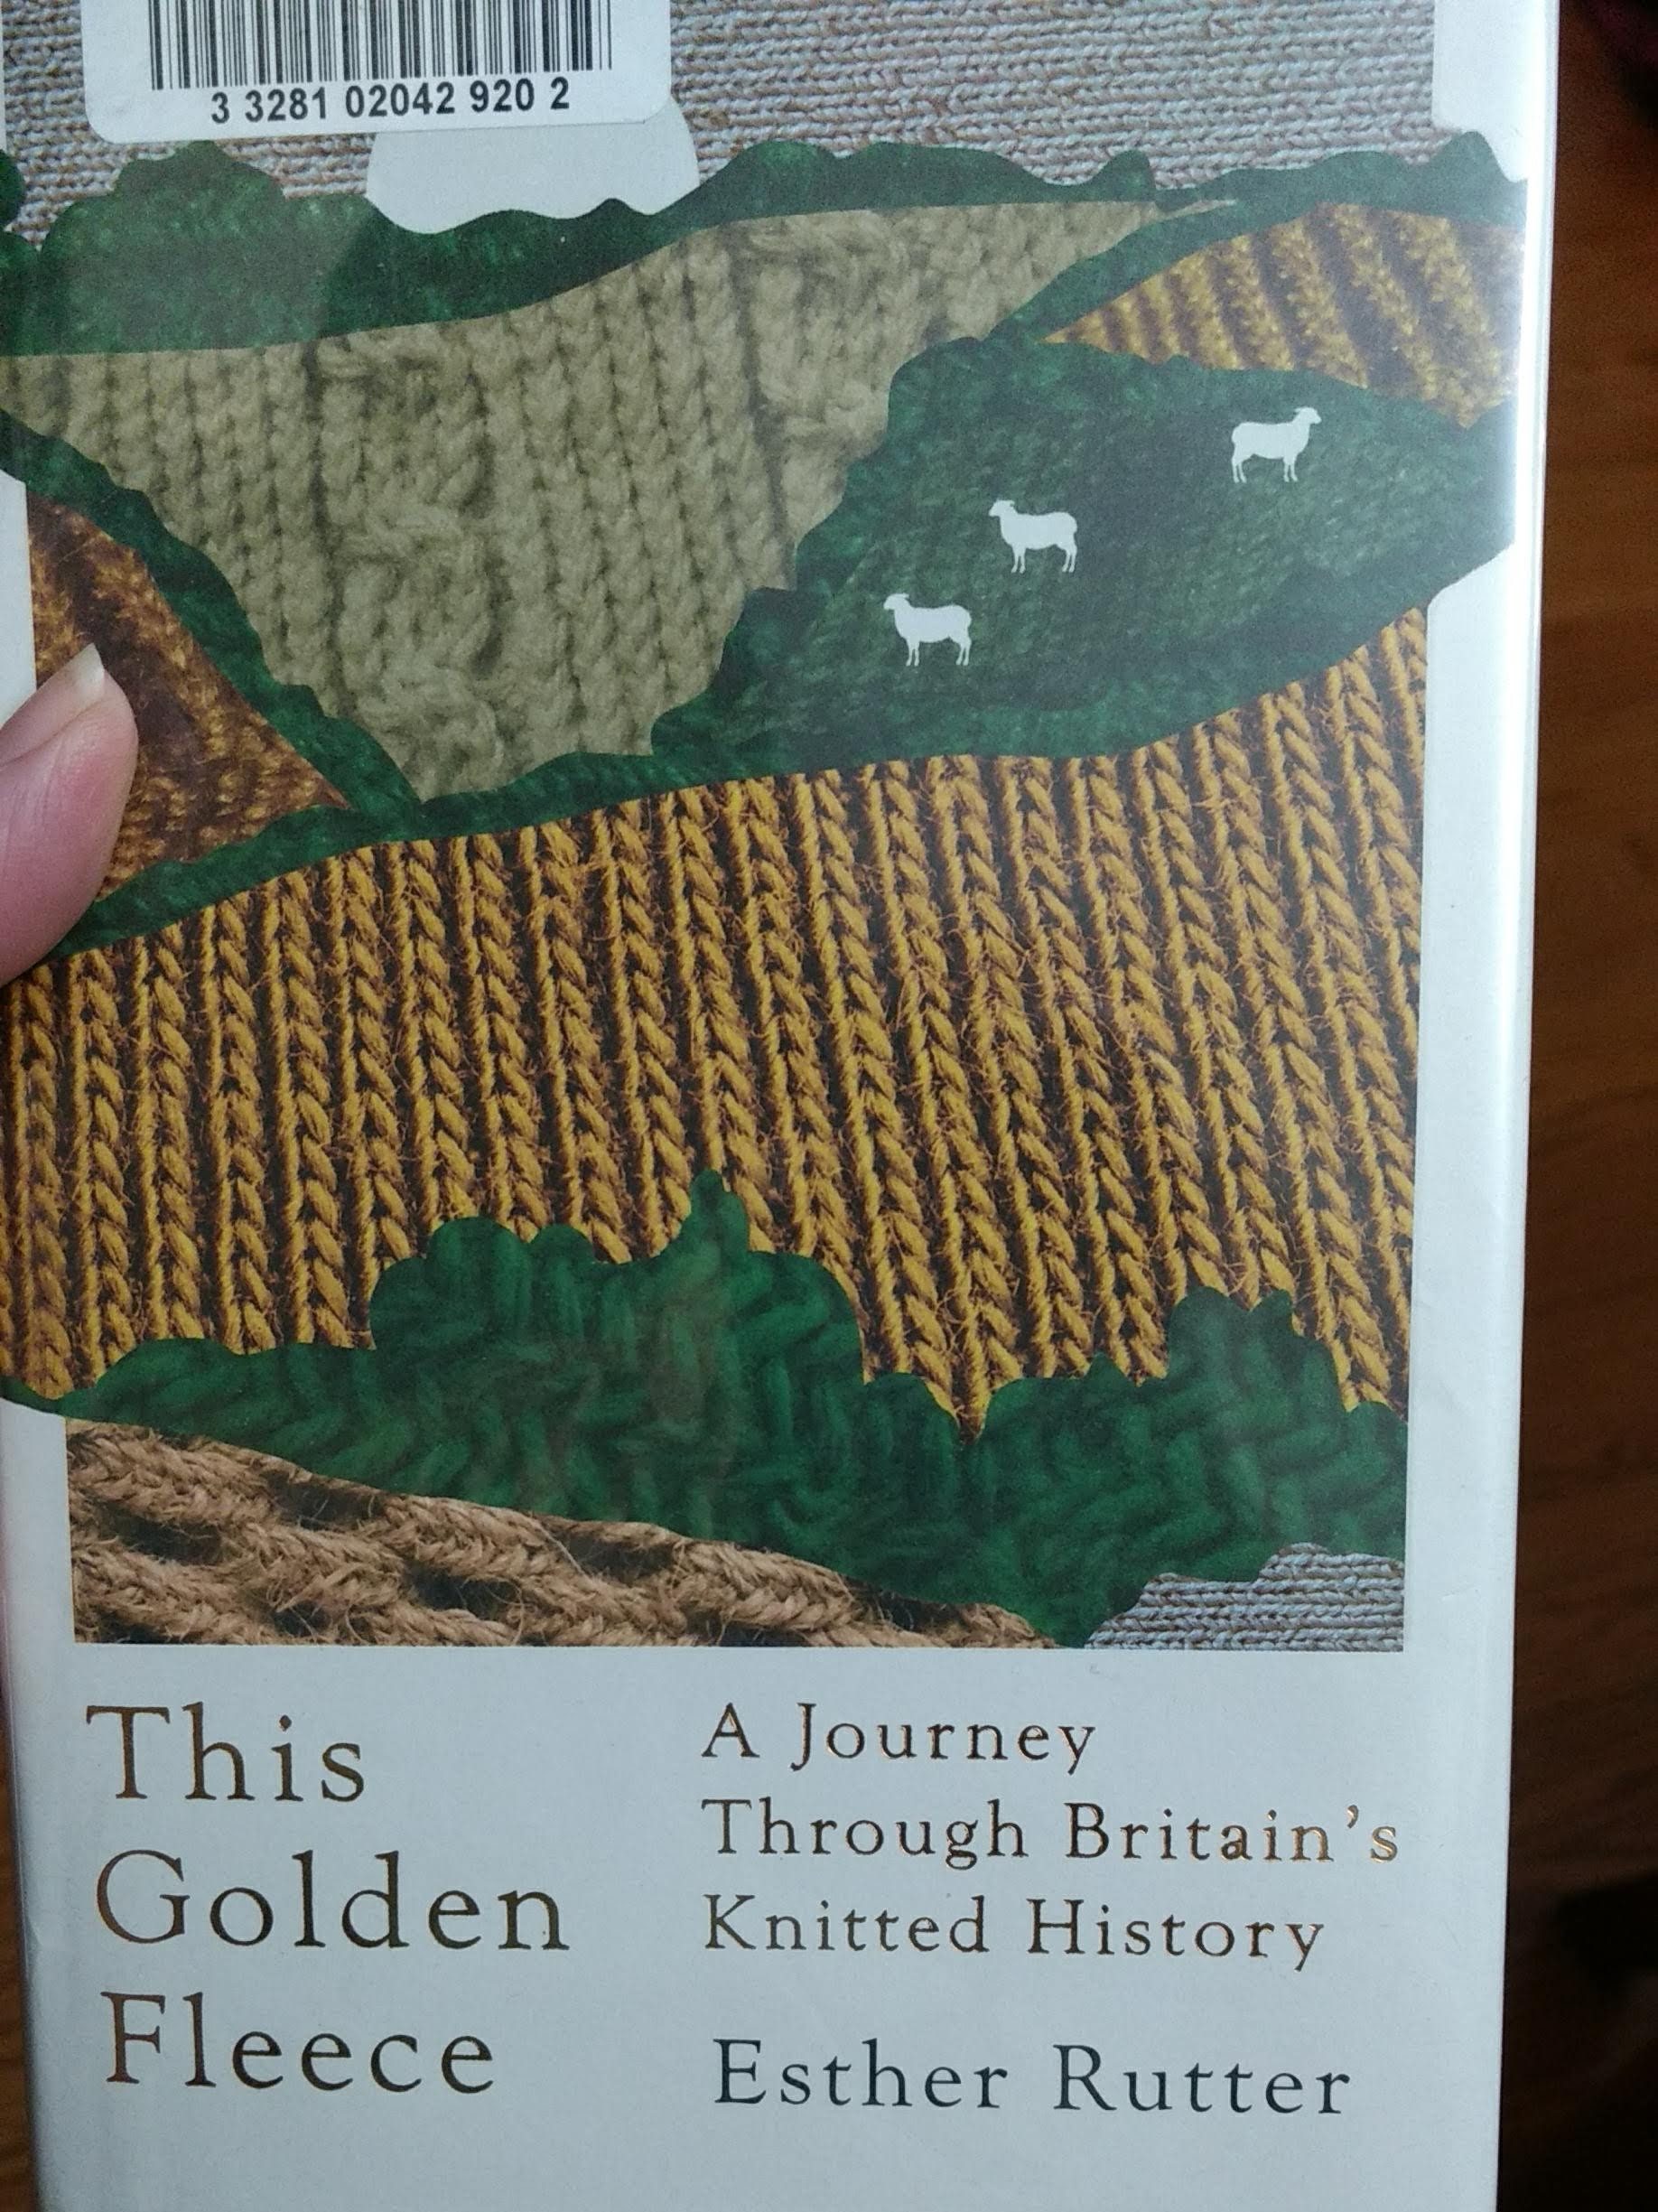
I picked up a book from my local library on hearing it mentioned.. I don’t remember where, but it felt like something right up my alley. This Golden Fleece: A Journey Through Britain’s Knitted History by Esther Rutter. It was published in 2019, so there’s no discussion of the plague times, which is rather a lovely pause from the present day.
Support your local library! Thank you Guelph Public Library!
This book looks at the knitting history of the UK in a really gentle introspective memoir style of writing. The author spends a year travelling around the UK picking a different aspect of knitting history and visiting museums and festivals, talking with people and working on a suitable knitting project for her months’ focus. (Seriously, how do I get a book deal for 12 months worth of exploration? Sheesh! Anyhow.) The author did grow up on a sheep farm, so she came into this experience fairly familiar with all things wooly, although she admits that her knitting skills were relatively beginner when she started. She did not, for example, have to learn to spin, even if she was woefully out of practice. For all my pre-1600 folks, fair warning that this book happily settles primarily in the hay day of knitting life in the UK, mostly the 18th and 19th centuries, but she does not forget early knitting, and she even touches on naalbinding and has a go at it!
I found it to be a lovely conversational read, with plenty of good solid research to go with it, the text is chock full of end notes and rarely was there a spot that I eyebrow raised and went ‘Cite THAT source, if you would’. You know those moments, when someone is writing on something you’ve spent a fair bit of time researching and they pull out the ‘as everyone knows’, and there’s no endnote to be found and you sigh at the spread of more myth and less fact. Basically none of that here. A couple spots that I went ‘hunh.. that feels a stretch’, and better, more than a few spots when I flipped to the endnotes and copied down her source to go read it myself.
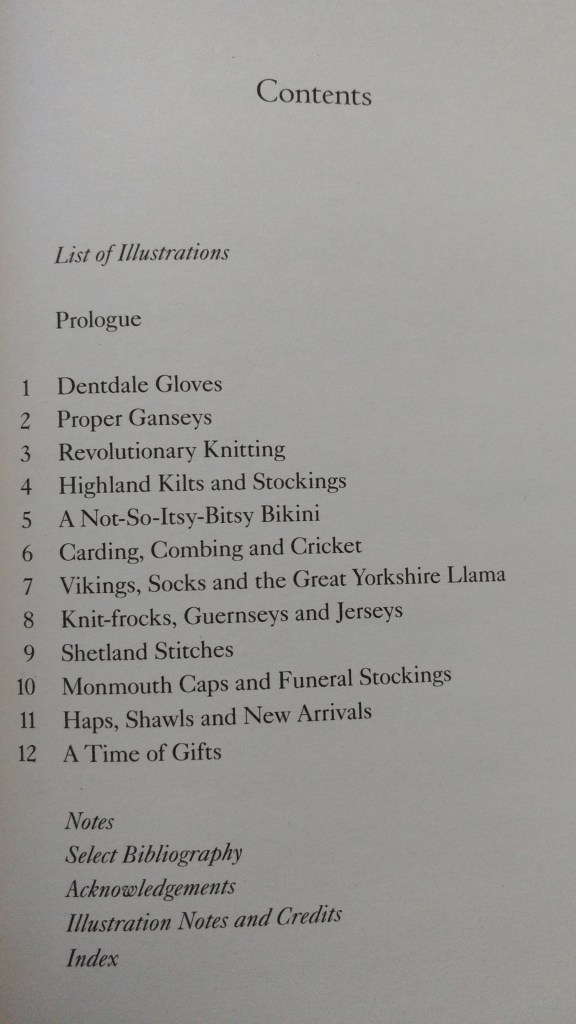
Not the most helpful table of contents.
The chapters are arranged by project and month, which makes it moderately a bear to use as a reference book, but at least it has an index, so there’s a hope of being able to find something again. I’m not sure I’m in a rush to go add it to my personal library, but I’m grateful that I can snag it from my local library. No regrets about the time I spent reading it.
The premise was to use 7 identical skeins of wool, and one pot of mordant water. That water held 7% wof (weight of dry fibre) of but a single skein. So the first skein of wool into the mordant bath got a full dose of alum. Then, without topping up any alum in that pot, the next six were mordanted (and labelled!) in succession. So, in theory, we would have no alum left.. somewhere in that chain. All 7 then went into a dyepot, all at the same time, such that they would get the same dye exposure and show up where the alum stopped. So the theory went. It was left up to the dyer on what dye they wanted to use, but alum and wool were consistent for all of us.
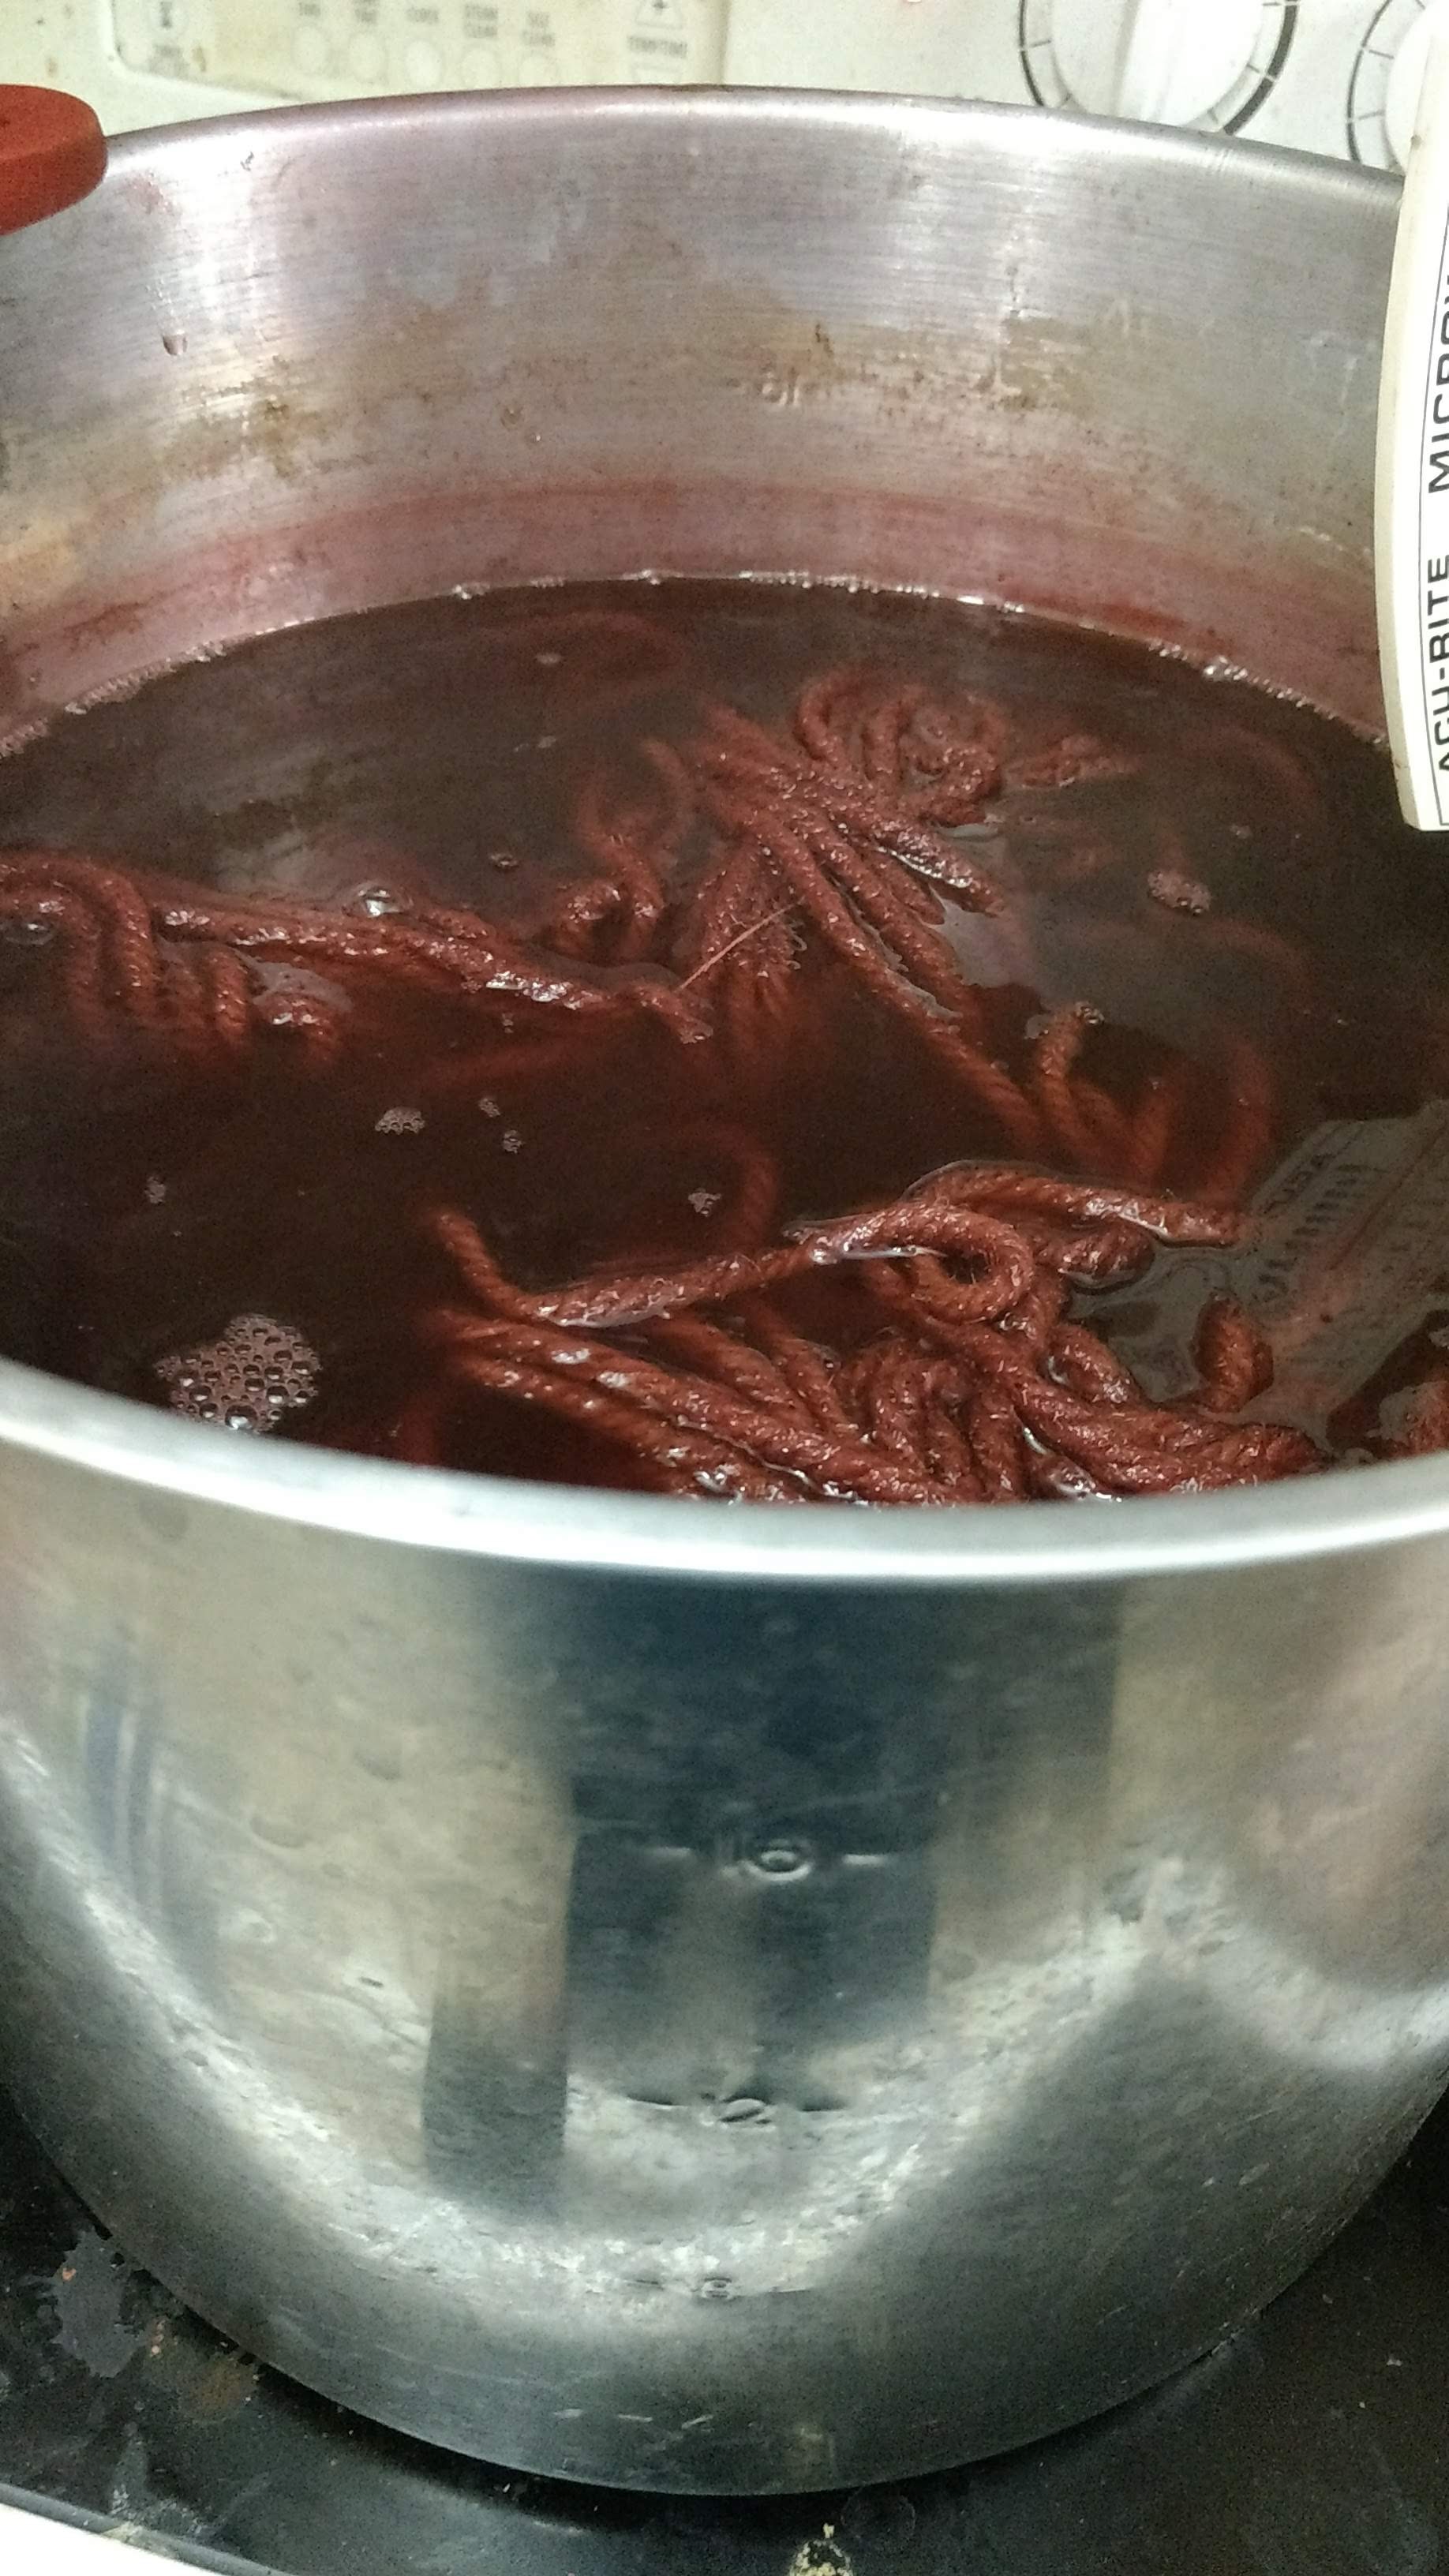
This is not spaghetti.
I used madder (because of course I did), and had dug up some bulky weight wool yarn out of the depths of the stash, each 55g. (Except for the 2 that I mismeasured and ended up 65g. whoops.) So because my skeins were (mostly) 55g, a mere 3.85g of alum went into that giant pot of water. I kept each skein at a simmer for about an hour, and then hauled it out hot and let it cool, unrinsed. Eventually there was a giant pile of damp wool.
Cleaned out pot and and fresh water and in went 100g of madder. I had a grand plan of containing it in a little cloth bag so I didn’t have to rinse out madder dust for days, but my bag wasn’t big enough once the madder started expanding on getting wet, so that was abandoned early and I resigned myself to a million rinses later. (Dear Future Me: When you do this again, let the skeins dry after you pull them out and then whap them on the deck railing a whole lot to get most of the madder out that way. You’ll be much happier, you’re welcome.) That sat on the stove at not quite a simmer, about 70 – 80C for a couple of hours.
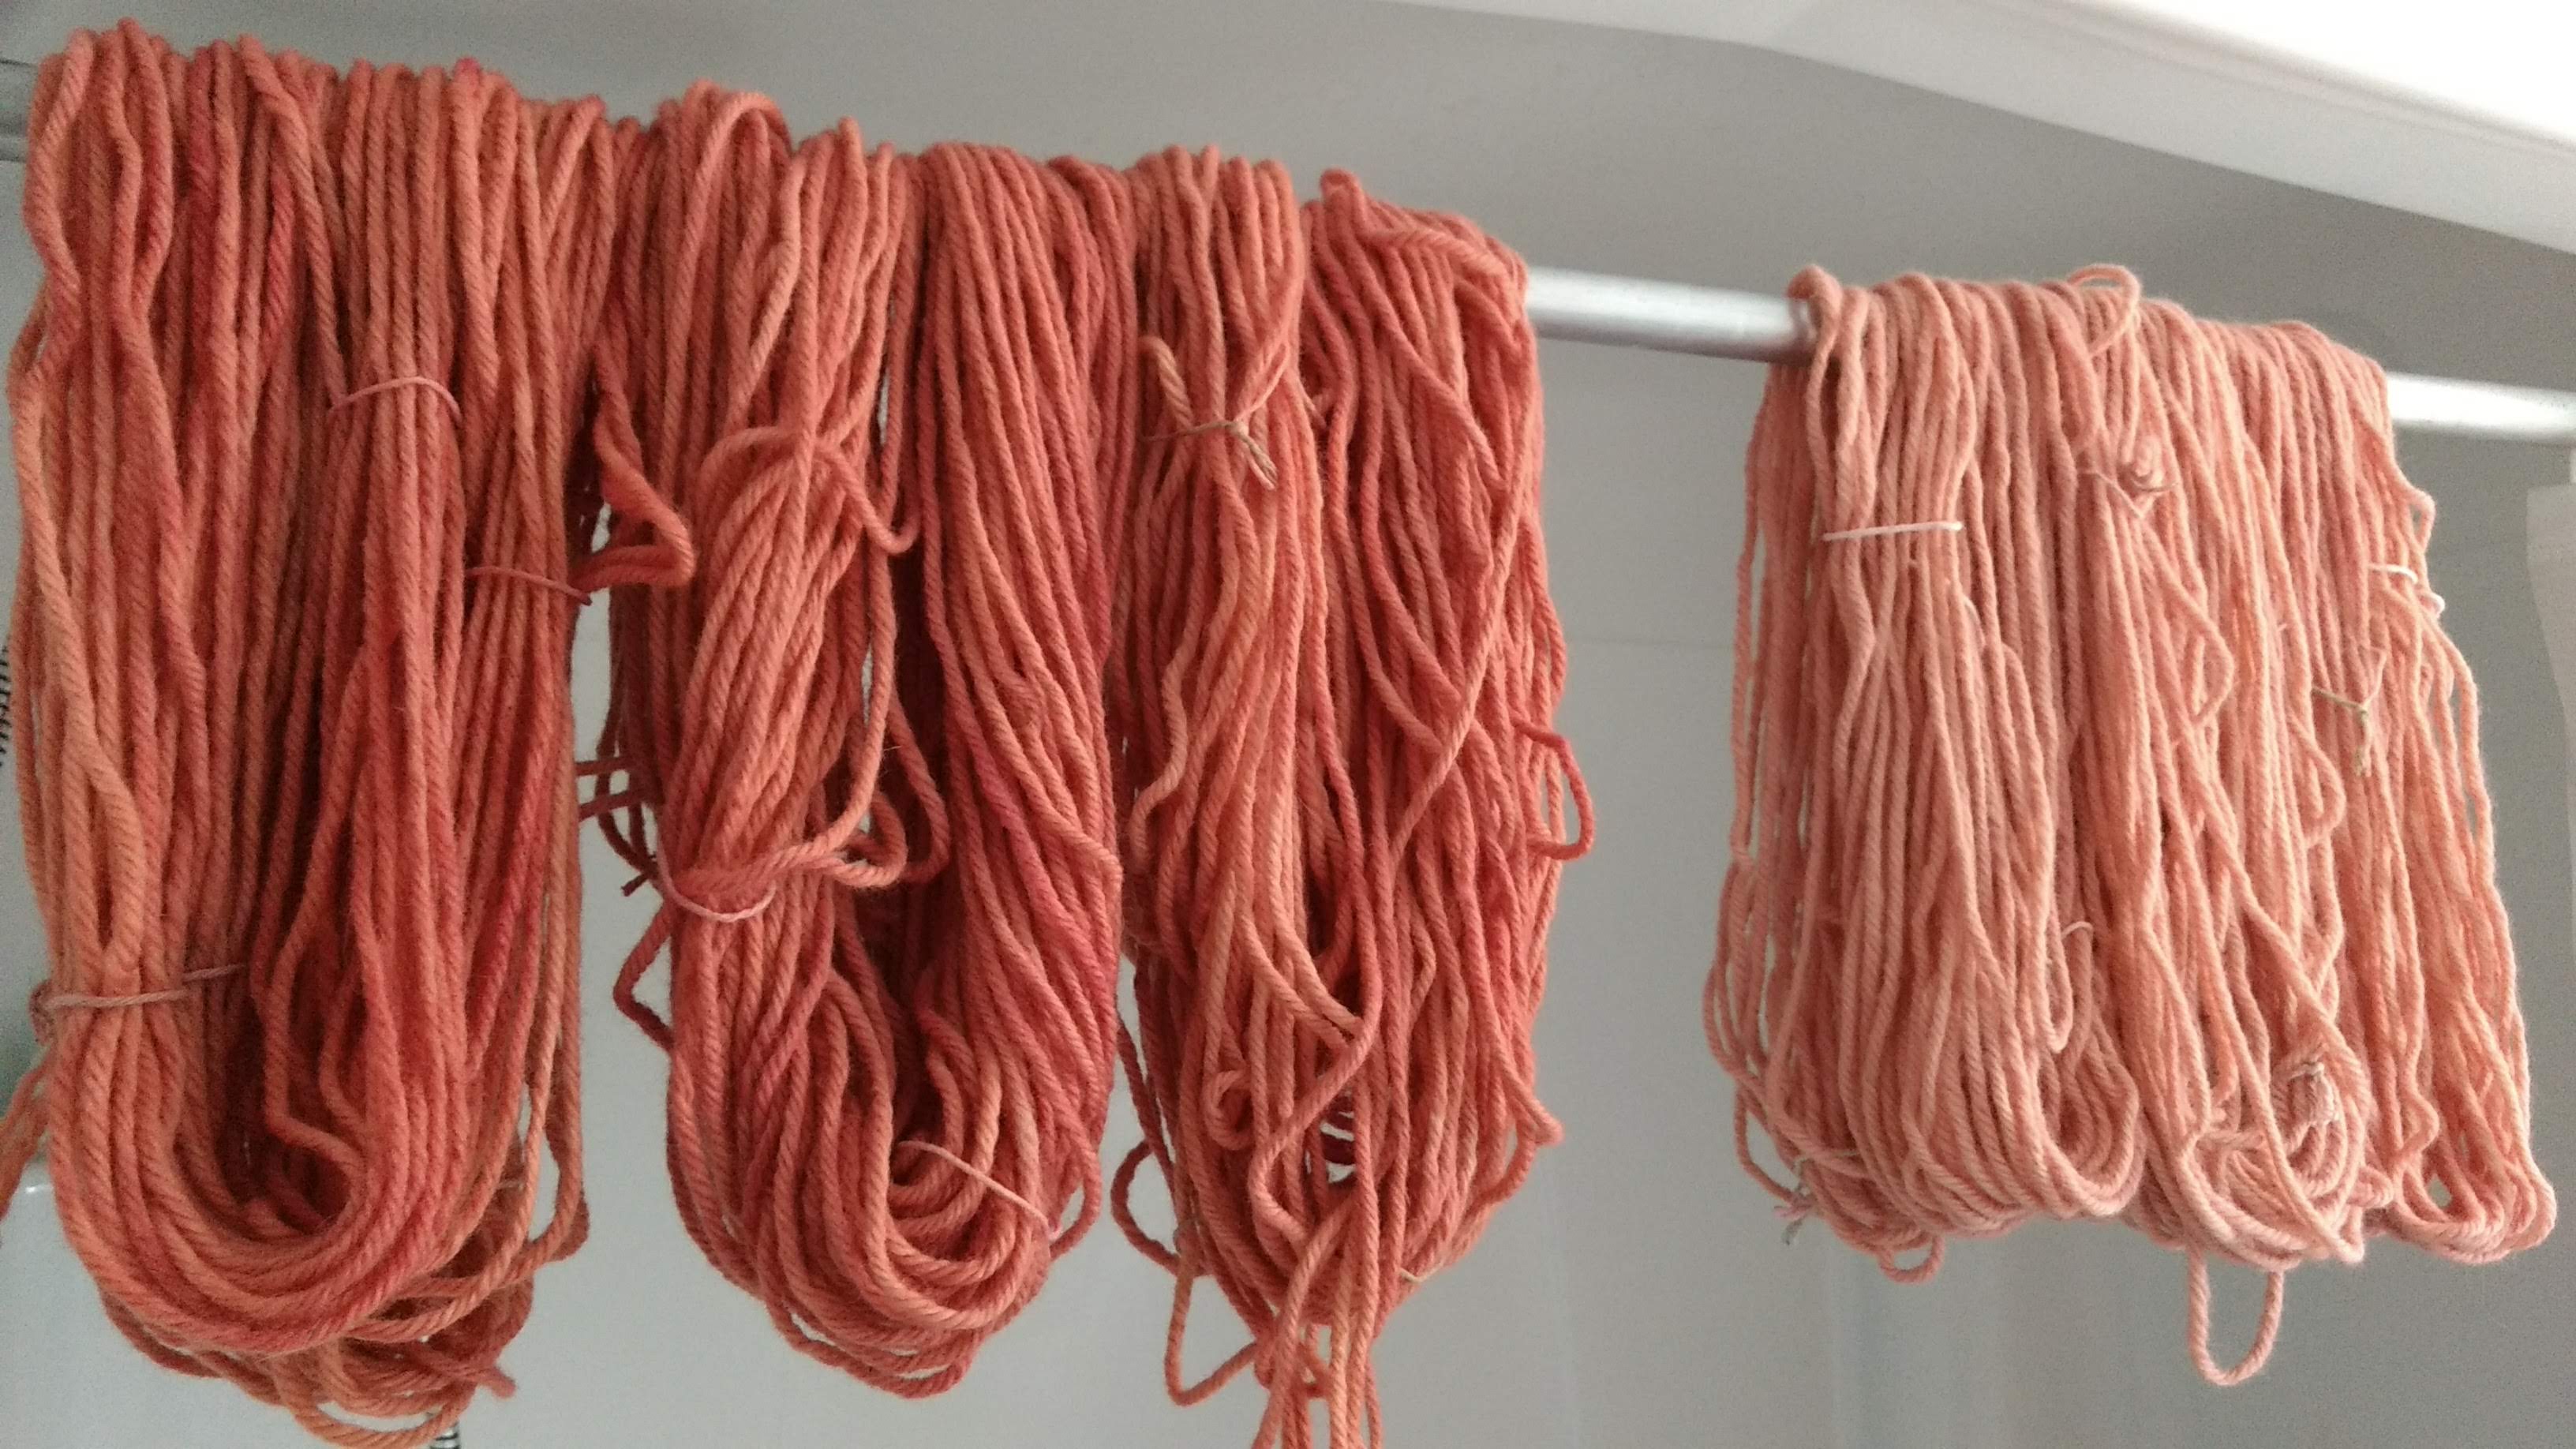
Top: Most Alum Bottom: Least Alum (plus bonus silk skein)
In goes all 7 skeins at once, and those got to sit around at not quite a simmer (80 – 90C) for another couple of hours before the heat got turned off and everyone went to bed. The skeins in the dyepot, and me.. well.. in bed. Next morning, rinse (and rinse and rinse and rinse and rinse) and plot what else is going in that pot of still dark red dye liquour. The exciting thing here is that in spite of there being successively less and less alum on these skeins, my 7 skeins are functionally identical. Now, madder is a dye that will take without a mordant, but not usually quite this dark and strong, so clearly more experimenting is required. (Oh /darn/, I’ll have to do more dye work. Such a tragedy. 😉 )
Well! I have more of that stash wool, so I grabbed another 600g of it, got that mordanted up (10% ish) and in it went to the same dye bath as the last batch. The madder bath was on a roll! The first 300g were still pretty solid colours, but by the last 300g I was getting pretty pale pinks and I was not in the mood to slowly simmer it down enough to bother storing it, so I called it there. Currently the big bulky wool is telling me it would like to be a stripy big thick sweater, but we’ll see how long that lasts. I’m not very good at using up the bulky yarn in my life, although I better start using up more of my dyed yarn, or I’ll be overrun!
When I wrote about my experiments using padauk wood shavings and isopropyl alcohol (rubbing alcohol) vs ethanol (vodka), there was a great conversation (mostly on FB alas) about it all. Those very same people who prompted me to do the first set of experiments, of course, had more questions. As did I! The main question that came out comes from how much distilled alcohol differed from fermented. So we (I) decided to do more playing.
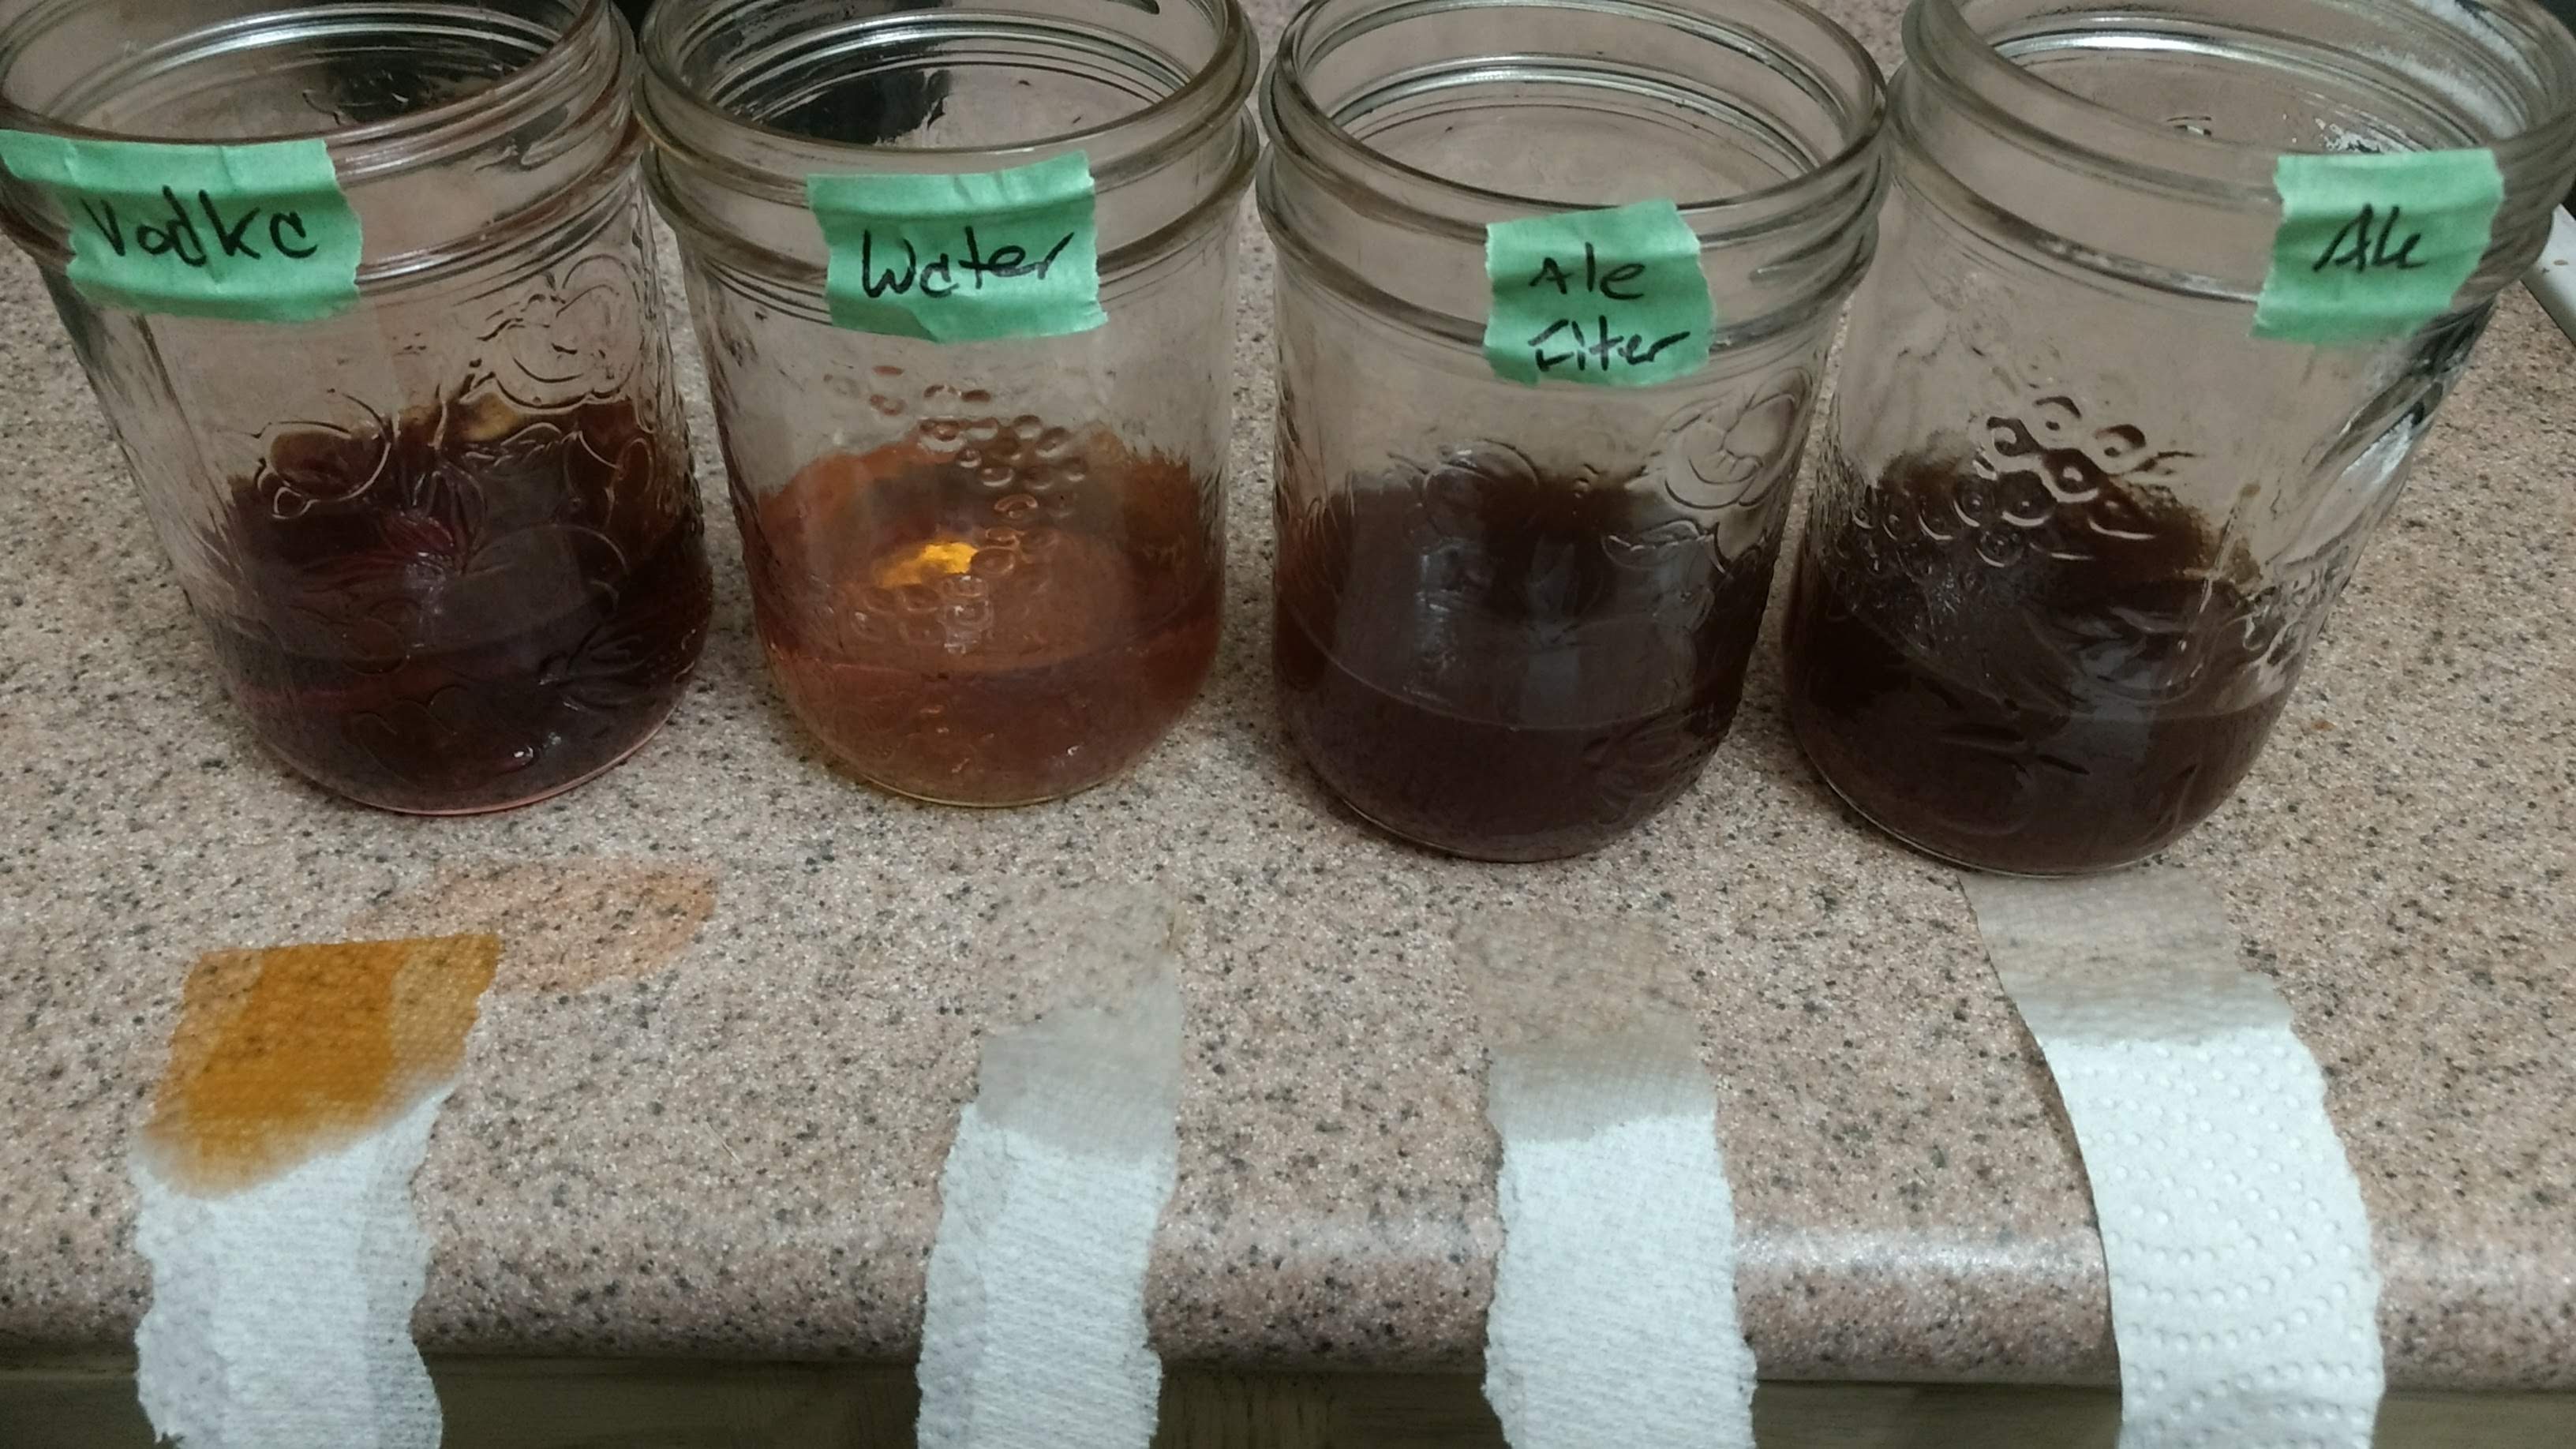
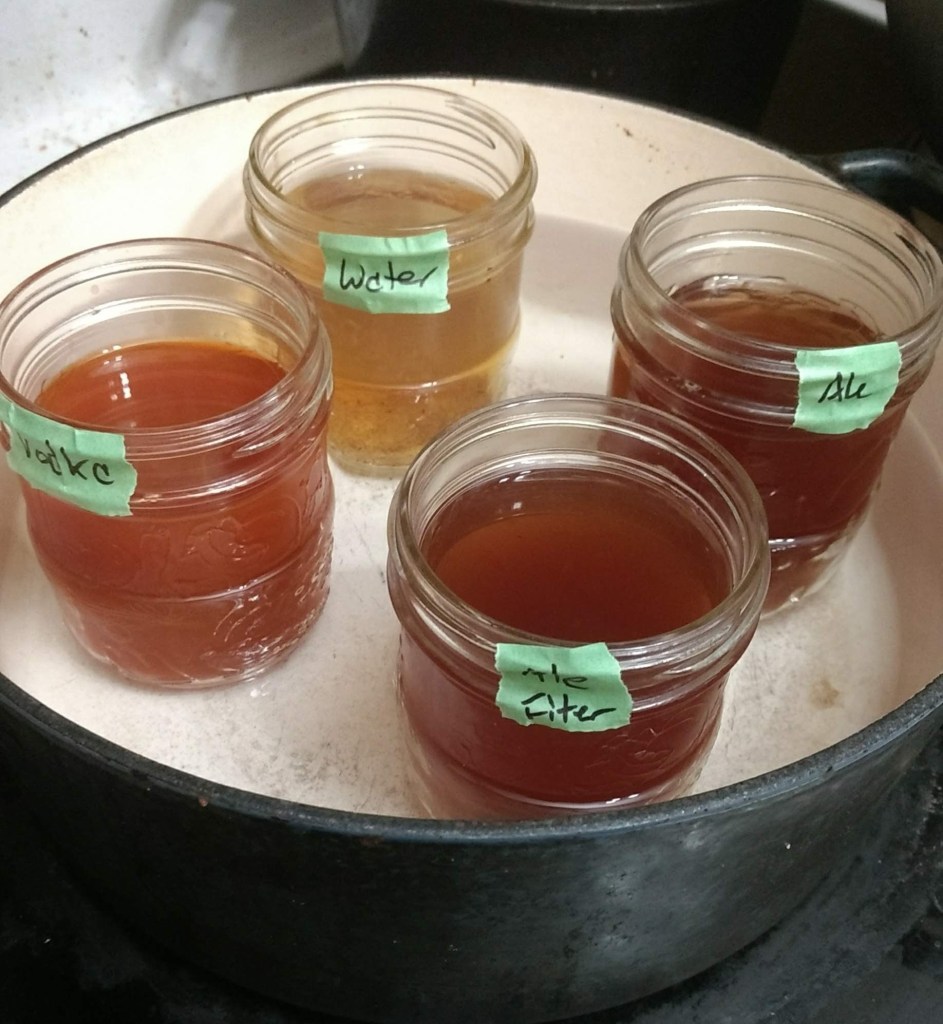
The four jars are 5 g of padauk soaking in water, vodka, the ale I brewed and then.. just to be careful.. the ale that I brewed having been filtered through some butter muslin (good quality cheese cloth) that I stole from my cheesemaking spouse. It changed not a whit, nor was there any residue on the cloth, so it felt like an extraneous step. It sat for a few weeks at the back of the kitchen counter, largely being ignored to be honest, but not protected from light or anything, and kept at basic room temperature.
Eventually, I got off my butt and skeined off more silk, and got it mordanted with 10% alum. (Eventually I’ll write up more detail on that process, but honestly, it is barely exciting enough to get mentioned, let alone a whole post about it. Still, I’ll add it to the list.)
I usually dip a bit of paper towel into these dye baths just to see how much colour sticks there, it’s not a perfect indicator on how the dye bath is going to go, but you get the disappointment early at least. Rarely do you get no colour on a dip test and plenty of colour on your skein. Sometimes you can get pretty good colour on the dip and not great on the skein, so there’s opportunity for disappointment certainly, but it’s a good first guess.
I decided that I would dye all four at once in a water bath, as I just was not invested in working up four dye pots. Basically that means that each dye was in a jar, and that jar was in a large pot, filled about halfway up the jars and the whole thing heated on the stove. I do most of my dye work hot, I don’t have the patience (usually) to leave something for a couple of months at room temperature to let the reaction happen slowly. I generally want it now now now!
In this case, the dip test was a pretty good predictor. The water soak got my silk from white to vaguely beige. I had such high hopes for the ale soaked padauk, but the dip test tempered my expectations pretty solidly. It’s coloured at least, but not by much. Well sigh. The vodka was as an awesome a colour as ever, better this time for the longer soak!
Vodka, water, ale, filtered ale
Distilled alcohol is still the king of extraction, the fermented side of things is letting me down here. At this point, I am out of padauk to play more with it as my dyestuff, but I’m not yet out of alcohol extractions to experiment with! Suggestions welcome on the next dyestuff to include. (Must not extract well in water, must extract well in alcohol.) I am also on the hunt for any sort of historical context for alcohol extraction of dye. I’ve only really started poking there, but if you have a lead on it (pre-1600 please!), let me know!