There is so much going on online that I’m going to try and sum up for the coming week and share some love to the awesome. Some SCA, a lot that is not. All times in Eastern, google can help you translate. If you know of other events you want to pimp.. pop ’em in the comments section!
For those who know me RL, you’ll know the amusement in deciding to brew with heather flowers. (Heather brews a heather ale? How could I not!?) First, some background. I am off playing with dyes, and the next step in those experiments are to try some dye extractions with fermented alcohol, rather than distilled alcohol. Hey wait.. I’m a brewer, I have rapidly getting more stale grain in the brewing supplies! I can make this happen!
I decided that I wanted to make an unhopped ale, and hey look, there’s a baggie of dried heather buds in the brew supplies too, so let’s go with that. I only wanted to brew up a gallon batch, as I really only needed this for dye experimentation and honestly drinkability was a secondary hopeful feature.
I wanted my grain bill to end up being about 2 lbs. (I am very Canadian and liberally sprinkle measuring systems in my world, you’ve been warned) So I started with 1.3 lb from a bag labelled ‘base malt’. Who knows, I certainly don’t, but it was a nice light inoffensive choice, so base malt of questionable origin it is. Then I honestly just started polishing off last bits of bags of grain so a bit of honey malt (0.4 lb), and some Munich II (0.1 lb) and a good dash of flaked barley. (0.2 lbs) I had only about an once of dried heather buds, which was less than most recipes I found wanted, but that’s what I had, so that’s how much was going in.
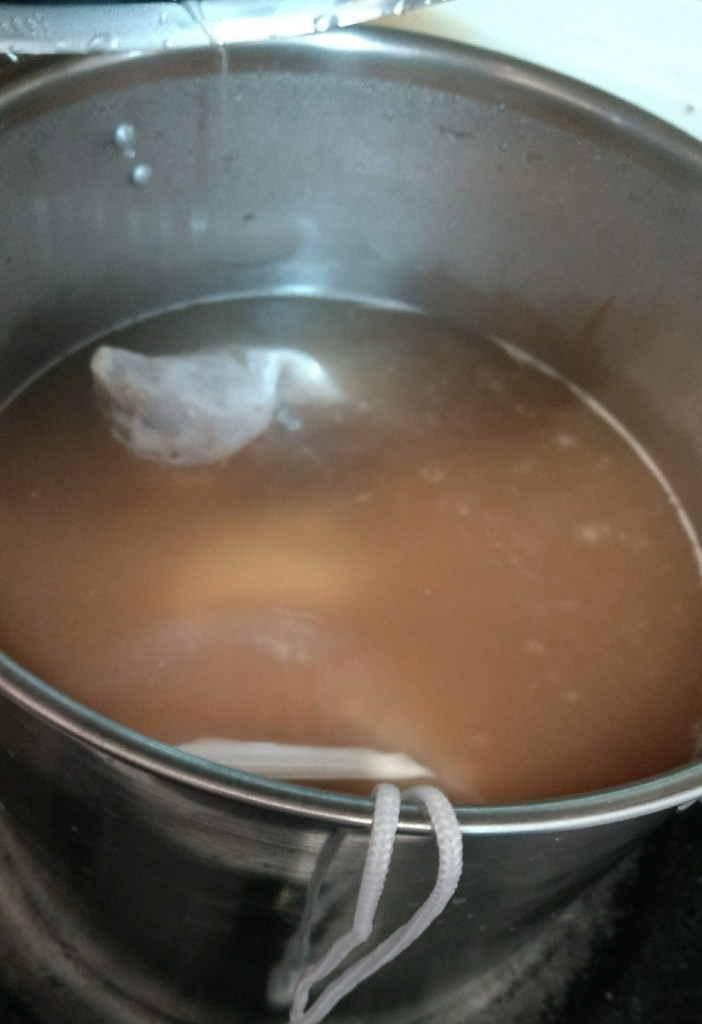
Experience has taught me that I need about 6 litres (I warned out about the mixed measures) going into things to end up with about a gallon after the boil, so everything got mashed for an hour at 155F (ish), and then got the boil going. (Do not use my rough shorthand as a good how to on basic brewing, follow a real recipe! I can recommend these ones over at Beer Craftr.) No hops in this boil, but instead I popped in about half the heather flowers at the start and the other half with 10 mins left in the boil. Most of the recipes I was vaguely cribbing off of suggested adding honey near the end and I utterly forgot. So no honey top up for the yeastie beasties, and an OG (Original gravity, essentially a measure of the sugar that’s available for the yeastie boys..) of 1.052.
Ale in progress
It hung out for about 10 days to ferment, bubbling away nicely at the start, trailing off at the end as expected and the FG came in at 1.020. The difference between OG and FG, plugged into an arcane formula (aka I use a web form), tells me that my final ale sits at 4.2% Lower than I’d hoped, but oh right.. I didn’t remember the honey. Oh well, close enough. I primed it with a bit of honey, such that, in theory, my bottles would be carbonated (spoiler alert.. they were not. Sad trombone.)
A couple weeks in, I cracked a bottle and … it was terrible. It was sharp and acidy and unpleasant. Thank goodness for swing tops, I closed that sucker back up and all three bottles are hanging out in storage now. Two in the cheese cave and one in the fridge. Less what I used for my dye experiments, of course. Perhaps forgetting about them for a year or two might make it drinkable. Stranger things have happened!
I probably should have started doing this a year ago, but hey.. better late than never, I suppose. There is so much going on online that I’m going to try and sum up for the coming week and share some love to the awesome. Some SCA, a lot that is not. All times in Eastern, google can help you translate. If you know of other events you want to pimp.. pop ’em in the comments section!
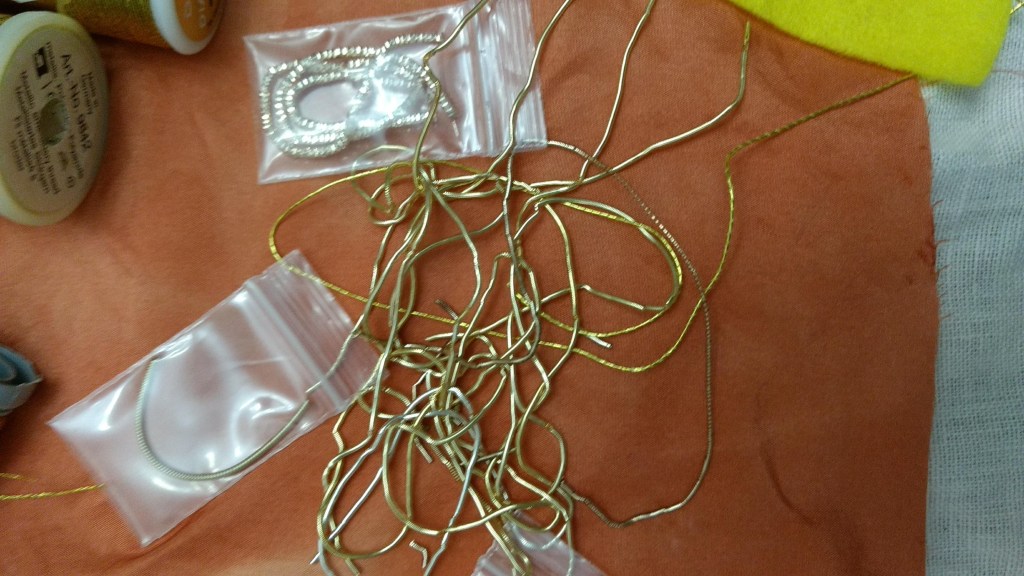
At the beginning of February I was excited to take a beginner goldwork class at an East Kingdom embroidery event. Not only did I have a handy stash of bits and bobs of goldwork supplies from various other classes I’d attempted to take and never quite managed to for a whole host of reasons, but it was another category in my sample collection! Win win all around.
Stash dug out to see what options I had
Demonstration zoom classes are a challenge, there’s no two ways to put it. You are trying to have a good view of what the teacher is doing, and they are trying to have a good view of what you are doing, with only sketchy web cams to connect you (and often sketchier internet). The most effective demo classes I’ve attended have had a dedicated camera (often a phone camera on a tripod) aimed at the workspace and quite narrowly focused in, and then a completely separate camera aimed at the teacher (often their normal web cam, be that in their laptop, or an external one). Each camera is signed into the call separately and doesn’t move much during the class, so that you arent’ fussing with getting things to focus or making your students motion sick as you wriggle a camera around. If you can only have one, the close up camera is the important one, and a tripod (or other rigged up stable solution) means you do not have to rely on someone to hold it steady for upwards of an hour, which is a helluva long time to hold something steady. Showing the teacher where you’re having trouble is still a challenge and requires a lot of description, guesswork and holding things up to questionable web cams, but by and large the pack of us seem to manage. Mostly.
Because I’m me, I decided to use one of the silk fabric squares I experimented with dyeing with padauk. It isn’t the most even dye job, but it’s alright enough for a sample. Literally it’s a chunk of silk scrap left over from the banners that my husband makes, so it’s even waste fabric! Win! I got that basted down onto a square of linen, because the silk has no weight to it at all, and the metal threads would just win in that fight. You do not want the threads to win over the fabric, the fabric should be your stable backdrop. So the silk got some linen backup, and then popped into a hoop.
Silk in the dyepot
I picked what I hoped was about the centre of my square and started tacking down the felt to pad up the acorn top. Smallest piece first, then mid size and then the largest so that it’s smooth on top. The steps of felt would catch the metal laying on top, so you want the largest padding on top. At this point remember that a sensible person would have traced their pattern down before they put felt down, but I managed. (With a pencil, because the micron pen incident is still fresh.) Couch down gold thread onto that outline and realize that my ‘acquired goodness knows when or where’ gold passing thread does NOT want to make a nice point. Too much plastic, not enough metal I dare say. Get those suckers tucked into the back of the piece and then face the acorn top.
Progress is being made!
The little pieces of gold are actually tiny and delicate tubes, that need to be clipped to exactly the length to cover the felt and then you run your needle and thread through them like a bead basically to sew them down. I had a helluva time with that, my current glasses are not amazing and managing to see exactly where I was cutting was an adventure. A lot of glasses on, glasses off, peer, squint, cut, swear because it was too short, set aside to use later (always start with the long middle ones, when you miscut, you can use them later!) and then realization that I was running out of materials because I had quite a bit of damaged perl. If it gets stretched out of its spiral, it does not come back, and a fair bit of mine was looking pretty beat up. So it’s not quite as shiny as many others, but it is all mine, and all from stash! I’m pleased. I can see how to improve, but I’m still pleased.
I’ve actually been accomplishing and finishing projects and experiments and not writing about them, so there’s going to be some catching up. I know that it’s no longer January, we’ll just ignore the fact that I’m only talking about it (and indeed only finished it) in February. Close enough.
For those who haven’t been following along, this is part of my plan to go explore all of the embroidery categories from the East Kingdom’s embroidery guild. I got six (ish) categories done last year, and I hope to finish the other six this year (with at least one re-do from those first six.) Ostensibly I was going through it in alphabetical order, and while I did do a little jumping around, Free Embroidery was next on the list and so here we are.
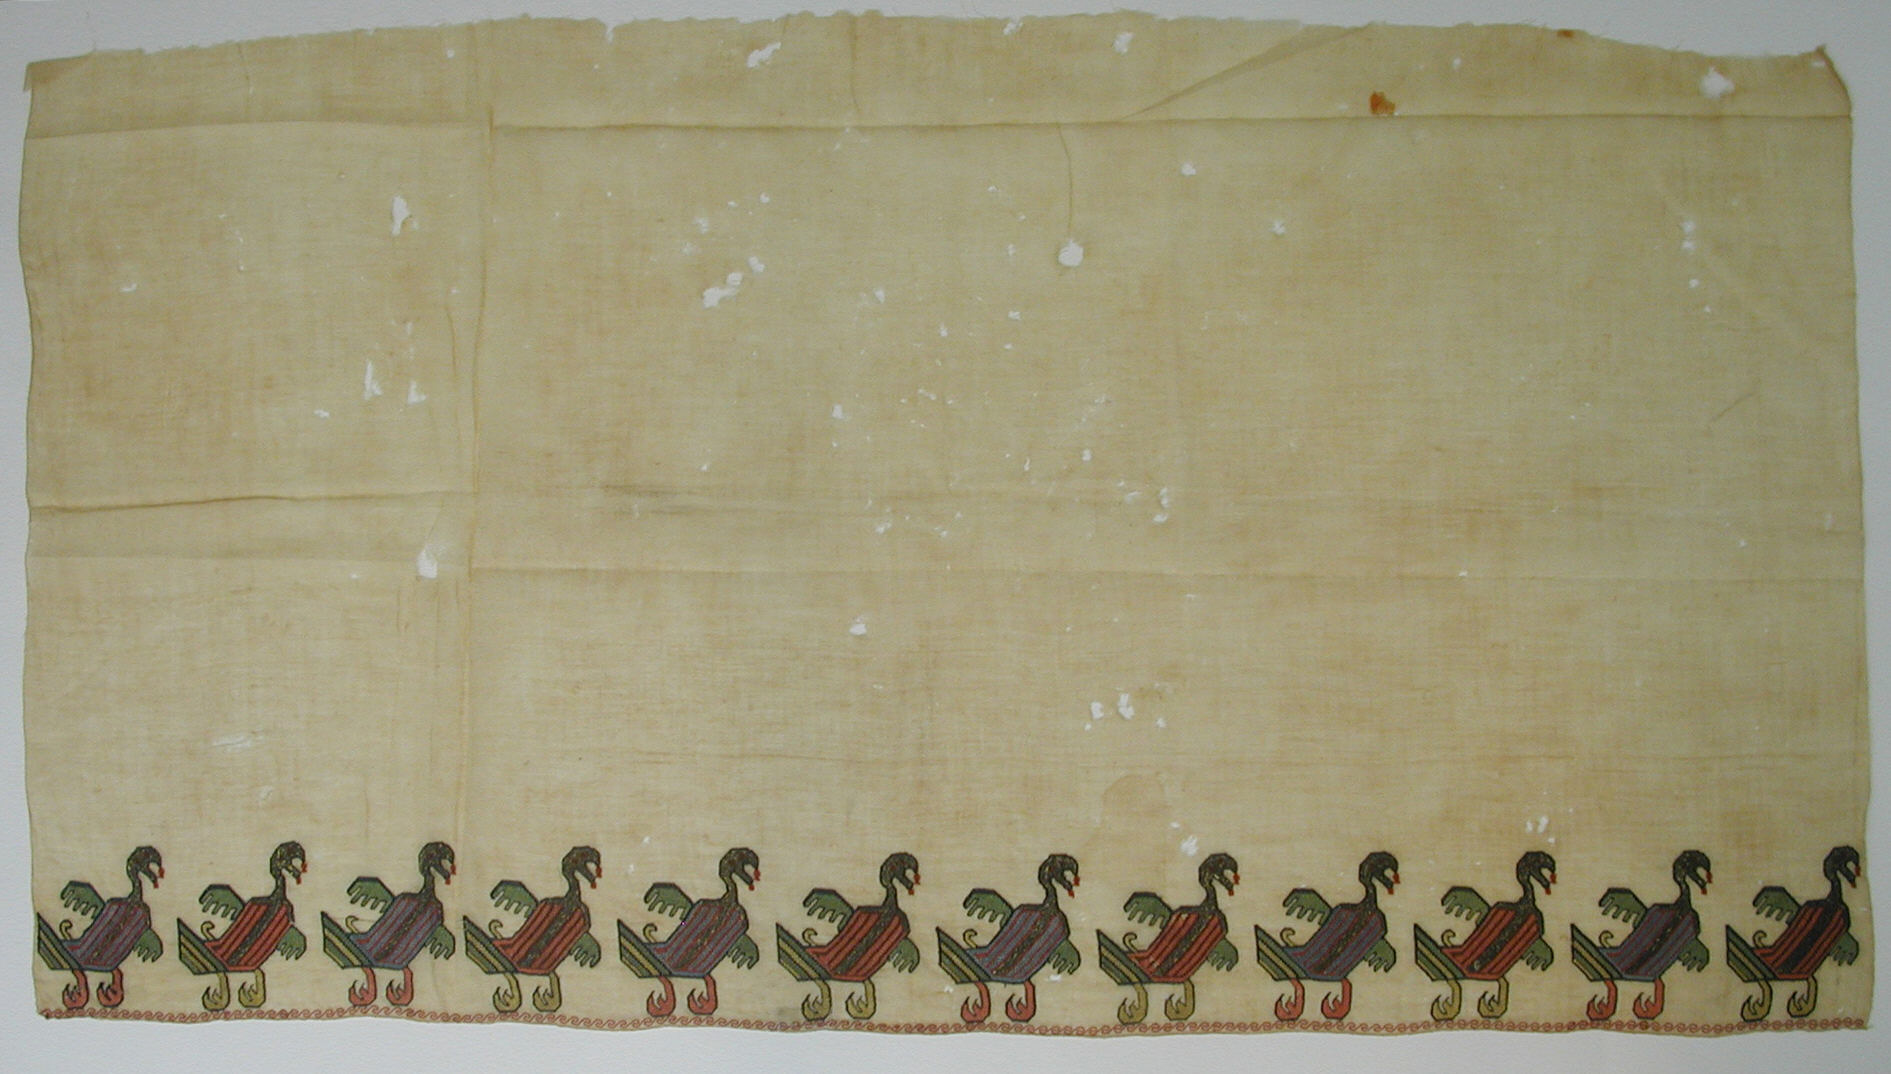
In hunting up inspiration pictures, I was casually surfing the MET’s archives and not really being inspired. Sure there’s lots of great things there, and I started (and quit) a polychrome motif that just wasn’t doing it for me last year. And then .. I found it. The perfect bit of glorious psychotic derpery from 15th century Egypt.
Psychotic medieval fever dream fowl of some sort with dripping beaks? (jaws? Fangs?) I’m in! I poked both the Ealdormere Embroidery FB group and the EK Athena’s Thimble embroidery group for their thoughts on what stitches were used in the original, and it looks like some sort of interlaced stitch in my opinion. That being said, I remembered that this was supposed to be a free embroidery sample, and so I used a whole selection of stitches.
Many of my hand dyed embroidery threads
All of the thread was hand dyed by me, and it’s a mix of size 60/2 weaving silk and size 30/2 weaving silk. The 60/2 was just so very thin, it looked fairly anemic, but the 30/2 is a lofty squishy thread, which looked too plush for quite what I was aiming at. I suspect that my interlaced back stitch is a pretty good approximation of the body stitch in the original, but the original was a firmer, probably 3 ply thread at a guess that didn’t have quite so much squish as mine. Ultimately I used back stitch, interlaced back stitch, chain stitch, stem stitch and eyelets.
Psycho duckie progress
After I finished up my psycho ducks, I was super looking forward to just quickly popping on that delicate little edging of the original. My first attempt.. well it looked like someone had done it with an etch a sketch. Okay, thinks I, no biggie, I’ll trace it from the original, no biggie. Well, dear reader, that’s when it all went horribly wrong. I use a micron pen to trace. I love it, it’s fine tipped and very very permanent. I wasn’t getting the curves quite right so I sketched it a couple more times. And then the realization hit. Very. Very. Permanent. Well now I had a big inky mess on my hands which was supposed to be a quick and easy little border.
Micron ink. Awesome and forever.
It sat for a few weeks until I got past (mostly) being really really mad at myself, and then I just chain stitched the snot outta that bottom edge. Take THAT stupid ink stains. Bah! And so, my psychotic ducks are done. Another sample into the bag. Next up? Metal threads!
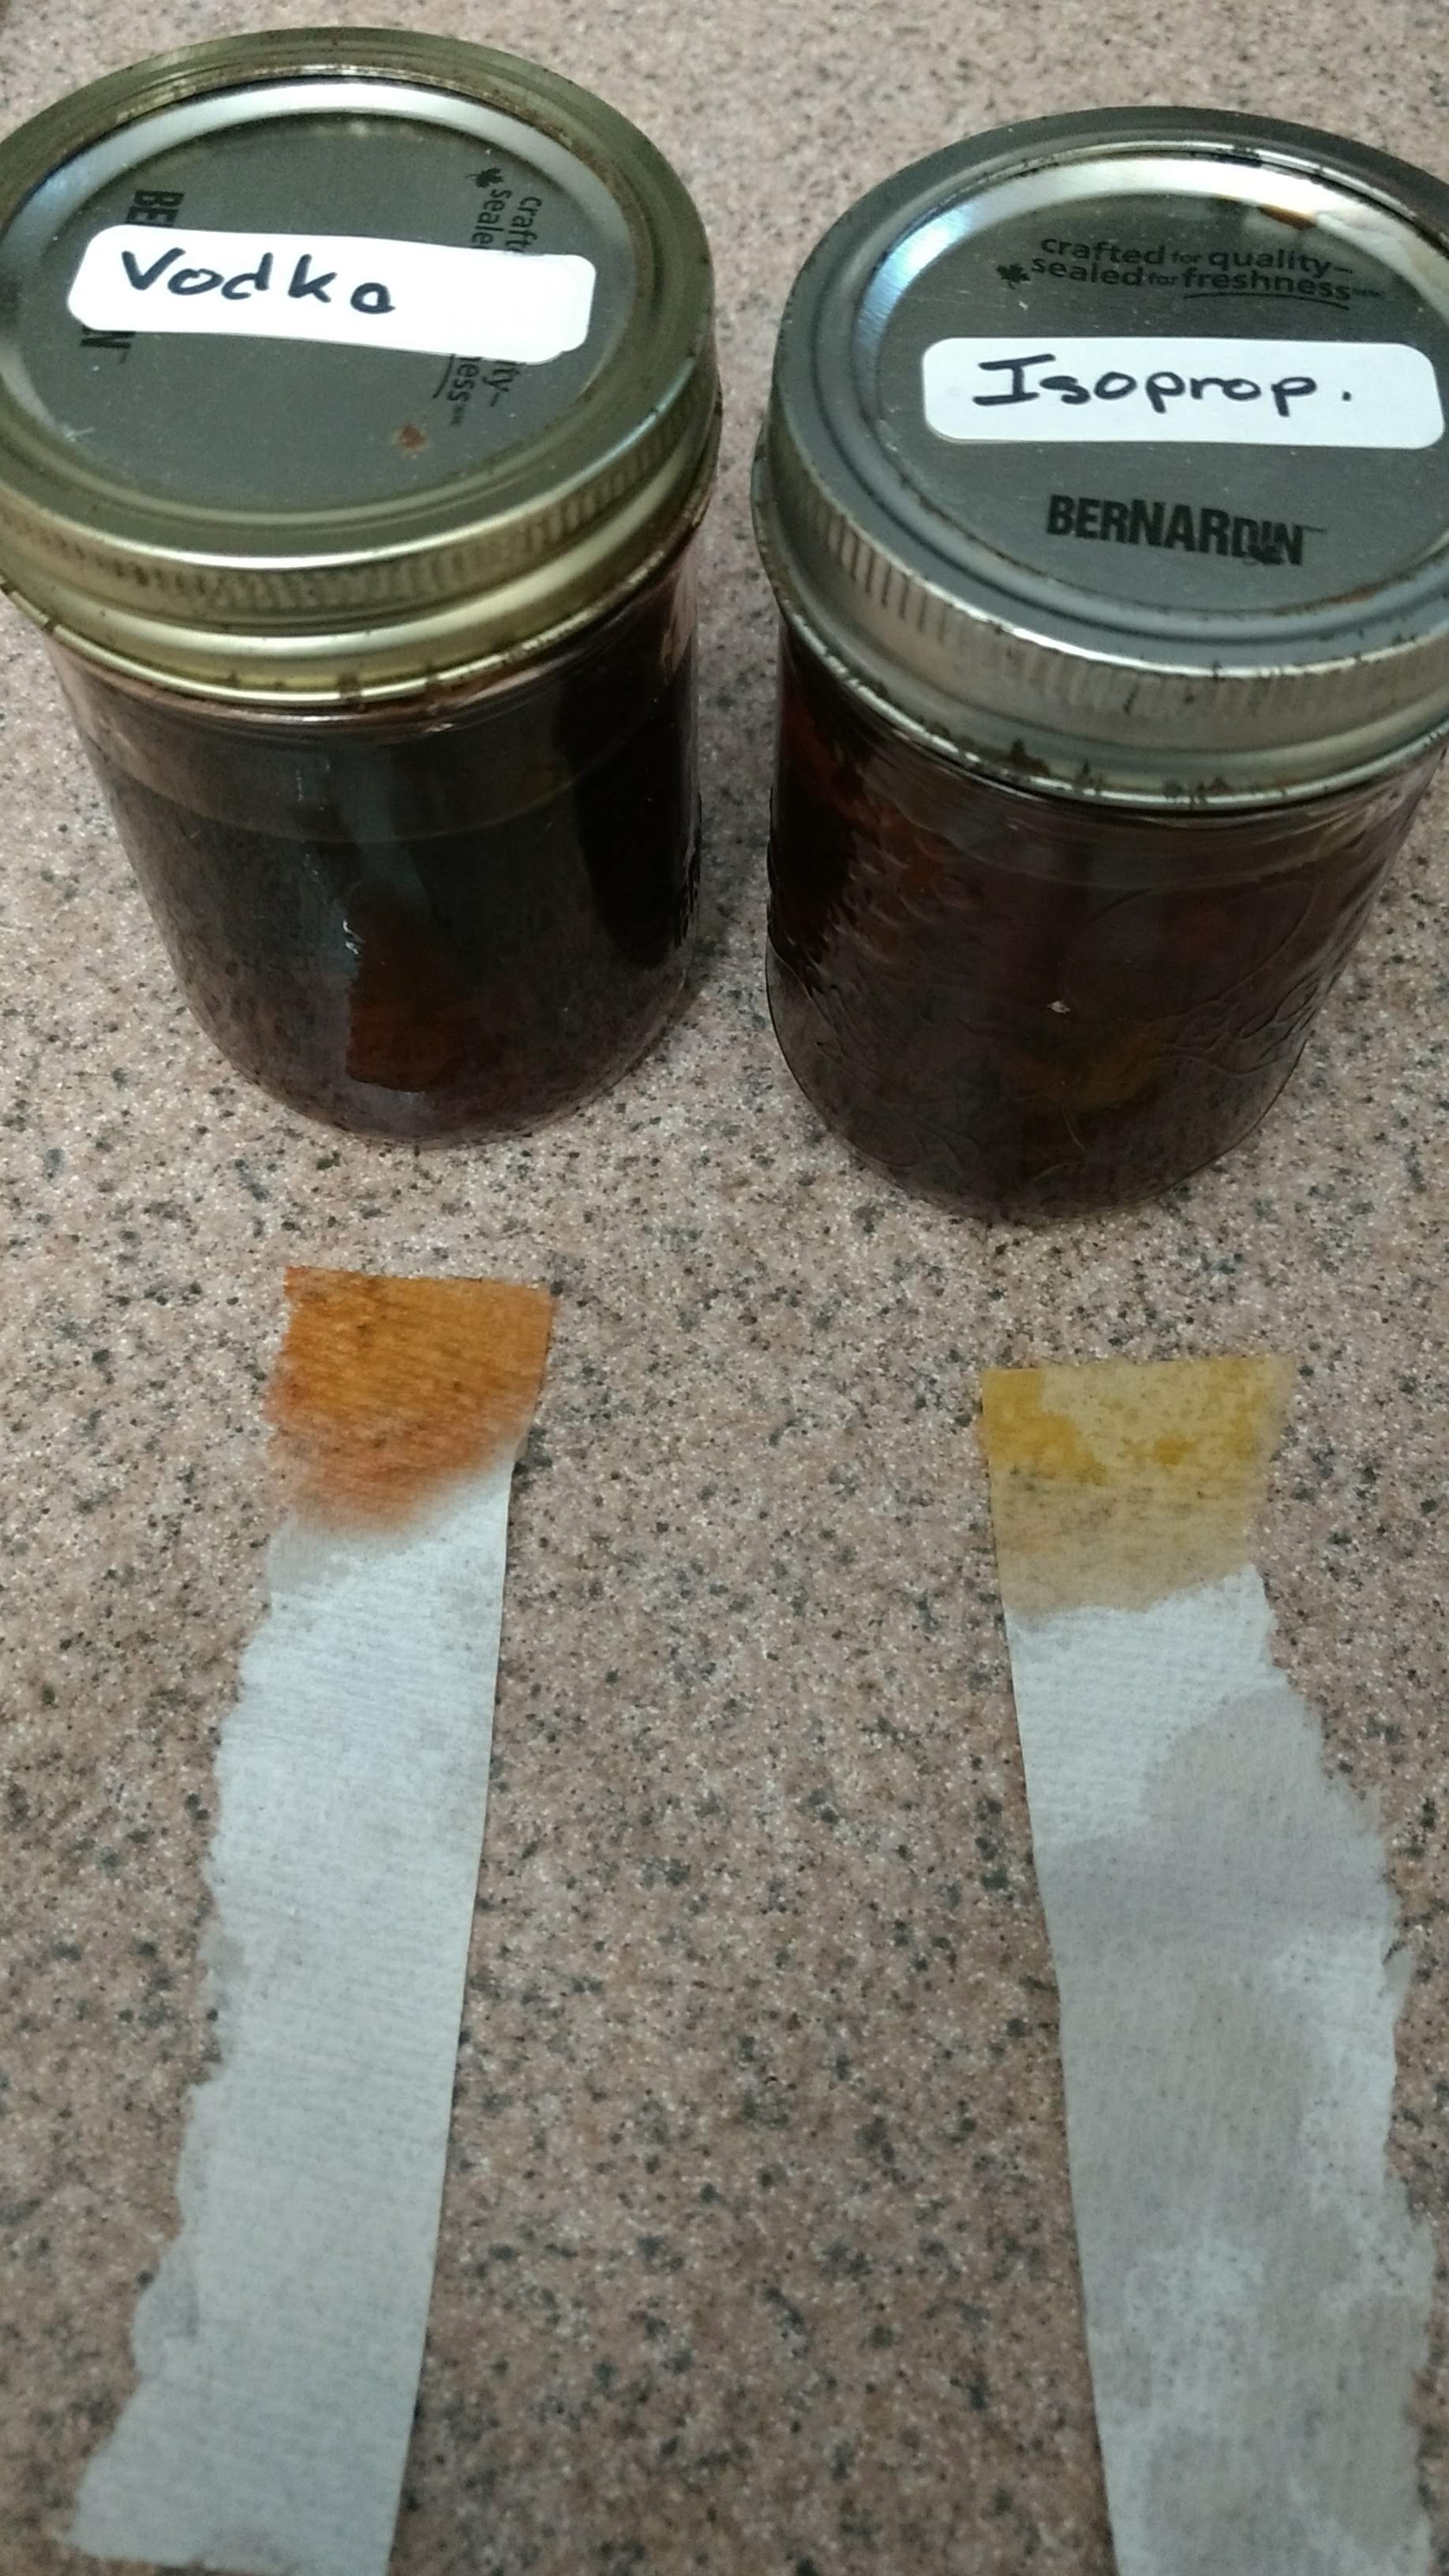
At the end of my last dye class in Avacal last month, there was a small group of us who kept chattering about this and that and the other, as one does after class. One of the things we got chatting about, was extracting dye from woods using alcohol. By and large, most of us just use isopropyl alcohol (rubbing alcohol) because it’s cheap and easy to get, but then there was a general musing on if ethanol (booze!) would give different results.
Well! I had a bottle of vodka I was willing to put to the cause, and some padauk wood shavings that I knew from experience required an alcohol soak to get dye out of.
I didn’t plan to do giant samples, so each jar only held 5 g of wood shavings, and then 135g of their respective alcohols. Vodka (45%) in one, and Isopropyl in the other (99%, yes that’s a higher concentration than normal rubbing alcohol, welcome to my house.) I left them both to sit for a couple of weeks, giving them a shake when I thought of it.
My silk was mordanted with alum at 15% wof (wof is weight of fibre.. so you take your dry fibre and weigh it, and then use 15% of that number.. alum is usually anywhere from 10- 25% wof). I had both silk cloth and skeins of silk thread in there, and everything got mordanted at once.
A paper towel dip gave a clue.
The isopropyl went first. I strained out the wood shavings, put the dye liquor into the crockpot, diluted with water and then in went a chunk of cloth, and a couple of skeins of silk. Holy pink, batman! They hung out there at a gentle warm for a couple of hours before being let cool in the dyebath and then out and rinsed. I then did exactly the same thing with the ethanol.
They are most decidedly different. There’s not any doubt at all that they extract dye differently, and dammit, I now can’t just use the cheap alcohol if I want to extract a dye I like better! A good experiment, a few more colours of silk into my stash. I wish I’d stirred more to get it more even on the cloth, but life does go on. I’m hoping to hide the worst of the splotches under embroidery.
So there we have it.. who knew that different chemicals would have different results. (spoilers.. everyone should have known, but now we have proof!)
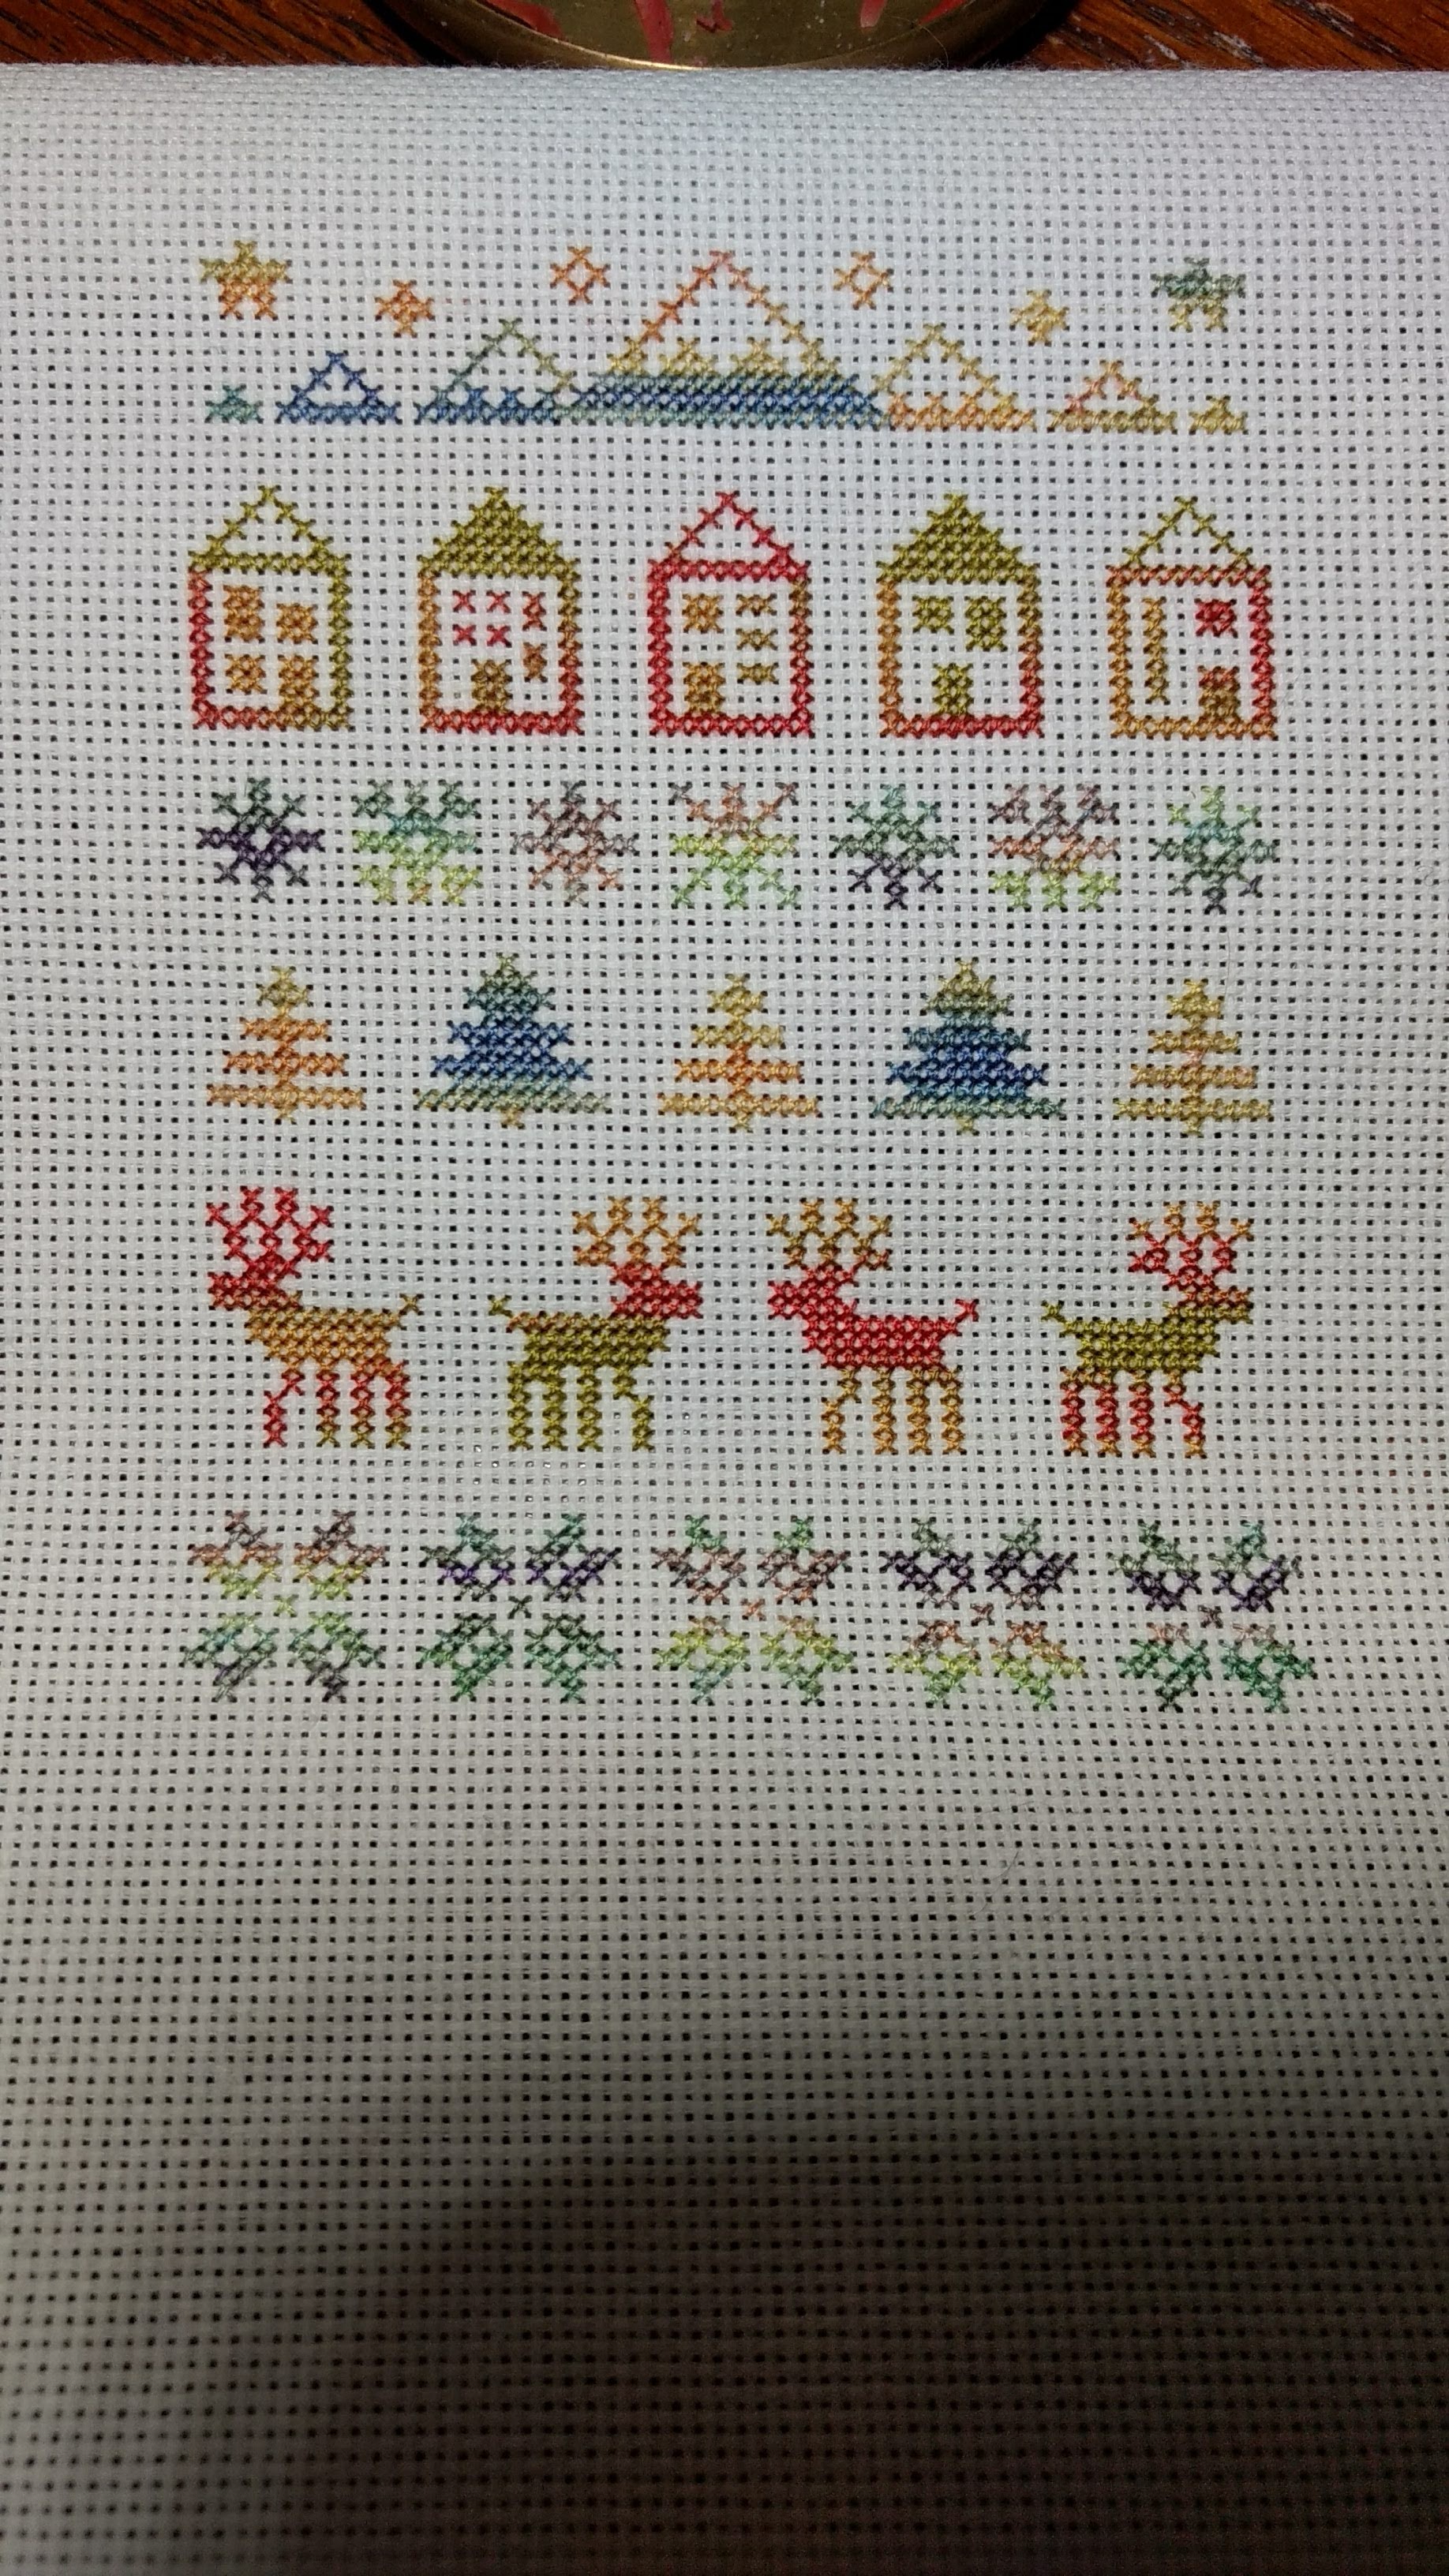
Hello 2021. I realize that we are two weeks into 2021 but there’s no time like the present to start considering what I’m aiming to do this year. As always, I have a collection of ongoing projects, that seems to be my norm every single year. Last year was a year very much devoted to accepting that plans don’t always go where you expect them to and that allowances need to be made for brains being stupid, oh yes and for the plague.
I really enjoyed my ongoing year long stitch along last year, although I’ve decided not to do the Peppermint Purple one again this year. I have a long term stitch along and a short term stitch along that I’ve picked up although we will see if I still like the long term one in a month or two. The short term stitch along is only six weeks and we’re halfway done already.
Almost half way!
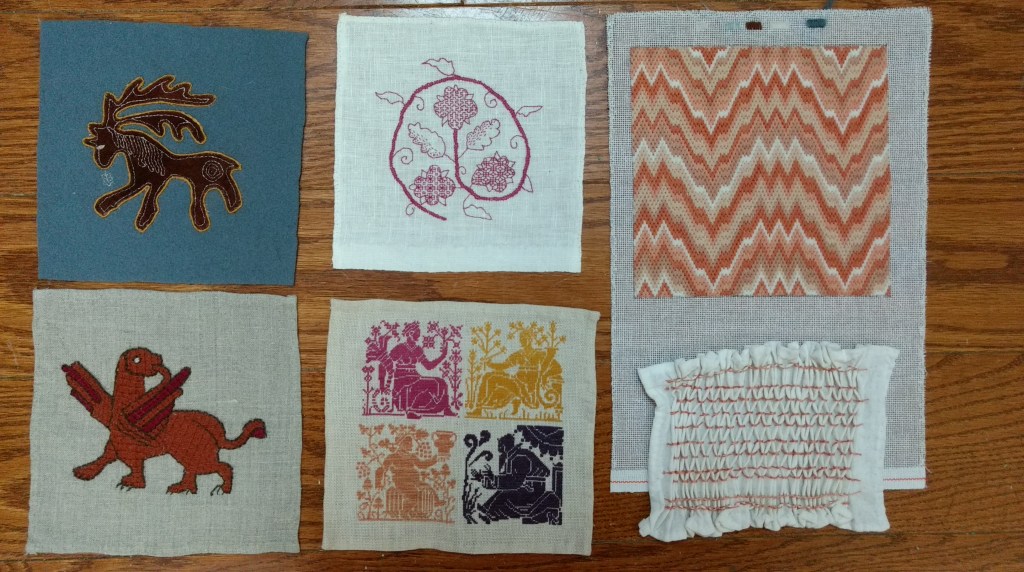
My big plan for 2021 is actually picking up a lot of the pieces that got left scattered all over the good intentions floor after 2020. I got halfway through my plan of doing 12 embroidery samples and so that means I have another half to go. The UFO pile is threatening to take over the craft room not just strictly unfinished projects but in unstarted projects that I would love to get to. The weight of the unfinished ones bring a lot of guilt in starting new ones so it’s probably time to accept that I need to finish or toss the old ones before too many more new things get started.
UFO basket of shame
The main thing to consider in 2021 is the reality of giving myself more grace and patience in my projects. That things won’t go to plan and if I schedule myself entirely too strictly then it’s only going to result in frustration and disappointment when there doesn’t need to be any. I get plenty of things done eventually but when they aren’t what I had planned on doing somehow they don’t feel as though they count and that’s frankly ridiculous. So we’ll see what this new year brings that’s still full of uncertainty and oddness even if the oddness is starting to feel normal. I have faith that there will be plenty to keep my hands busy, there always is. What do you hope to accomplish in 2021? Survival is a completely valid answer.
Like most of the world, there’s no love lost between myself and 2020. I have been exceptionally fortunate in that the hardest part of this year has been being isolated from family and friends, and not unending levels of tragedy. It did come with some serious creative slumps and plans? Ha! The universe laughs at planning these days.
I aspired to two main ongoing projects in 2020, as I mentioned last year in the blog, and it was a mixed success. The Peppermint Purple SAL actually got completed! On time! It needs a good bath and framing, but the stitching is done. It’s cute, I’m grateful not to be doing the 2021 version, I look forward to a change of pace. To me, all the riotous mix of colours and patterns makes me think of a patchwork quilt. I am glad I did it.
The other ongoing project of 2020 was the more ambitious 12 samples for the 12 Athena’s Thimble categories. That was going along great until the plague, and then it was stumbling a little and then I hit May. May is counted work. I love counted work! I decided to do a piece that was 4 months of work as my ‘sample’ because I am an idiot who probably was unconsciously trying to show off how much I love counted work. (Still do!). I finished May’s piece in December. It looks fantastic, I’m very pleased with it, but it was a looming pile of guilt for 6 months. I dabbled in a couple of other samples.. I tried Lacis and just could not get my restless and not focused brain around it, which was stunningly disappointing. I made a mess of my first smoking sample, which is normal and reasonable, but I did not react reasonably and I just stopped anything new for weeks. Which is silly, but brains ARE silly as often as not. Halfway.. almost half way really, I will want to do another smocking sample is not bad for the year. I’m pleased with my progress and very pleased with 5 of the 6 pieces. There’s a lot of my own dyework in it, and I’m chuffed. Look for more of those in 2021.
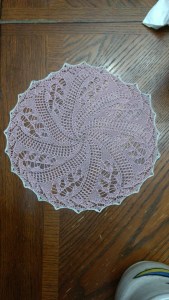
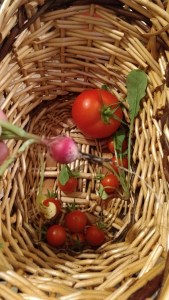
I knit doilies this pandemic. I knit a lot of doilies in 2020. More than were in that picture above. They are my happy place, my comfort craft, my handwork mac and cheese. I knit myself a cozy shawl to wrap myself up in when I first started working from home. I am on the home stretch of a sweater I’ve been ignoring for 6 years. (I really do hate knitting sweaters). I’ve baked too much, cooked too much, eaten too much, gamed too much and lost my knack of road trips. I had a vegetable garden for the first time. We met our neighbours. I canned my way through the great canning jar shortage. We are hobbits, apparently.
And now the year is coming to a close, and I won’t be sad to see it go, but there’s been a slow comfort to it all. For me, it’s been a year of quiet comforts at home, and I know how very very lucky that makes me. I look forward to seeing what 2021 brings, it’s got a giant hole to dig itself out of in the big world picture. Be well, be safe and take care.
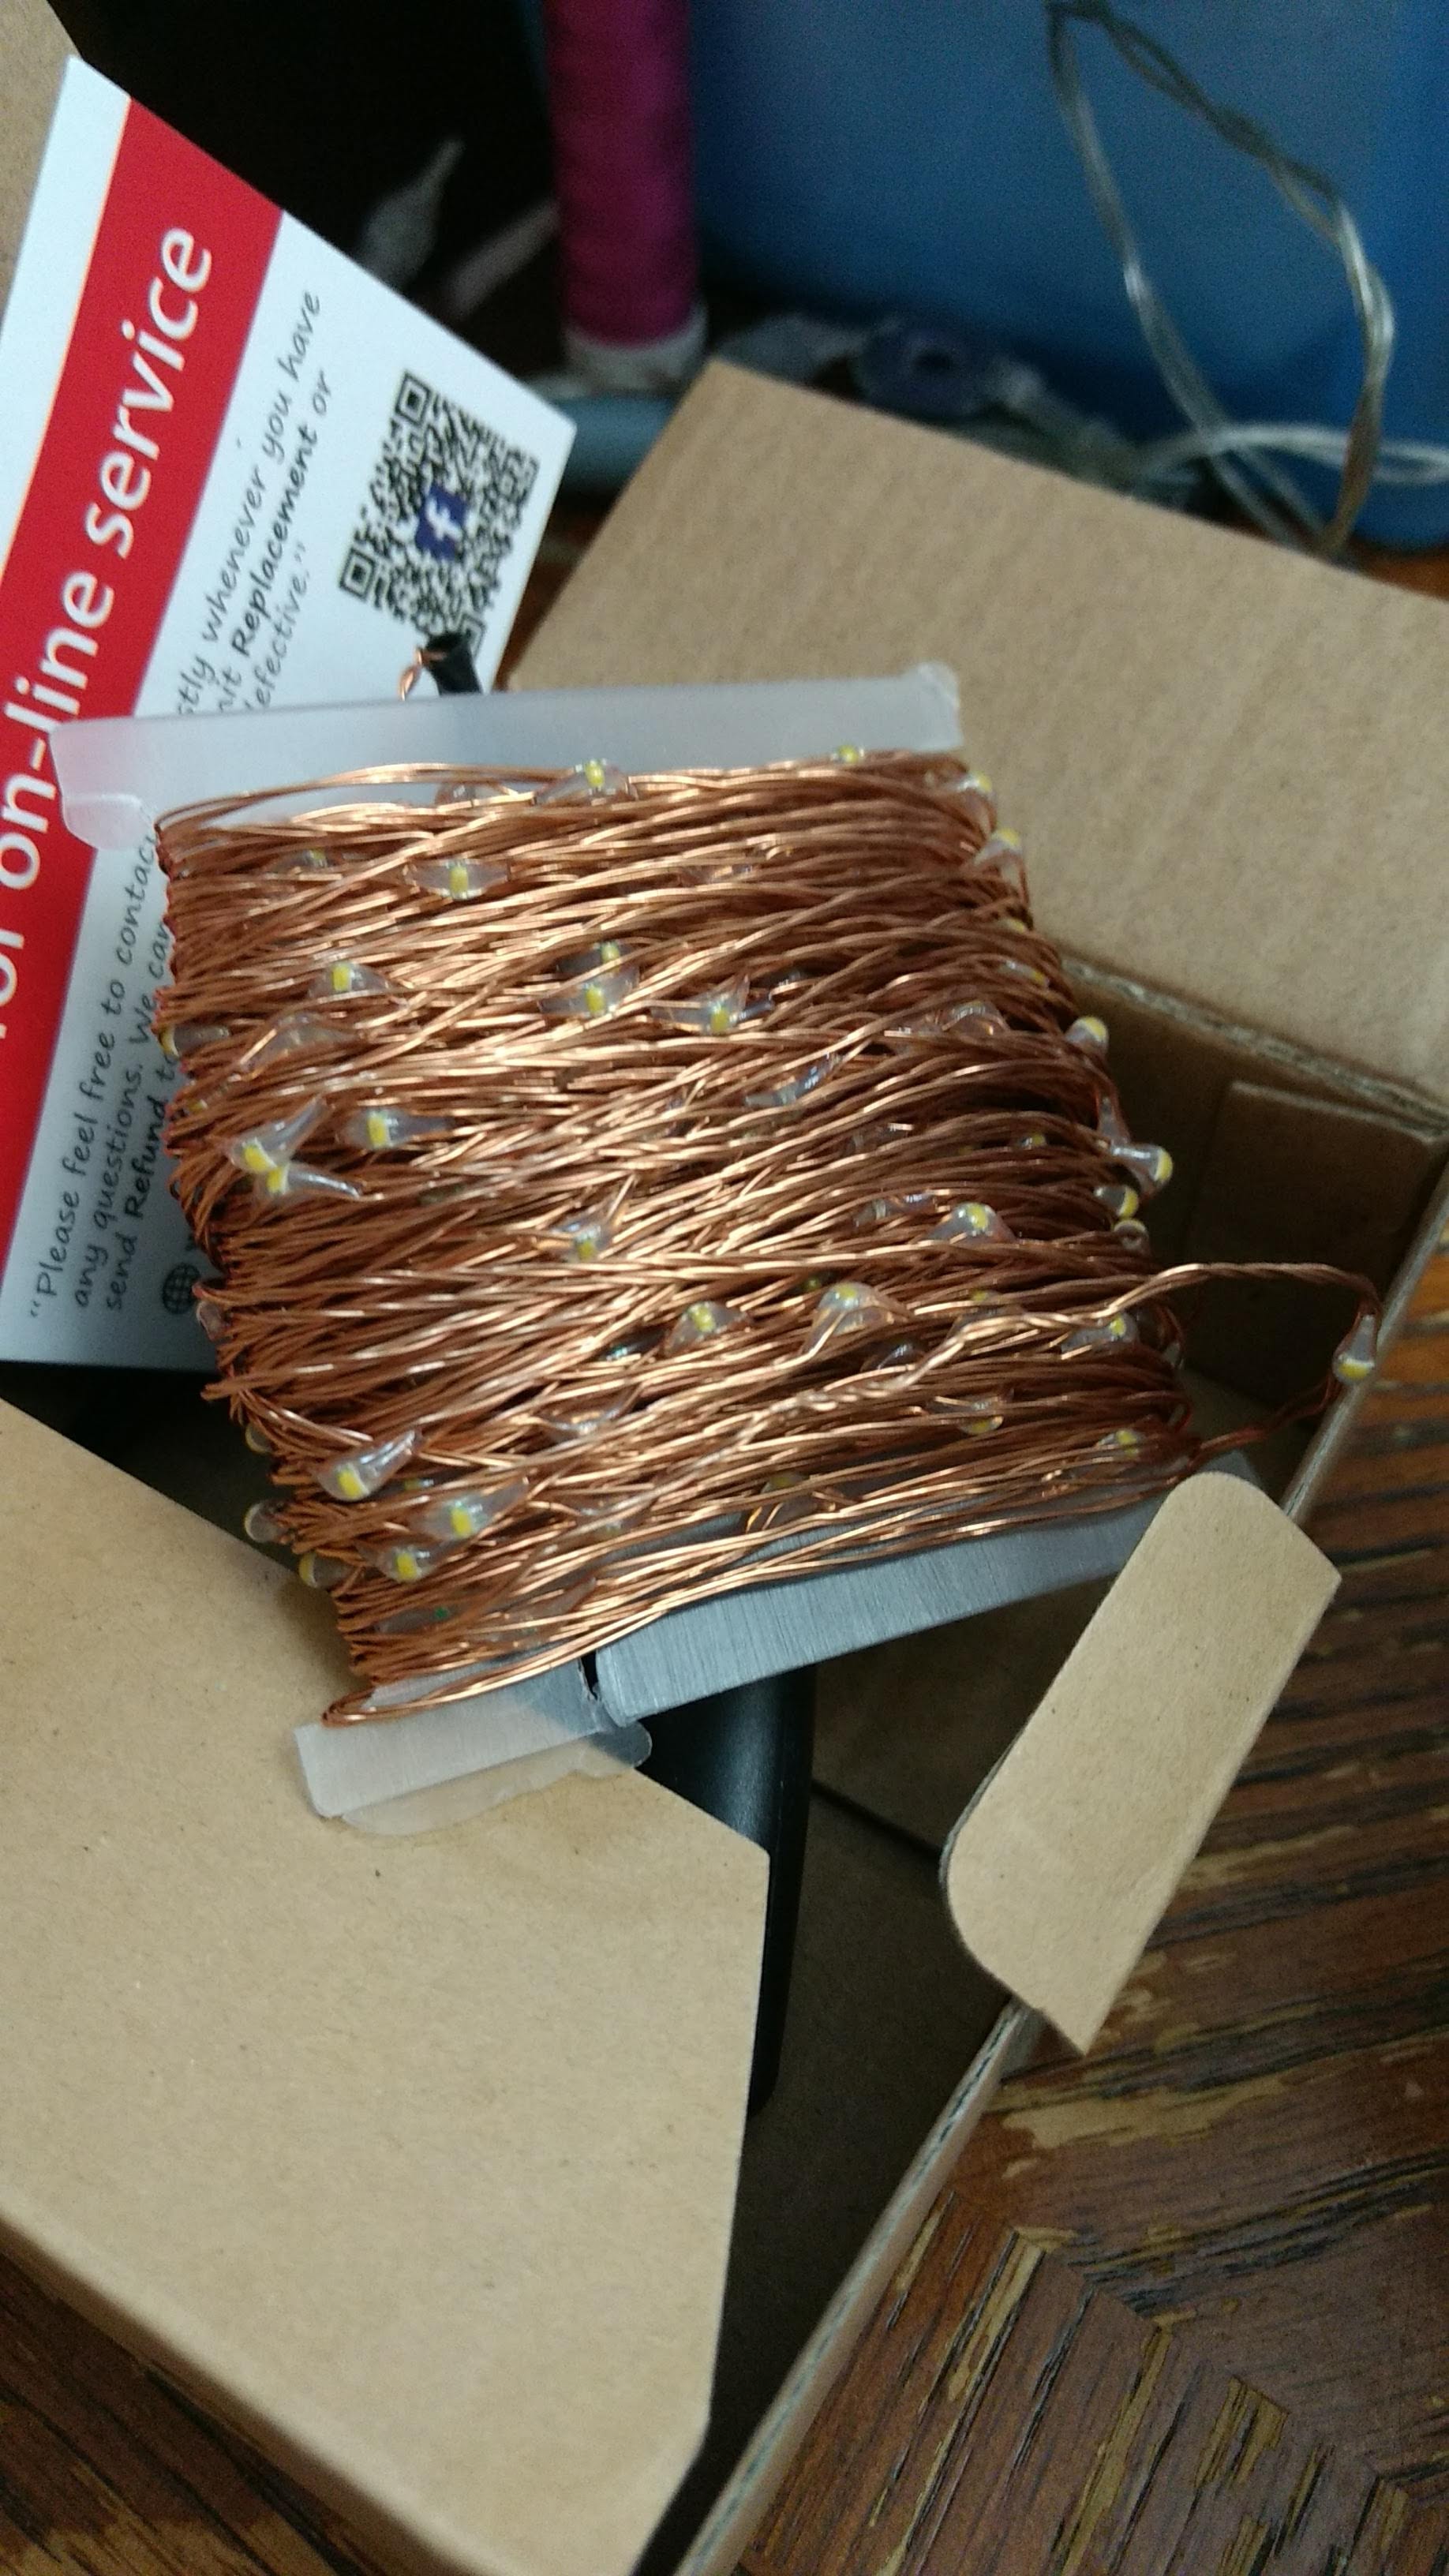
There is something, apparently, about this time of year that prompts me into stupid knitting projects. With wire. This year is no exception at all. In fact, I got linked to a reddit post about other people who also do stupid things with knitting, and the die was cast, and this year’s stupidity was crystallized into being.
Thank you Amazon.
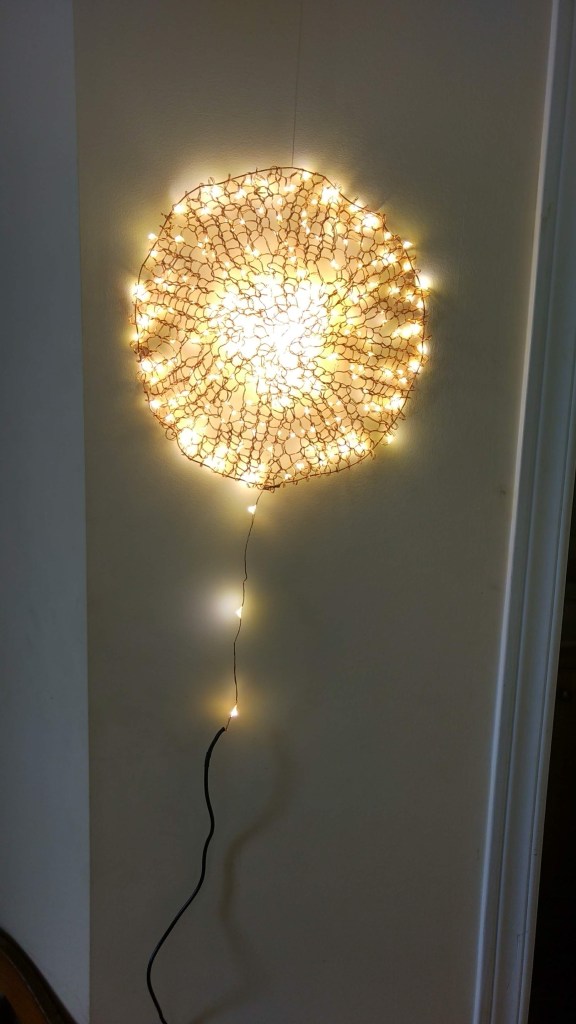
Clearly I needed to also knit with fairy lights, and because I do most of my knitting in the round, that was the plan. The initial plan was a doily, because of course it was, but ultimately I was struggling enough with the lights that I just did a glorious round blob of sparkly mess.
They plug in via usb, so they can be battery powered, and I knit with anything from 6 mm to 8 mm needles, depending on the minute and what I could find. If I ever do this again (seems unlikely), I’ll aspire to something with more shape. I didn’t try and cast off, I instead just ran another wire through the outside loops and then hung it on the wall. It’s stupid and so much fun. I’m rather pleased, all in all. I might try pulling it into a more interesting shape, blocking is pretty straightforward.. just pull!
I’ve been meaning to post this for ages, as it’s finally been sent and received! The hazard of working on gifts, you finish them and then have to wait to post about them.
For those unfamiliar, the Trillium Exchange is an artisan exchange here in Ealdormere where you get a little survey on what sort of things your giftee might like, and then sometimes there’s a theme (usually optional) and sometimes there isn’t and you get to send someone a gift! You get a gift too, and that’s always nice, but honestly? I prefer the giving.
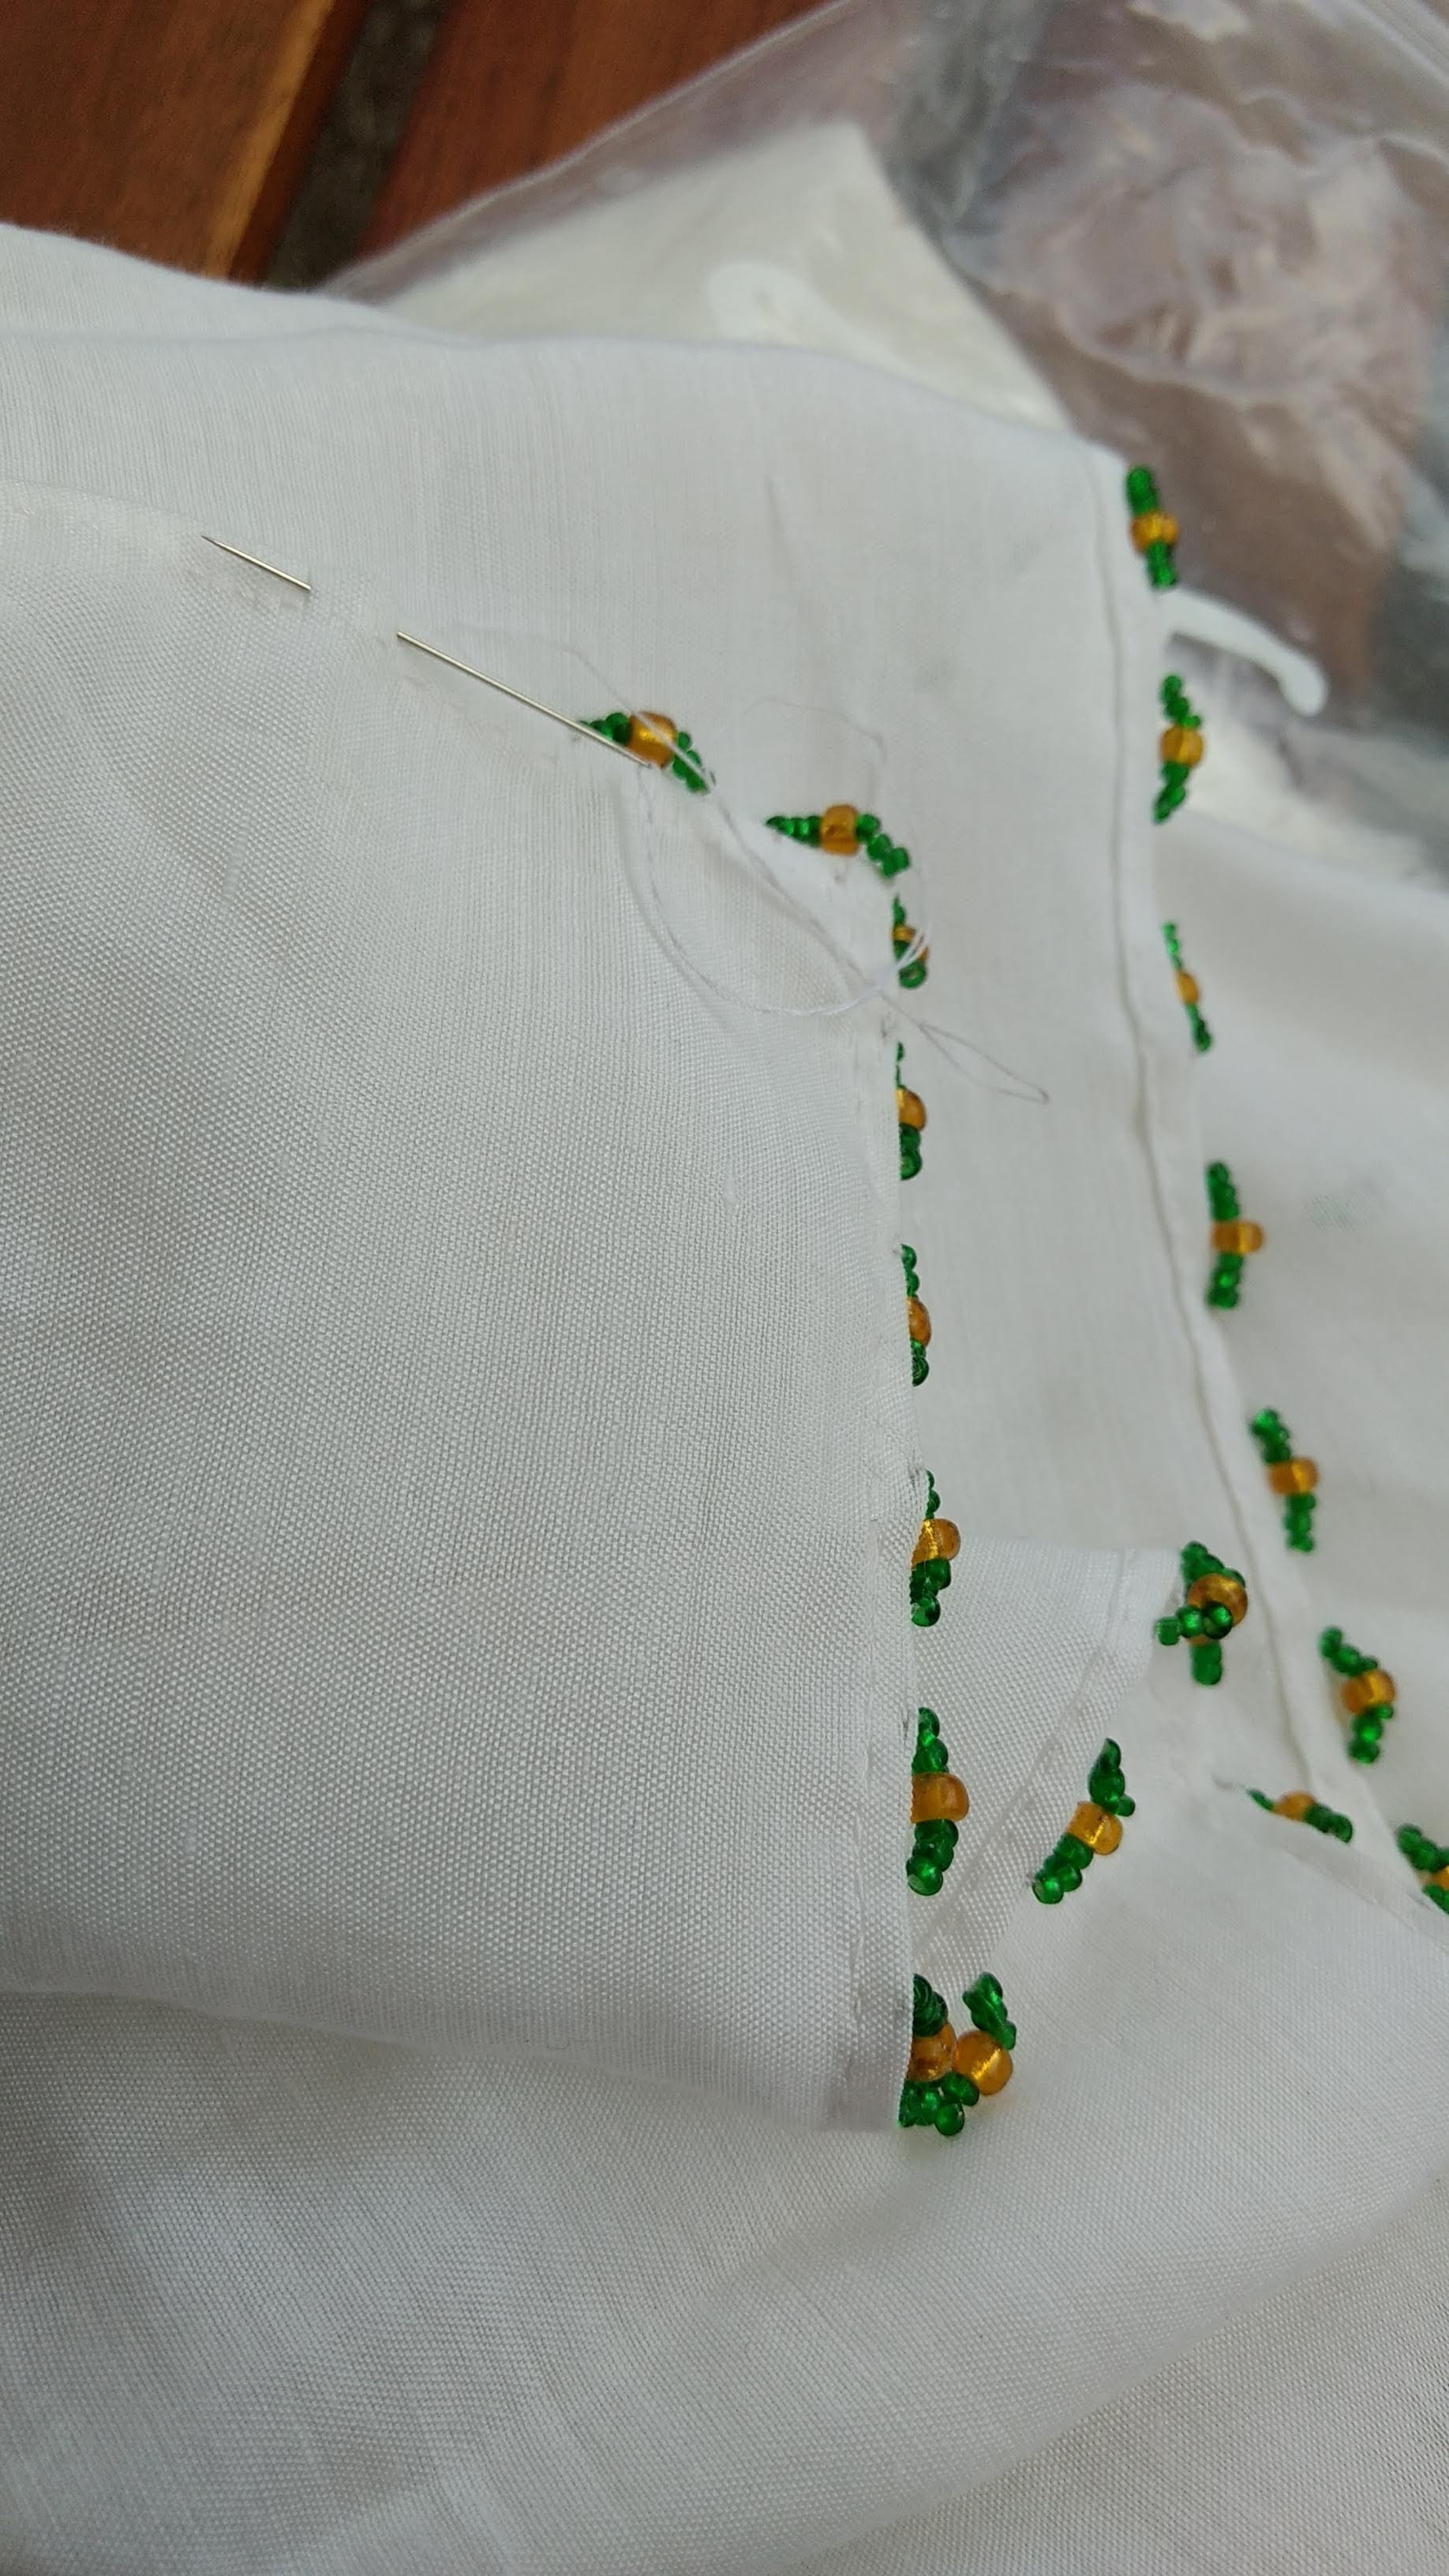
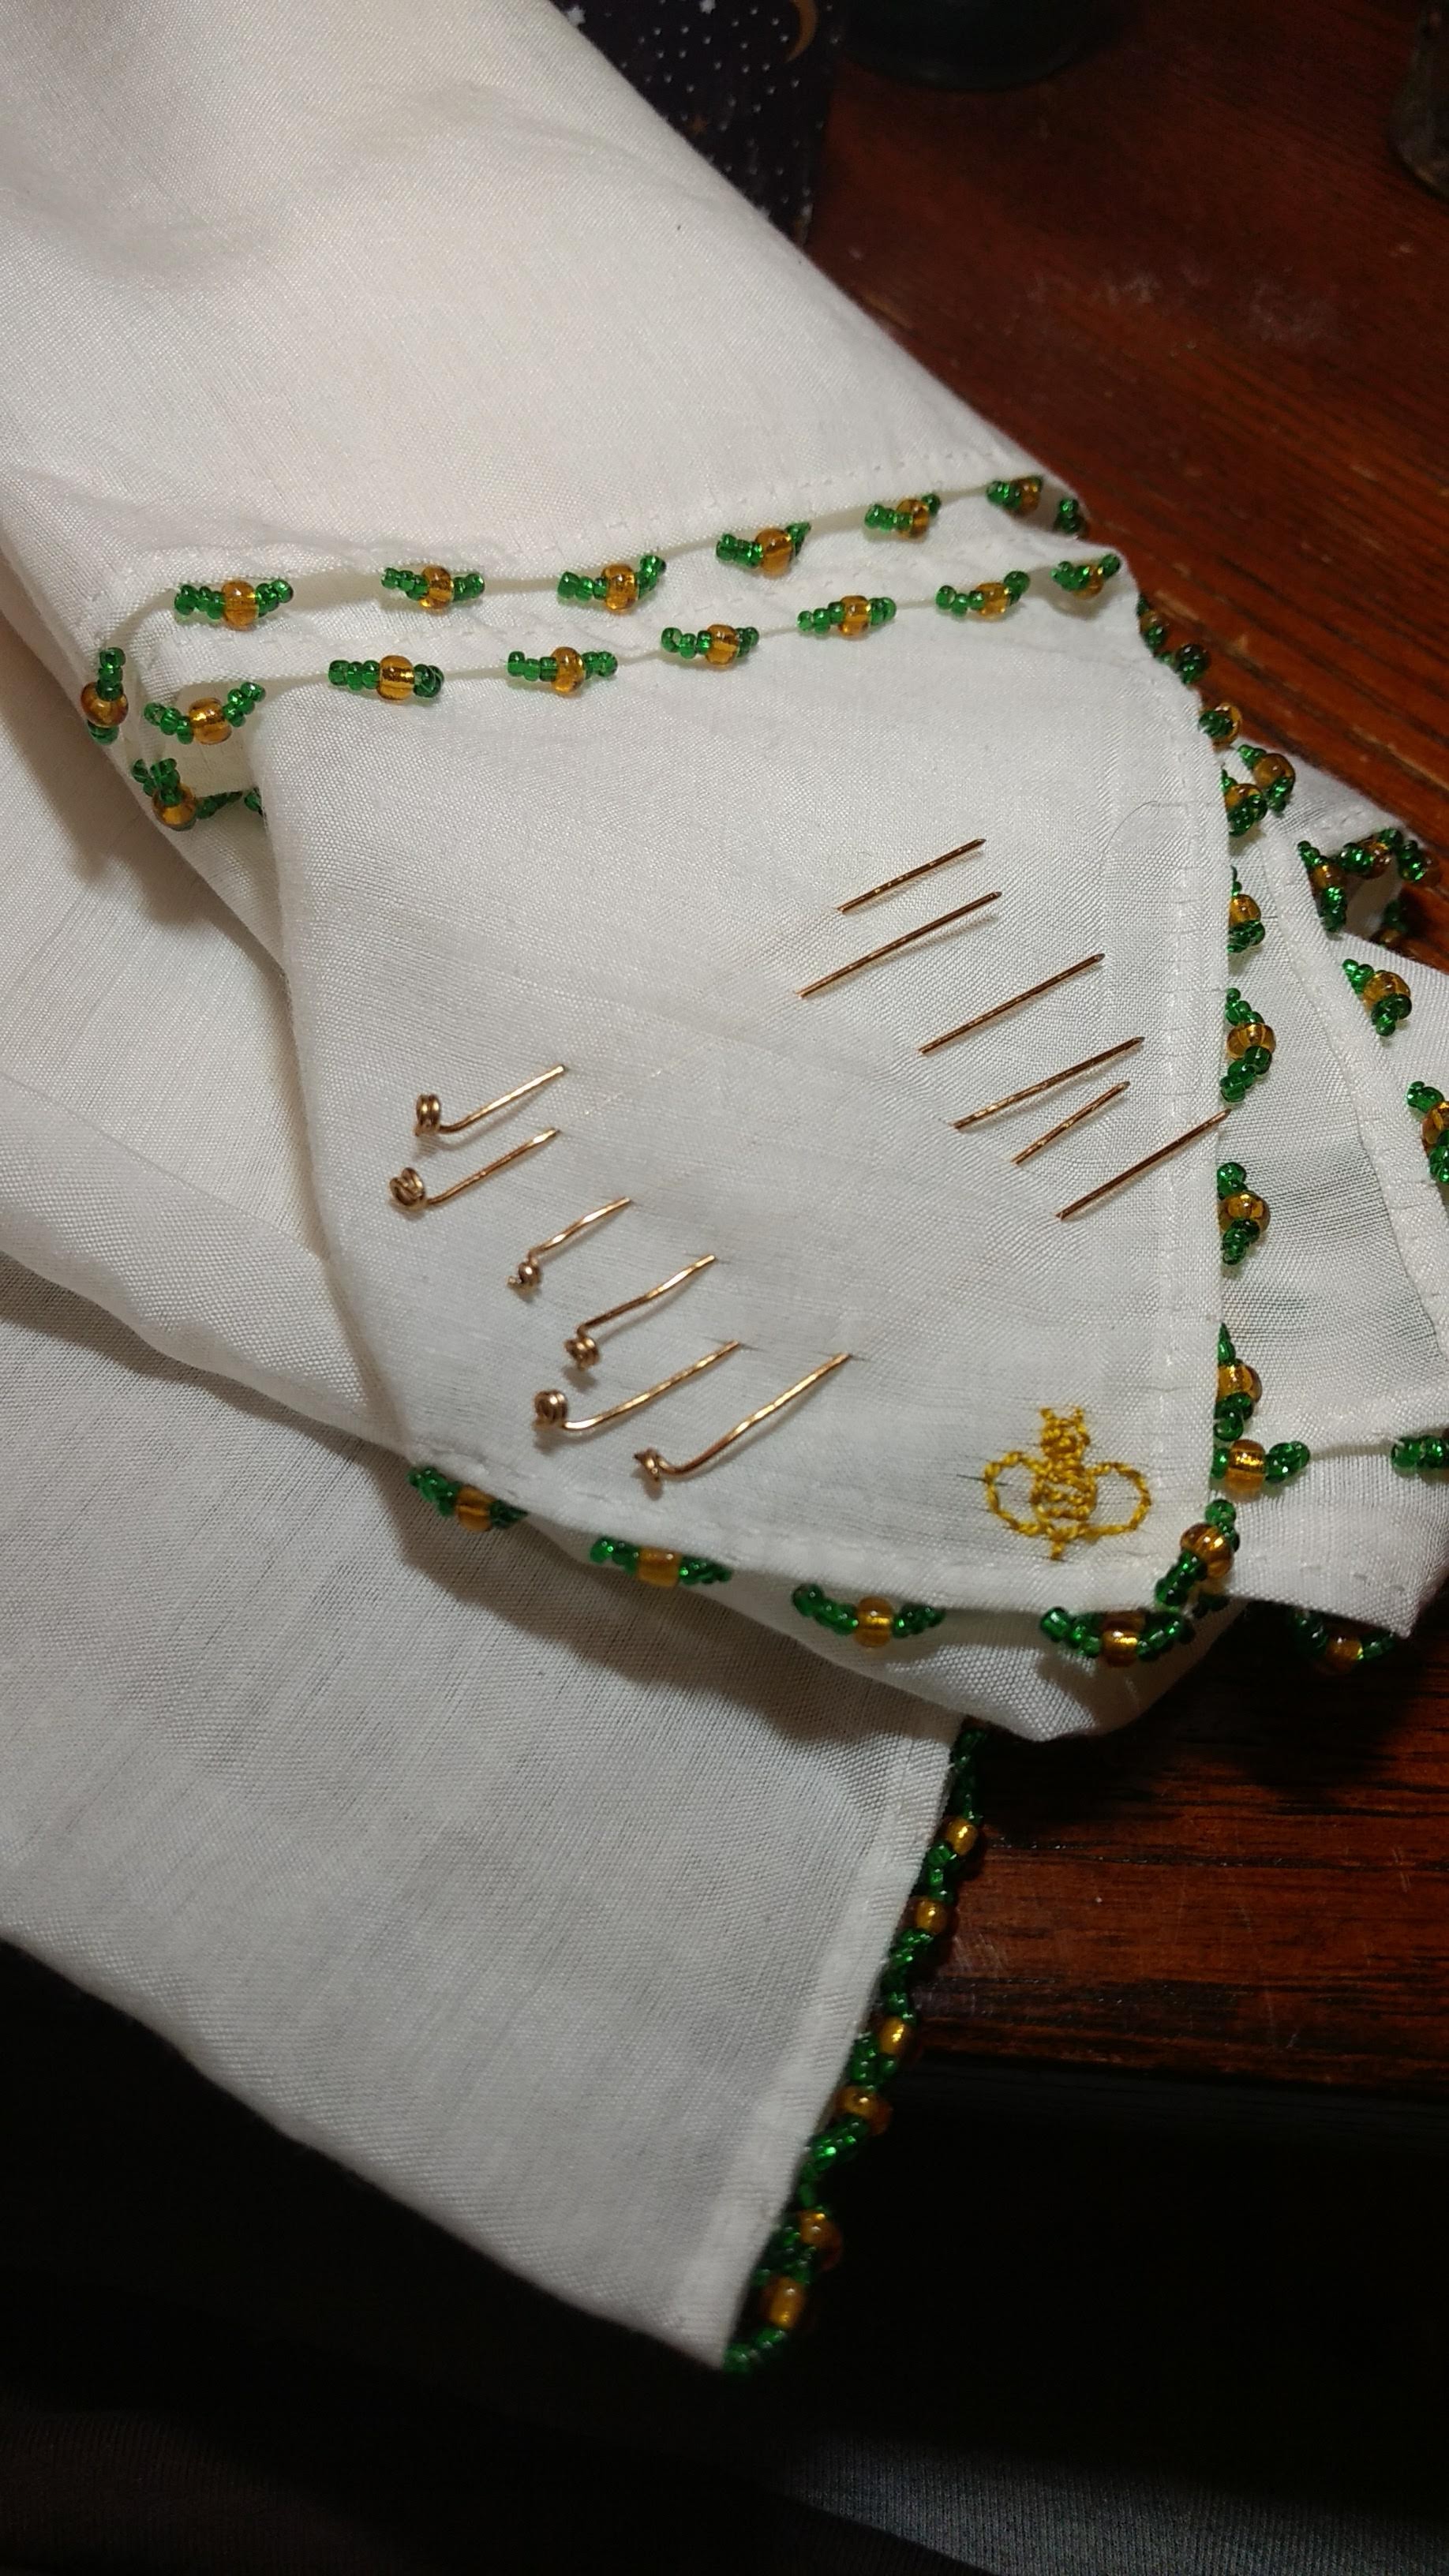
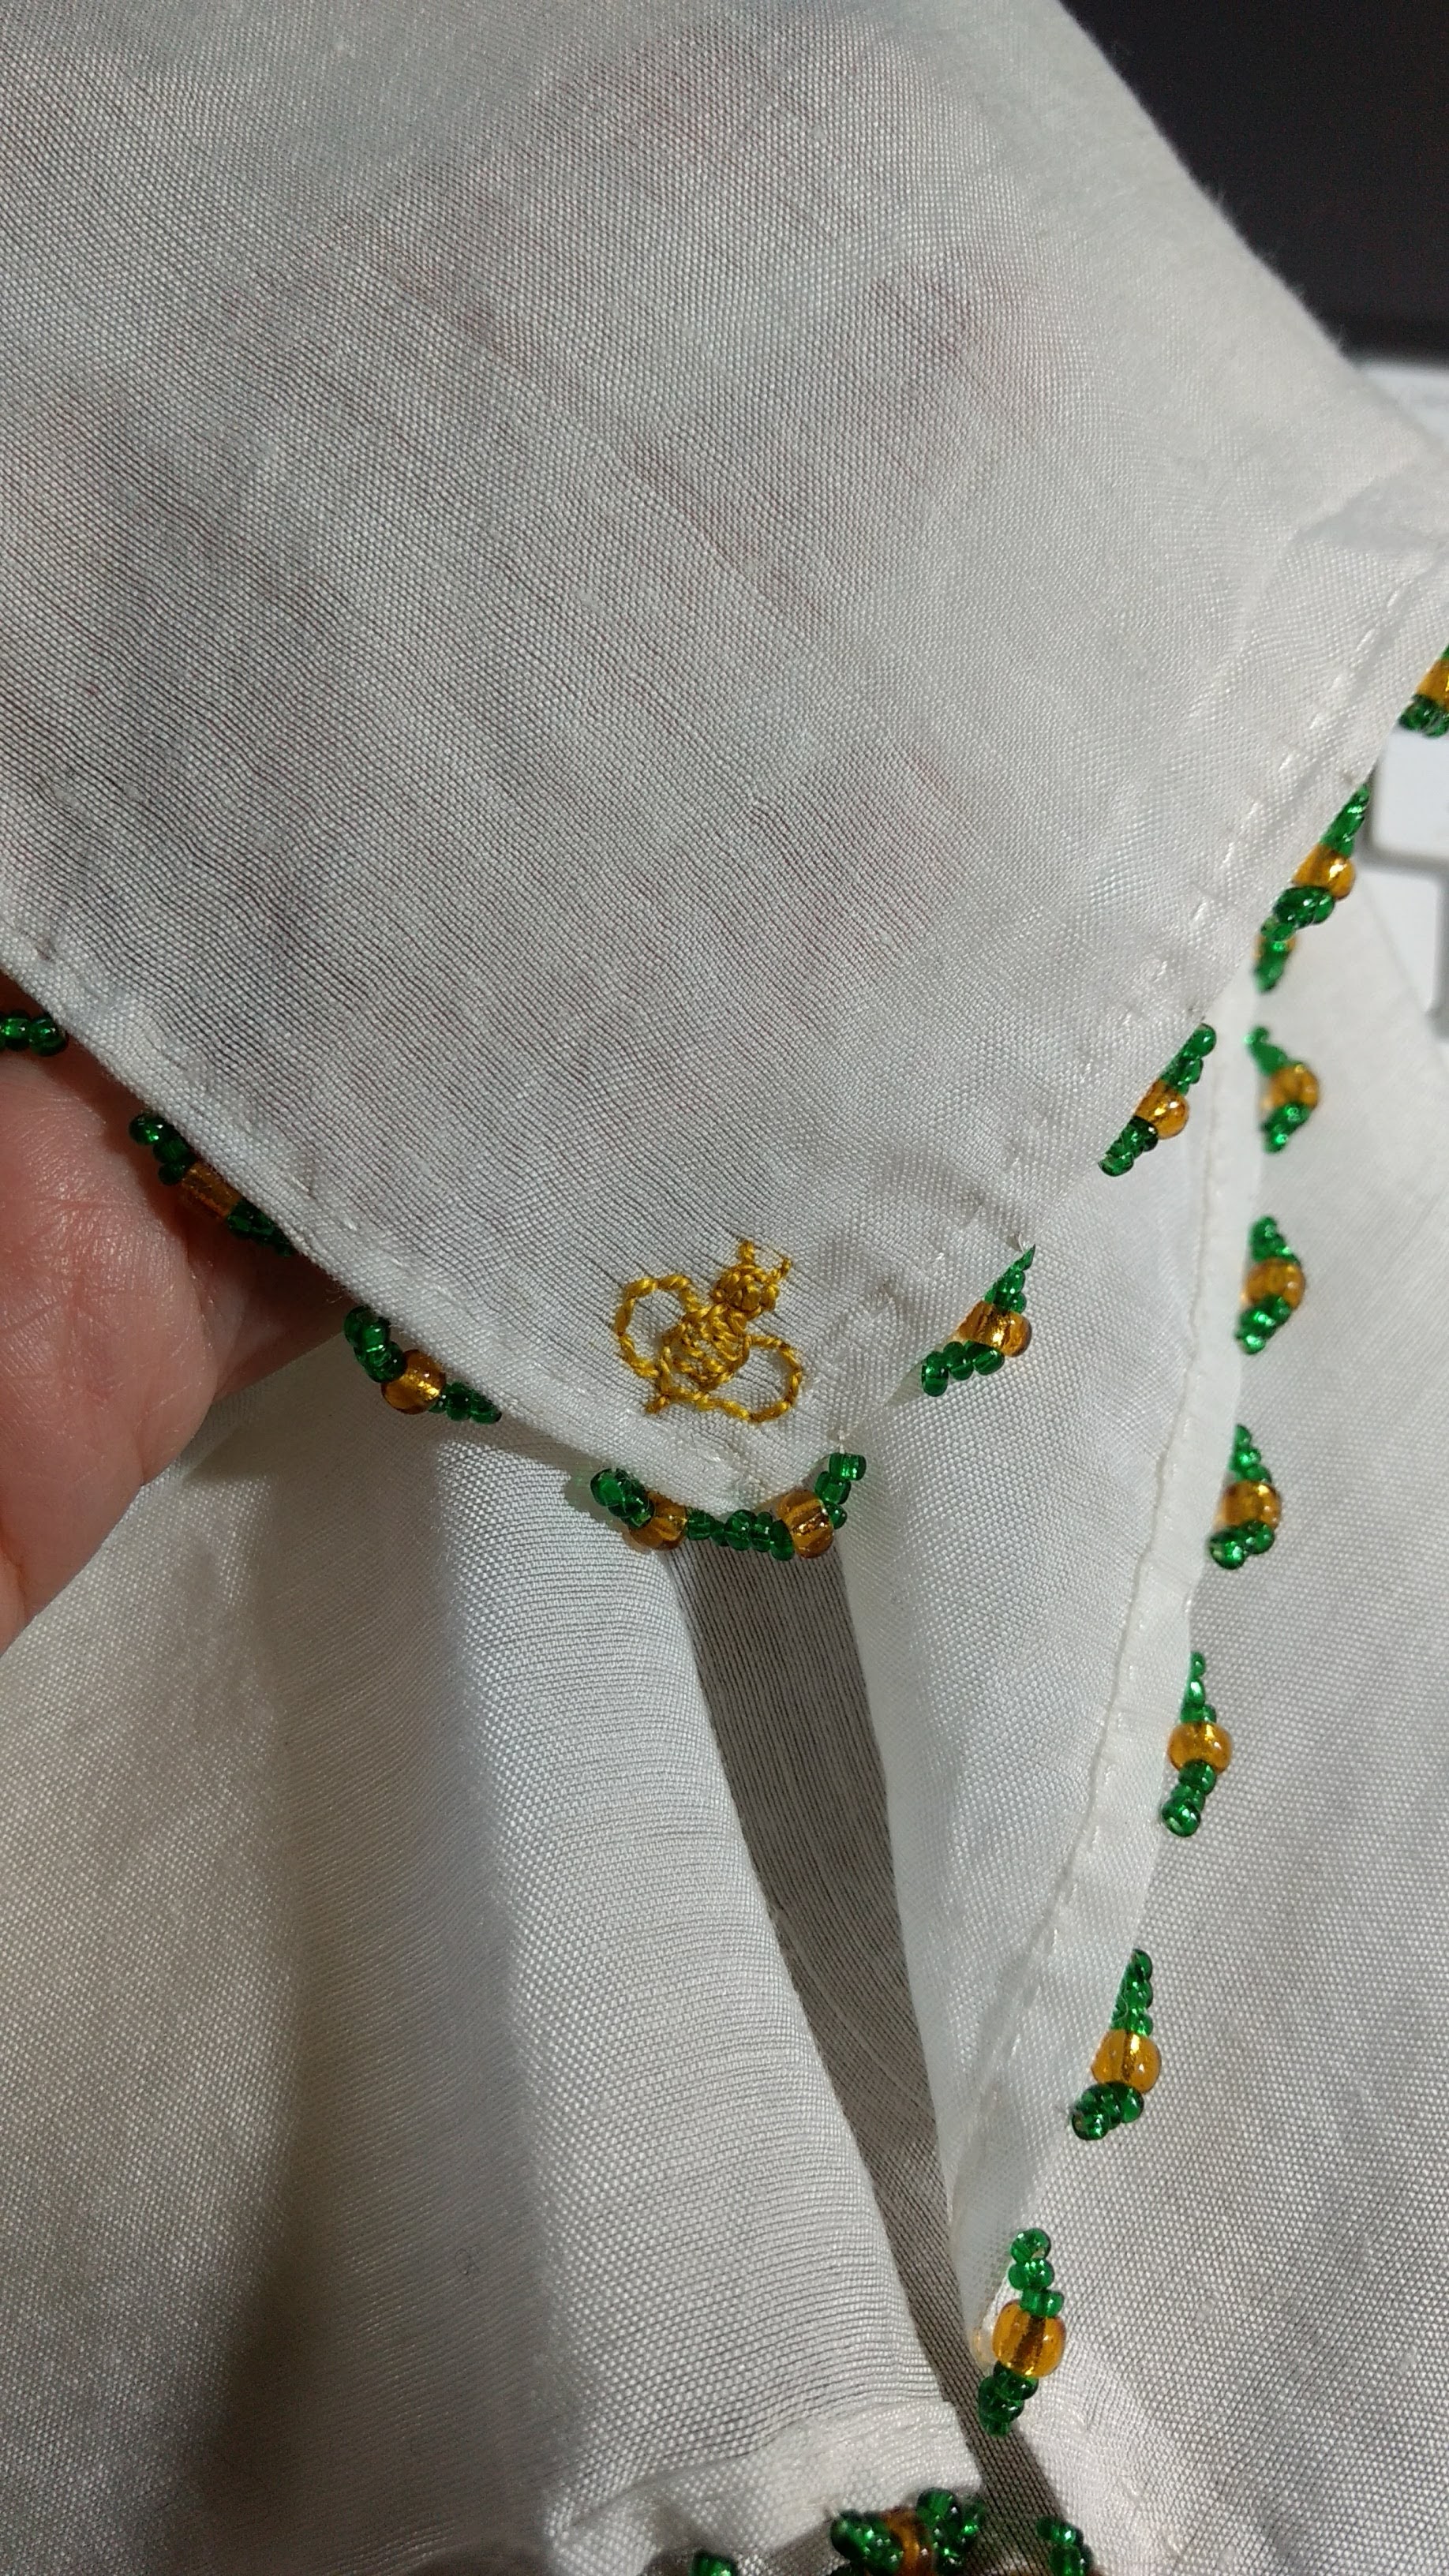
So! The theme this time was bees, and that wasn’t really inspiring me, I ultimately decided to make her a new beaded veil as the first part of her gift. Some silk-cotton blend fabric (out of stash! Win! There’s a quite limited spending cap on these exchanges, which is good darn it.. but most of us have a quite extensive stash to pull from), and some glass beads and some inspirational photos.
This is a detail from the Last Judgment Triptych painted by Hans Memling in about 1471 or so. Very considerate of her to have a light veil with lovely little bead details in just about exactly what I wanted to use.
Mine looked a little more colourful, with green and gold glass beads (sewn on with silk thread).
Beading in progress.
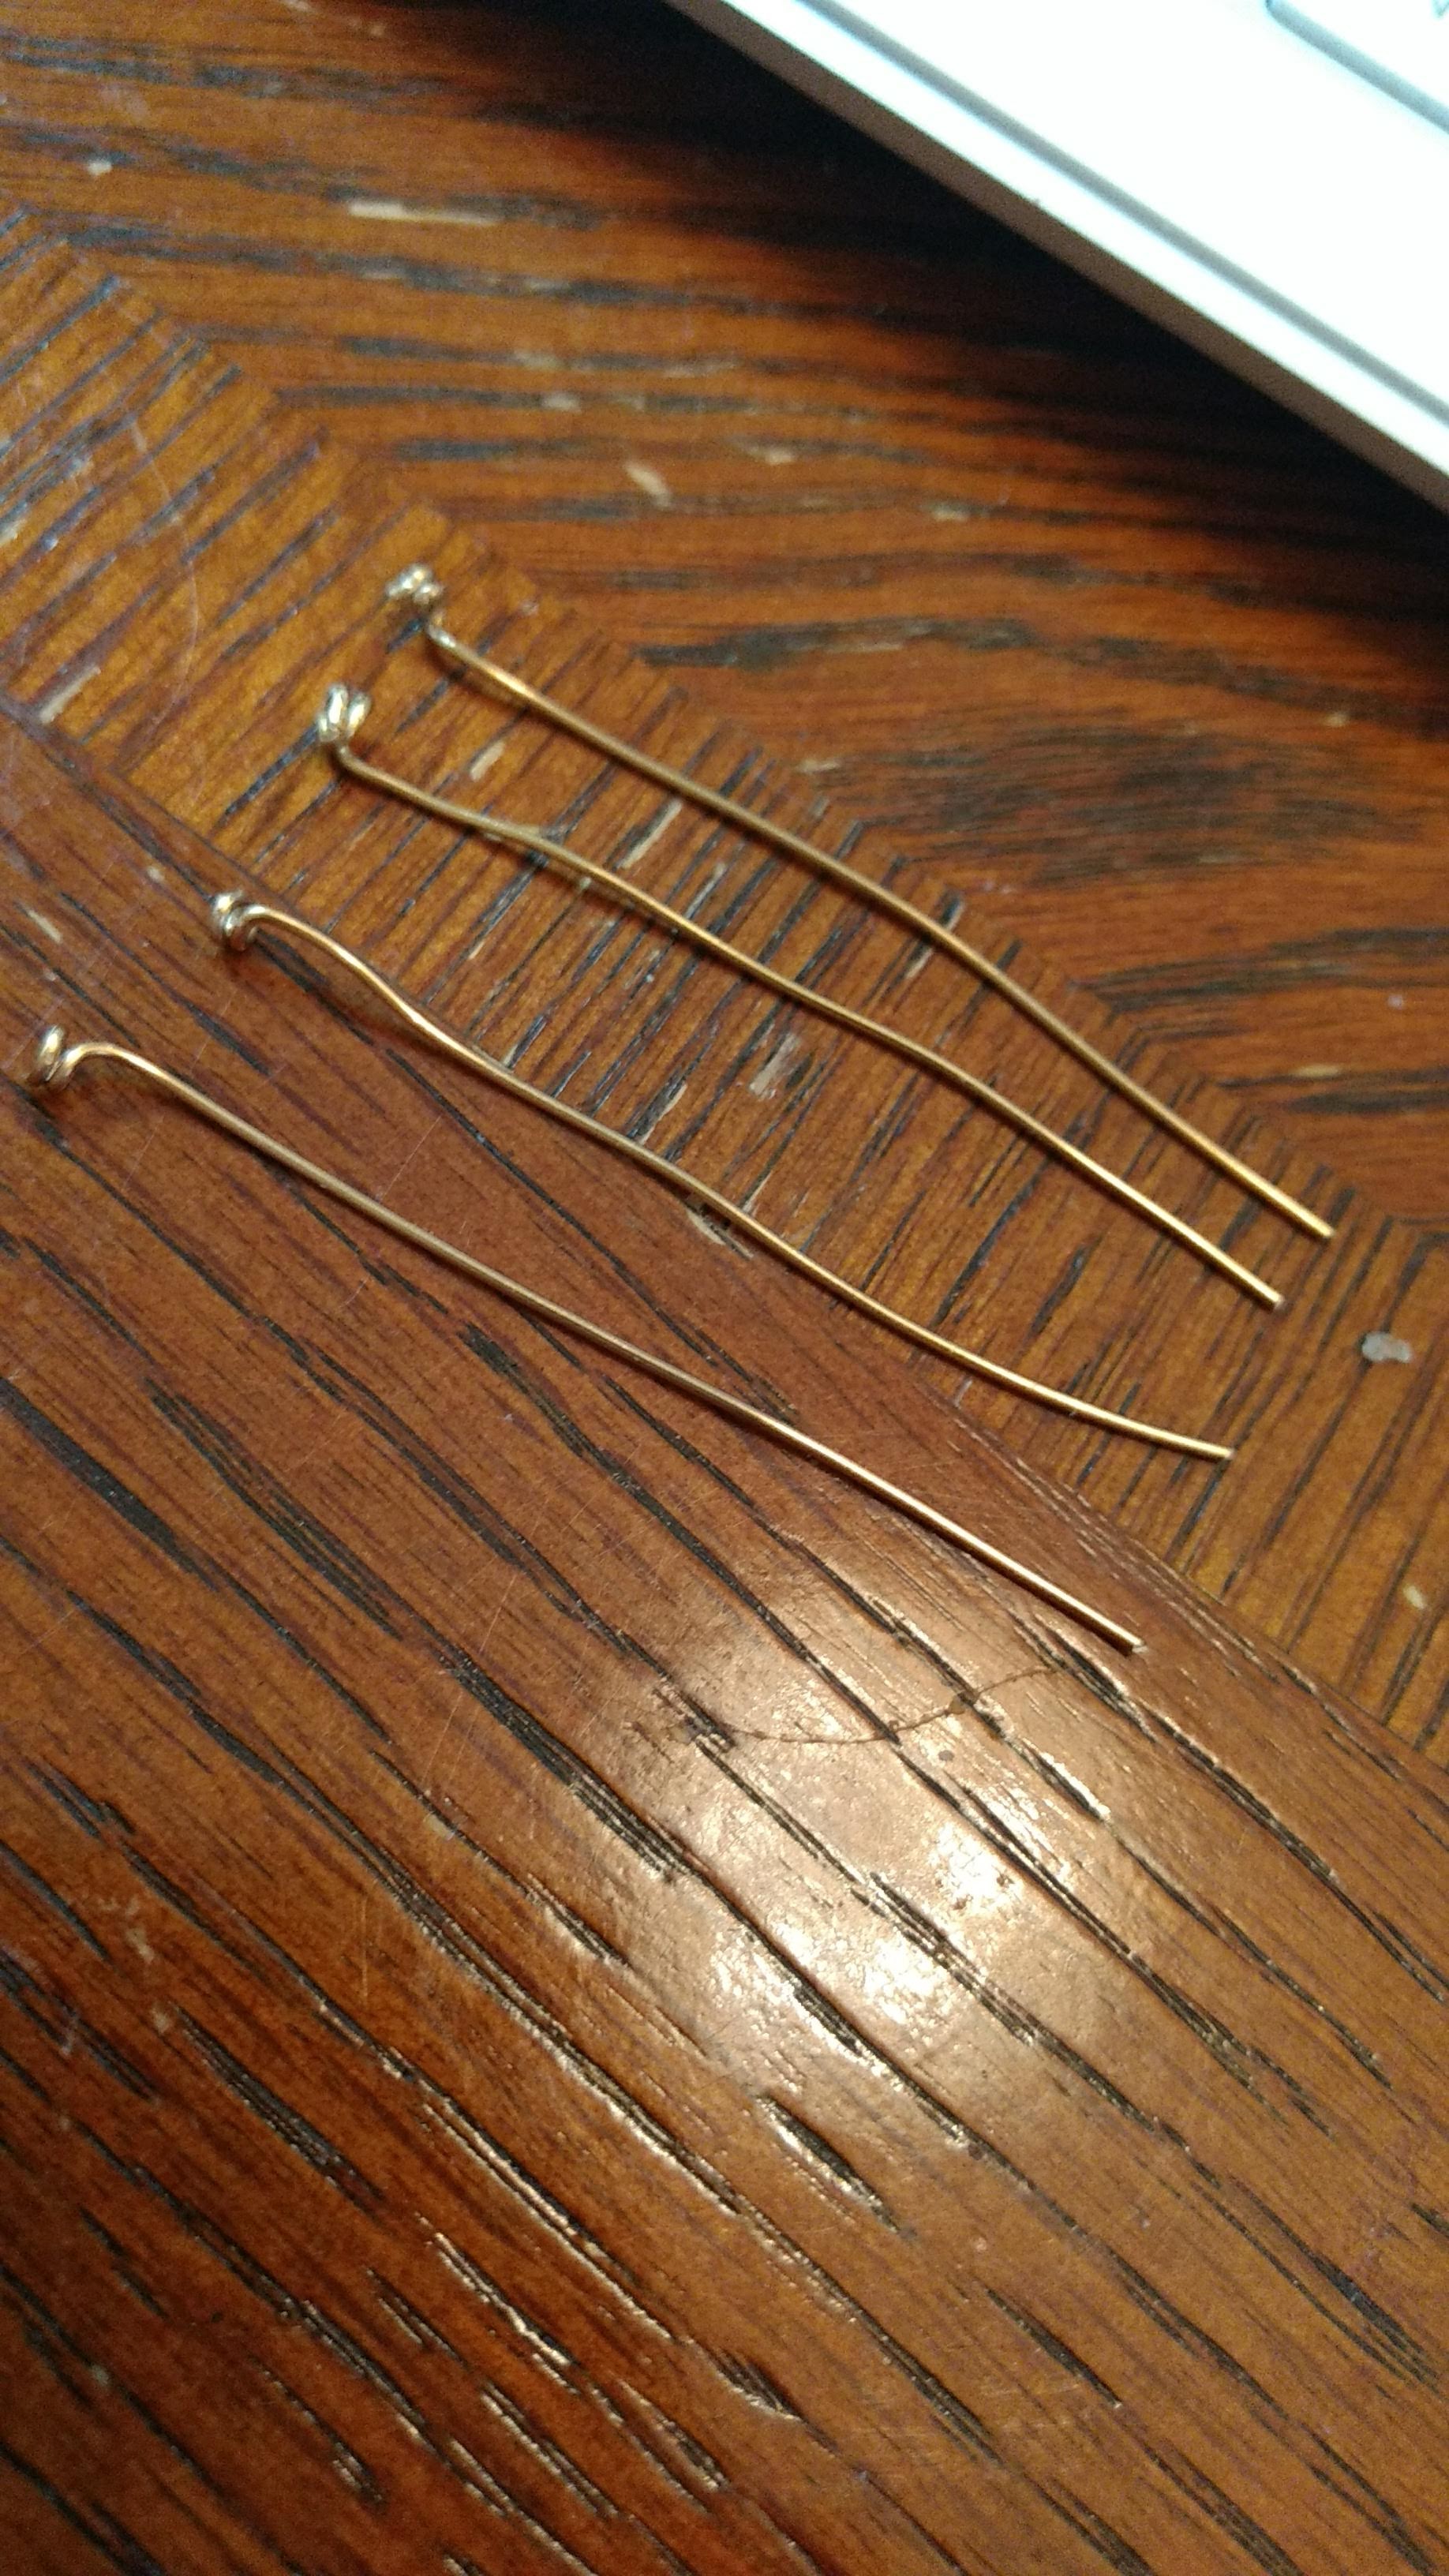
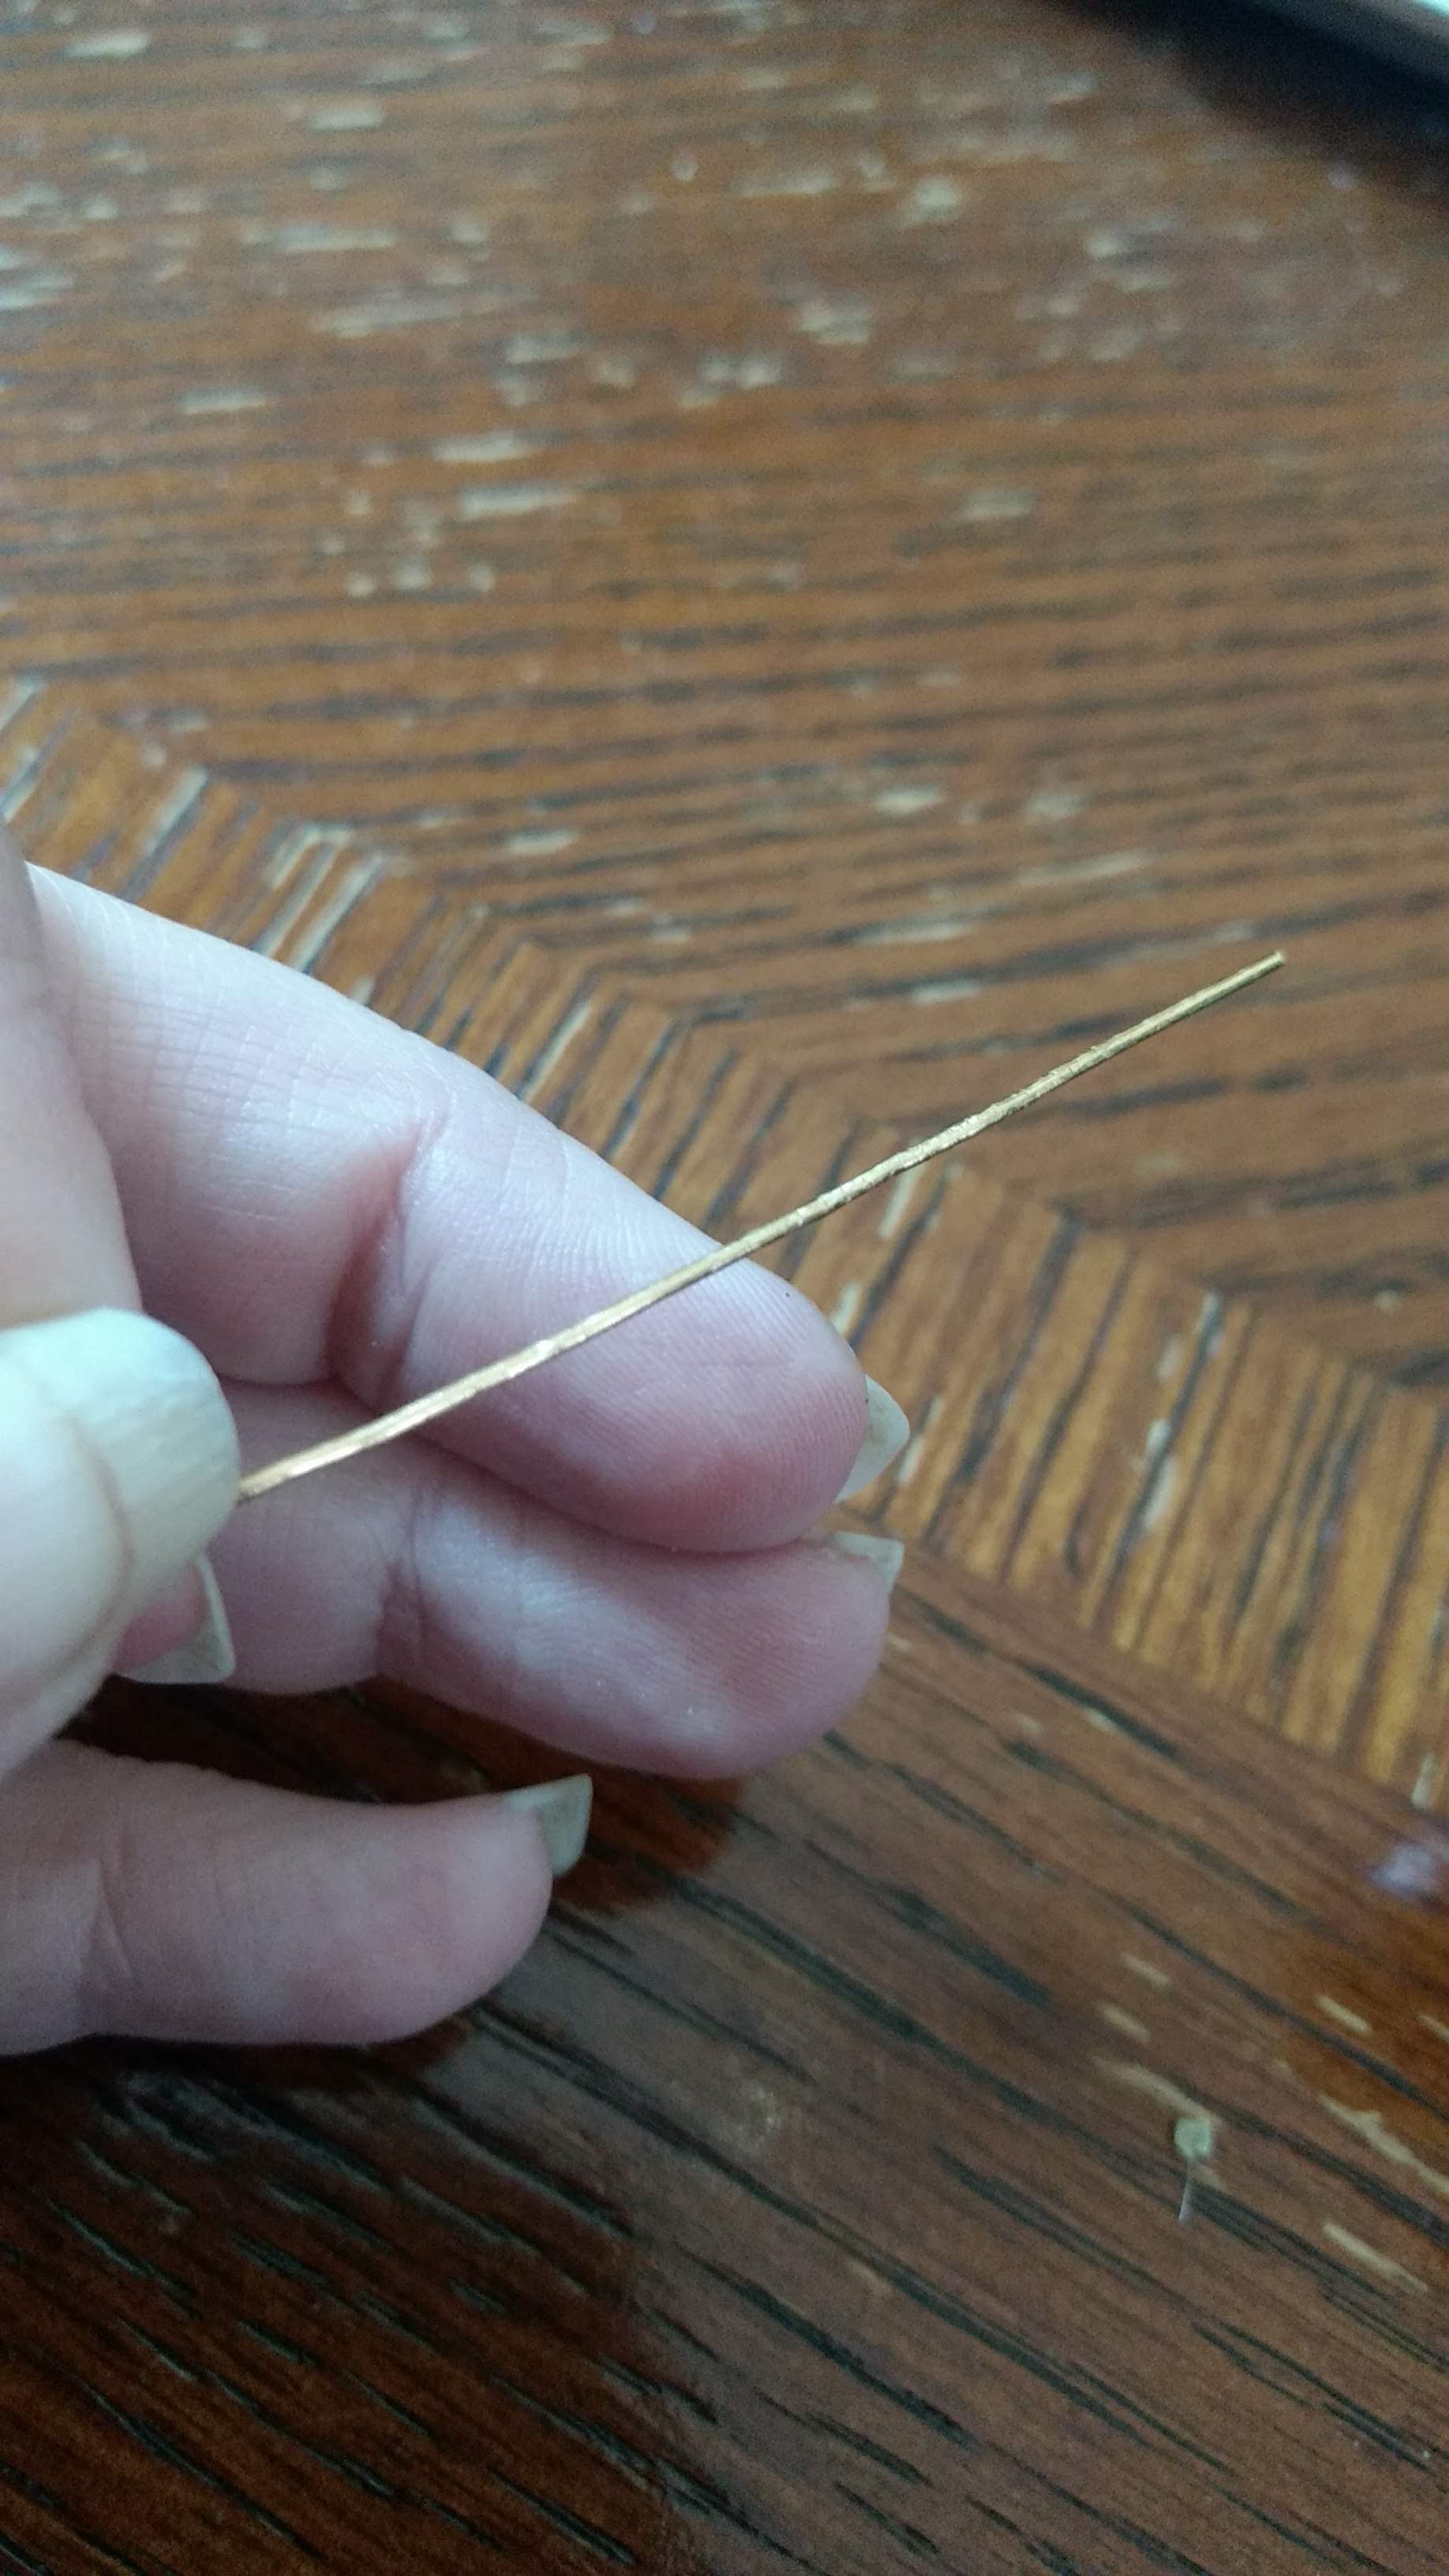
Once I got the veil done, I wanted to aim for the stretch goal.. so I decided to make some veil pins to go with. I do not work with metal. I play with string, but after consults with people who know far more than I (Thank you!), off I went to gather up brass wire and pliers and a hammer. A little wonky perhaps, but I learned about how to work harden metal, and file points onto my little pins and even a little wonky, I am chuffed to bits with these silly little things.
At the last minute, just before it got popped into the mail, I couldn’t help myself but add a wee bee in the corner in silk as a nod to the exchange theme that I had ignored through the rest of it. One beaded veil with a half dozen veil pins that arrived safe and sound to its new human. Now we just need to be able to have events, darn it!