I was vaguely musing on what to do for the Padded Work category of the EK Embroidery guild samples. The usual is stumpwork, which while it can have some padded work, is best known for being exceptionally fine work, usually with a wired edge so that it can be posed in 3D. It’s gorgeous, it’s fussy, it’s tiny fiddly work and while usually that is 100% my jam, I wasn’t feeling it. There was a ton of meh about doing a stumpwork piece.
Then, at a panel, someone had done a trapunto piece, and it was gorgeous and simple but elegantly so, and someone in chat noted about the Tristan Quilt being in period and I had a ‘where have you been all my life’ moment.
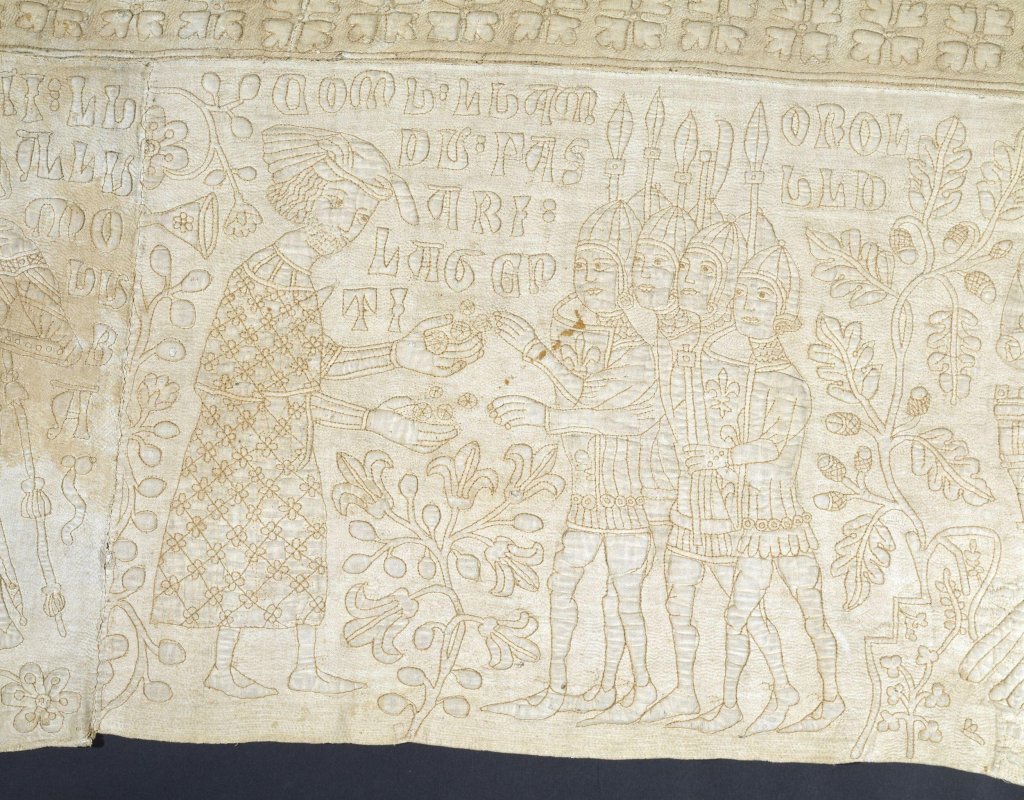
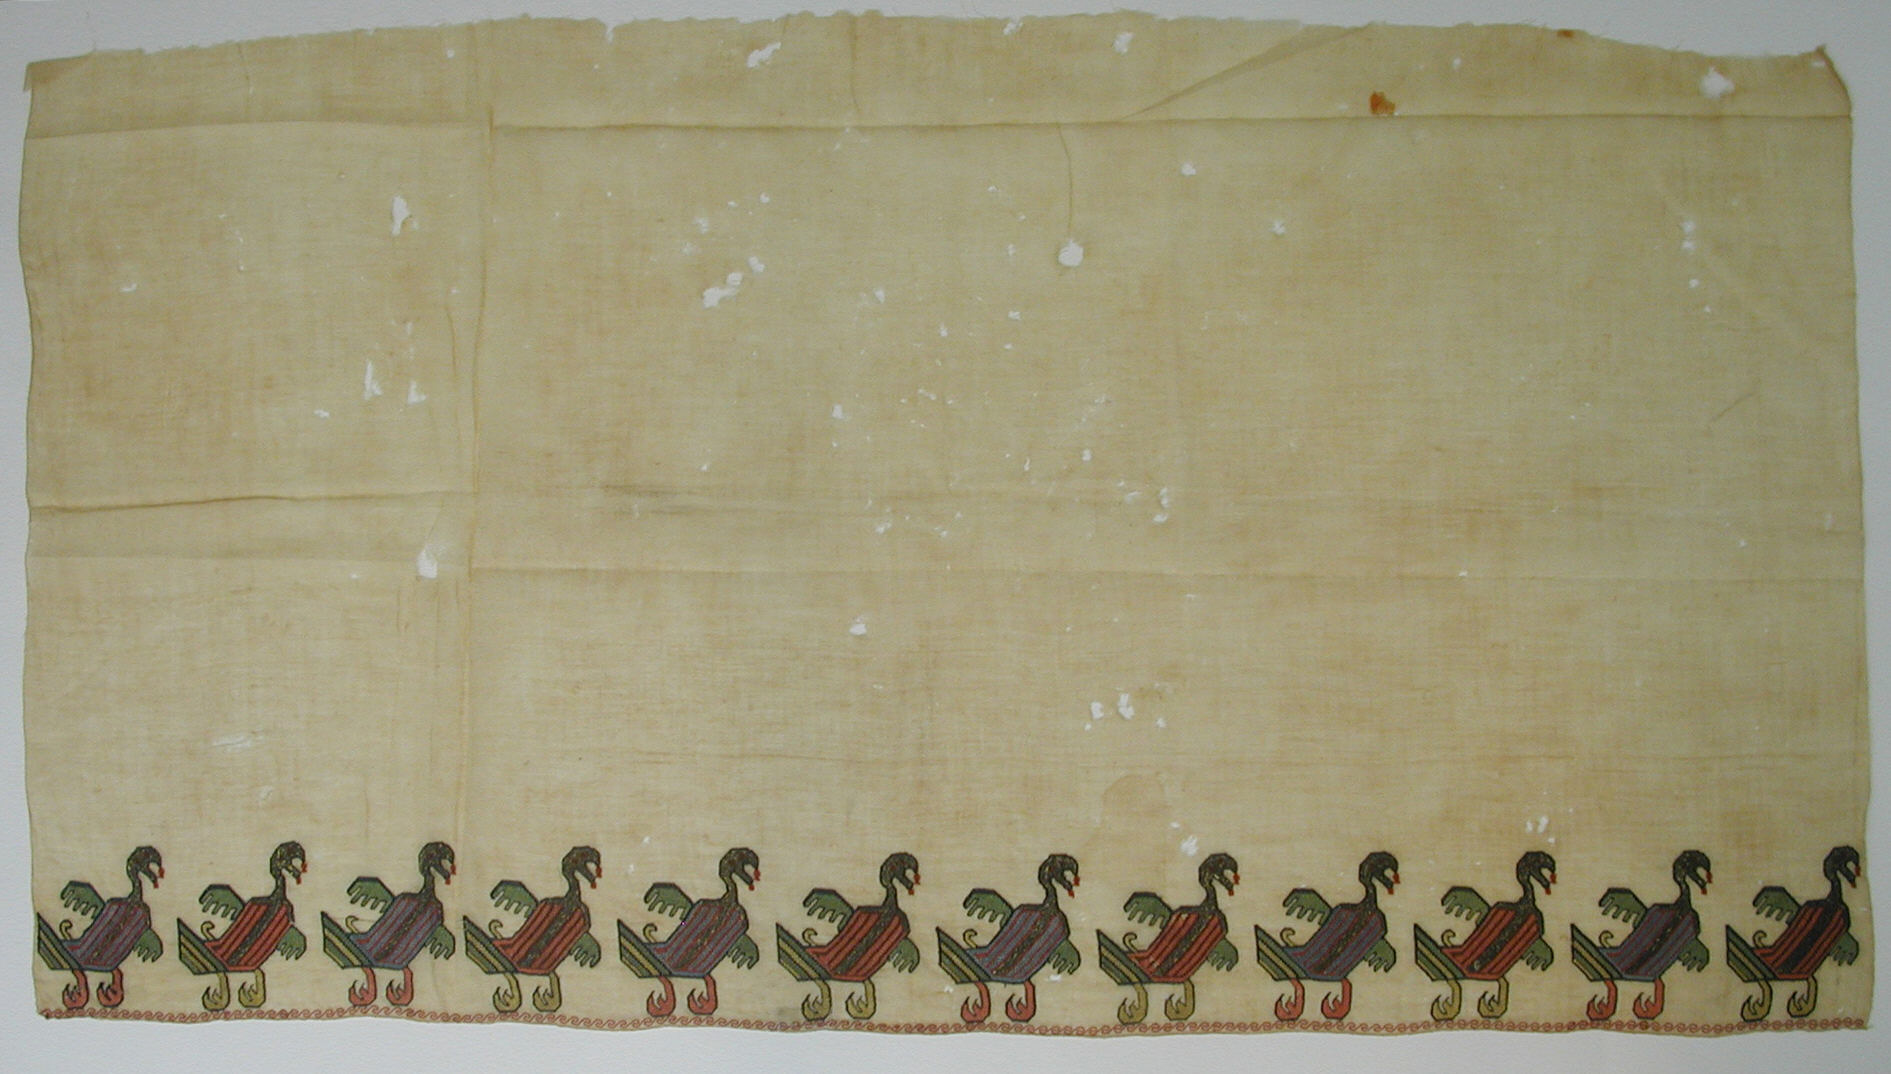
So, some back story. The Tristan Quilt is how its most often referred to, but it is probably better referenced as the Guicciardini Quilt, as it is suspected that it was made for the Guicciardini family of Florence, and figures in the quilt (Tristan) bear that family’s arms. It is a bed covering that was made between 1360 and 1400 (or so), with the story of Tristan and Isolde quilted into it in many panels. It’s monochrome, dark brown thread on cream coloured linen, and is enormous. The chunk at the V&A is 320 cm x 287 cm (126″ x 113″) , the chunk at the Museo Nazionale del Bargello in Florence is 238 cm x 207 cm (98″ x 81″) and there’s speculation of the missing bit being as large as either of those chunks, or possibly a little bit larger. (For reference, a modern queen size mattress is 60″ x 80″) and current research speaks to them being part of one giant quilt to start, and hacked up in later eras. (Randles) They are the oldest surviving examples of decorative quilting in Europe, and I fell in love.
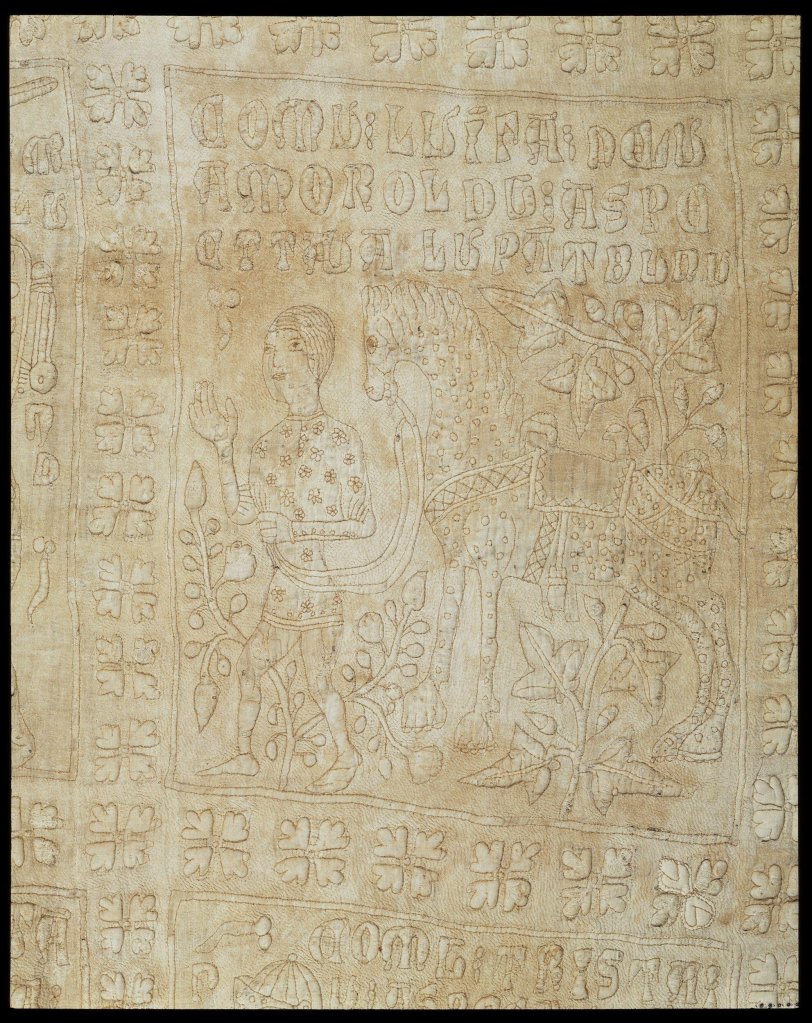
So! I had my inspiration piece, and then I went hunting through online images to find a wee bit of the giant whole that I wanted to add to my samples. I considered the horses, but once they were down to something that fit into a 6″ x 6″ square, they were too small to stuff with any sort of interest. Then I found the fish. And well, that was that. Fish it was to be!

I chose a natural oatmeal coloured linen for my backing fabric, and then took some linen embroidery thread (conveniently stranded for me) and dyed it with an unholy combination of iron, pomegranate, walnut and padauk to get a fairly good dark brown. Not quite as dark as I wanted, but good enough.
While a lot of trapunto is done by either cutting, or teasing apart the loosely woven back fabric to shove your cotton, or wool, batting into the stuffed sections, and then adding a backing, the original was not done that way. The stitching is shown on both sides, and the back fabric is as tightly woven as the front, so it is speculated that it was stuffed as they stitched. I went with that tactic on my fish as well. While there is no indication of traced out lines on the original, I have no illusions about my artistic skills and used modern washable fabric marker to trace out my fish and some background squiggles.

Being a ‘stuff as you go’ experience, it makes the most sense to start in the middle and then work your way up and down. So fish first! Stitch an area, add wool fleece (the original was cotton, I’m using wool because it’s what’s in my house.), shove fleece to where it’s supposed to stay, stitch more. Then add some details on top, and shove more fleece in. It’s a fairly basic procedure, all in all, if a little fussy to get the fabrics to stay relatively flat, with the fleece not spilling too far.

The stitching, even with fighting with fleece, went quickly. I used a basic back stitch throughout, and it was really a satisfying experience. I can utterly see why they’d choose something like this for a giant area, it is pretty zen and works up pretty fast.
A hem around the edge and then a quick bath to get rid of the marker and then voila! Fishy, fishy, fishy, fish!

References:
Randles, Sarah. “One Quilt or Two? A Reassessment of the Guicciardini Quilts.” Medieval Clothing and Textiles, Pp. 93–128. Accessed April 30, 2021. https://www.academia.edu/4523166/One_Quilt_or_Two_A_Reassessment_of_the_Guicciardini_Quilts.